HP Photosmart 5515 User Guide - Page 36
CAUTION, Use a dry swab or lint-free cloth to wipe the contacts. - ink cartridge problem
 |
View all HP Photosmart 5515 manuals
Add to My Manuals
Save this manual to your list of manuals |
Page 36 highlights
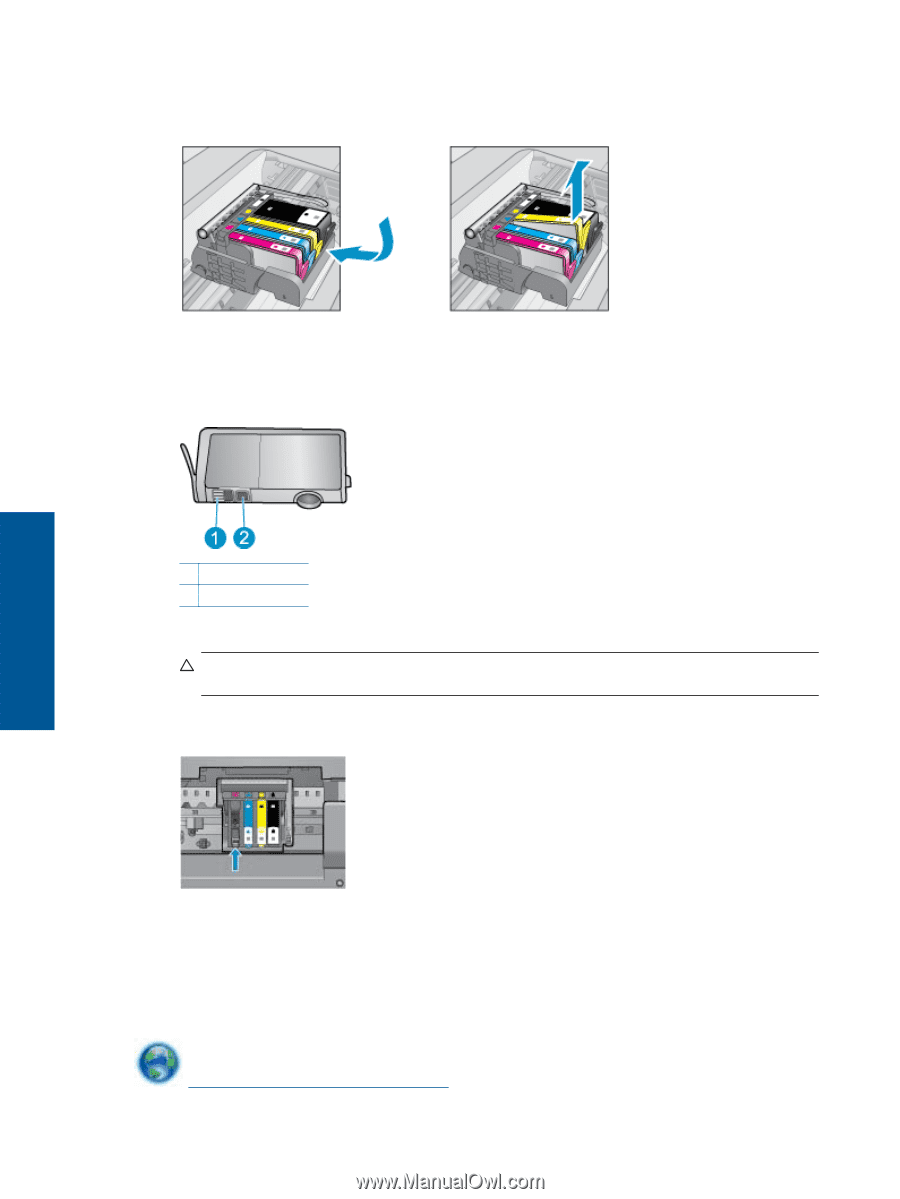
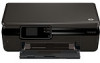
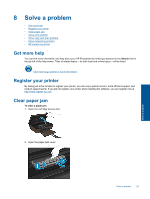
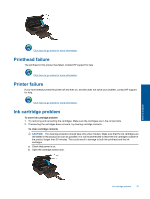
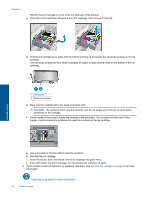
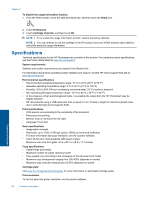
Chapter 8 Wait for the print carriage to move to the ink label part of the product. c. Press tab on the cartridge indicated in the error message, then remove it from slot. Solve a problem d. Hold the ink cartridge by its sides with the bottom pointing up and locate the electrical contacts on the ink cartridge. The electrical contacts are four small rectangles of copper or gold-colored metal on the bottom of the ink cartridge. 1 Ink window 2 Electrical contacts e. Wipe only the contacts with a dry swab or lint-free cloth. CAUTION: Be careful to touch only the contacts, and do not smear any of the ink or other debris elsewhere on the cartridge. f. On the inside of the product, locate the contacts in the printhead. The contacts look like a set of four copper or gold-colored pins positioned to meet the contacts on the ink cartridge. g. Use a dry swab or lint-free cloth to wipe the contacts. h. Reinstall the ink cartridge. i. Close the access door, and check if the error message has gone away. j. If you still receive the error message, turn the product off, and then on again. 3. If your problem is still not resolved, try replacing cartridges. See Replace the cartridges on page 20 for more information. Click here to go online for more information. 34 Solve a problem
-
 1
1 -
2
-
3
-
4
-
5
-
6
-
7
-
8
-
9
-
10
-
11
-
12
-
13
-
14
-
15
-
16
-
17
-
18
-
19
-
20
-
21
-
22
-
23
-
24
-
25
-
26
-
27
-
28
-
29
-
30
-
 31
31 -
 32
32 -
 33
33 -
 34
34 -
 35
35 -
 36
36 -
 37
37 -
 38
38 -
 39
39 -
 40
40 -
 41
41 -
42
-
43
-
44
-
45
-
46
-
47
-
48
-
49
-
50
-
51
-
52
 |
 |