HP Photosmart A430 Getting Started Guide
HP Photosmart A430 Manual
 |
View all HP Photosmart A430 manuals
Add to My Manuals
Save this manual to your list of manuals |
HP Photosmart A430 manual content summary:
- HP Photosmart A430 | Getting Started Guide - Page 1
• HP Photosmart A430 series • • HP Photosmart A430 series • • HP Photosmart série A430 • 1. Take a picture 1. Realice una fotografía 1. Prenez une photo Beautiful Photos in 3 Easy Steps! ¡Fotos increíbles en 3 sencillos pasos! De magnifiques photos en 3 étapes simples ! 2. Place camera on printer - HP Photosmart A430 | Getting Started Guide - Page 2
A430 series printer c. User documentation d. Sample pack of HP Advanced Photo Paper (not included in all countries/ regions) e. HP Photosmart software on CD f. Printer remote control and battery g. HP 110 Tri-color Inkjet print cartridge h. Audio-visual (A/V) cable i. USB cable j. Power supply - HP Photosmart A430 | Getting Started Guide - Page 3
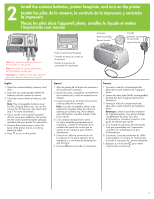
le de votre appareil photo peut varier de celui illustré dans ce guide. English 1. Open the camera battery/memory card door. 2. Insert the two rechargeable NiMH AA batteries into the camera as shown. 3. Close the camera battery/memory card door. Note: The rechargeable batteries must be fully charged - HP Photosmart A430 | Getting Started Guide - Page 4
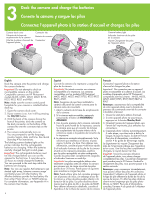
de la cámara Voyant Chargement des piles de l'appareil photo English Dock the camera onto the printer and charge the camera batteries. Important! Do not attempt to dock an incompatible camera on the printer. Compatible cameras are HP Photosmart models M425, M525, M527, M627, R725, R727, R927, R827 - HP Photosmart A430 | Getting Started Guide - Page 5
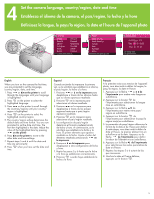
langue, le pays/la région, la date et l'heure de l'appareil photo English When you turn on the camera the first time, you are prompted to set the language, country/region, date, and time. 1. Press or on the printer to scroll through the languages until your language is highlighted. 2. Press - HP Photosmart A430 | Getting Started Guide - Page 6
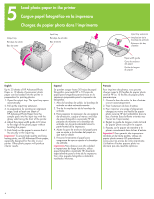
-width guide to fit close to the edge of the photo paper without bending the paper. 5. Push firmly on the paper to ensure that it fits securely in the input tray. Important! To ensure high quality and long lasting prints, use HP Advanced Photo paper, especially designed for the inks in your printer - HP Photosmart A430 | Getting Started Guide - Page 7
"x" appears to the left of any of the bars, align the print cartridge again. Refer to the printer User Guide for more information. 8. Discard the alignment page. Español 1. Retire el embalaje del cartucho de impresión de tres colores HP 110. 2. Tire de la pestaña color rosa para retirar la cinta - HP Photosmart A430 | Getting Started Guide - Page 8
View/Playback button Botón Vista en directo/ Reproducción Bouton Prévisualisation/Lecture buttons Botones ▲▼ Flèche English Be sure the camera batteries are fully charged before you take your first picture. The batteries are fully charged when the camera battery light on the printer is solid green - HP Photosmart A430 | Getting Started Guide - Page 9
Botón Imprimir Bouton Imprimer buttons Botones Flèche English 1. Place a few sheets of HP Advanced Photo Paper in the input tray with the glossy side facing the front of the printer and adjust the paper-width guide. 2. If your camera is on, turn it off by pressing the ON/OFF button. 3. Place the - HP Photosmart A430 | Getting Started Guide - Page 10
c d e f English Control the basic functions of the printer from the printer control panel. a. On: Press to turn the printer on or off. b. Save: Press to transfer photos from the docked camera to a connected computer. c. Photo Fix: Press to turn Photo Fix on or off. d. Print: Press to print the - HP Photosmart A430 | Getting Started Guide - Page 11
may vary from those described here. For specific information see the camera User Guide. a. Print menu: Contains options to print images from your docked camera including passport and panorama photos, and adjust printer settings. b. Design Gallery: Contains options to delete, modify, and enhance - HP Photosmart A430 | Getting Started Guide - Page 12
! Do not connect the USB cable until you are prompted. Your HP Photosmart printer can be connected to your Windows based computer to share images using e-mail, online albums, or online photo finishing services. 1. Insert the HP Photosmart CD into the computer. If instructions do not appear, use - HP Photosmart A430 | Getting Started Guide - Page 13
online photo finishing services. 1. Connect the USB cable to the printer and to the computer. 2. Insert the HP Photosmart CD into the computer. 3. Double-click the HP Photosmart CD icon on the desktop. 4. Double-click the HP Photosmart Installer icon. Follow the onscreen instructions. 5. When the HP - HP Photosmart A430 | Getting Started Guide - Page 14
the Windows Start menu, select Run. Click Browse, and navigate to the CD-ROM drive where you inserted the HP Photosmart software CD. Double-click the setup.exe file. Problem: The Found New Hardware Wizard opens but does not recognize the printer. Solution: You may have connected the USB cable before - HP Photosmart A430 | Getting Started Guide - Page 15
software y, a continuación, vuelva a instalar el software HP Photosmart. Nota: El software de protección de virus se volverá a activar cuando reinicie el equipo. Windows y Mac Problema: El equipo no puede leer el CD HPPhotosmart les instructions de réinstallation. Ne rebranchez le câble USB que - HP Photosmart A430 | Getting Started Guide - Page 16
Help describes how to use the printer with a computer and contains software troubleshooting information. After you have installed the HP Photosmart software on your computer, you can view the electronic Help on your computer. See the Printer User Guide for specific instructions on how to access the
-
 1
1 -
 2
2 -
 3
3 -
 4
4 -
 5
5 -
 6
6 -
 7
7 -
8
-
9
-
10
-
11
-
12
-
13
-
14
-
15
-
16
 |
 |
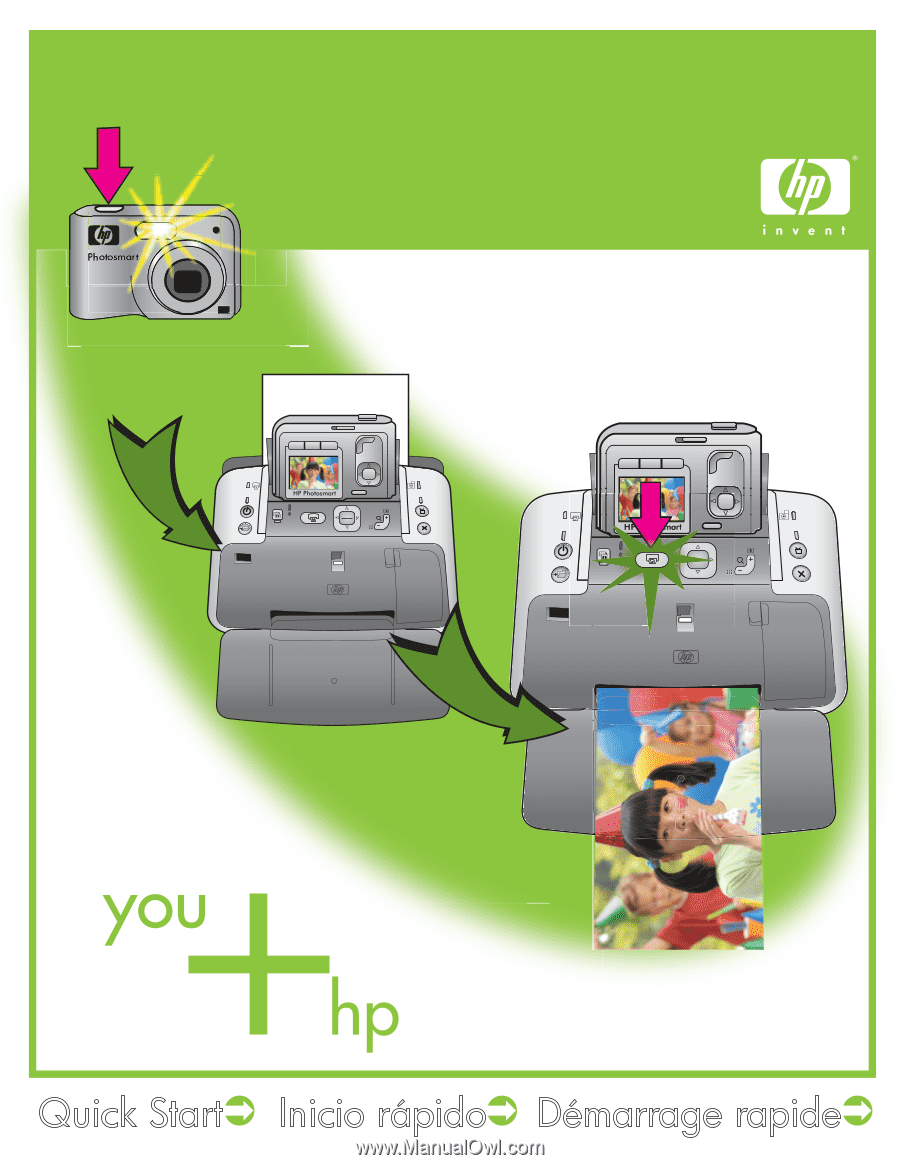
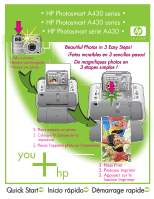
Beautiful Photos in 3 Easy Steps!
¡Fotos increíbles en 3 sencillos pasos!
De magnifiques photos en
3 étapes simples !
Beautiful Photos in 3 Easy Steps!
¡Fotos increíbles en 3 sencillos pasos!
De magnifiques photos en
3 étapes simples !
1. Take a picture
1. Realice una fotografía
1. Prenez une photo
2. Place camera on printer
2. Coloque la cámara en la
impresora
2. Placez l'appareil photo sur l'imprimante
3. Press Print
3. Presione Imprimir
3. Appuyez sur le
bouton Imprimer
Quick Start
Inicio rápido
Démarrage rapide
• HP Photosmart A430 series •
• HP Photosmart A430 series •
• HP Photosmart série A430 •