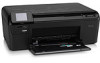
HP Photosmart e-All-in-One Printer - D110 User Guide - Page 33
Tips for setting up and using a networked printer, Change Mode, Wireless, Settings, Enable Wireless
 |
View all HP Photosmart e-All-in-One Printer - D110 manuals
Add to My Manuals
Save this manual to your list of manuals |
Page 33 highlights
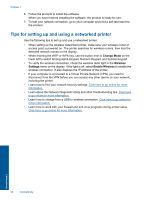
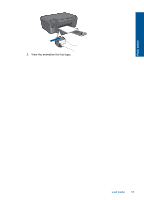
Chapter 7 6. Follow the prompts to install the software. When you have finished installing the software, the product is ready for use. 7. To test your network connection, go to your computer and print a self-test report to the product. Tips for setting up and using a networked printer Use the following tips to set up and use a networked printer: • When setting up the wireless networked printer, make sure your wireless router or access point is powered on. The printer searches for wireless routers, then lists the detected network names on the display. • When entering the WEP or WPA key, use the button next to Change Mode on the lower left to switch among Alpha Keypad, Numeric Keypad, and Symbol Keypad. • To verify the wireless connection, check the wireless radio light in the Wireless Settings menu on the display. If the light is off, select Enable Wireless to enable the wireless connection. It also displays the IP address of the printer. • If your computer is connected to a Virtual Private Network (VPN), you need to disconnect from the VPN before you can access any other device on your network., including the printer. • Learn how to find your network security settings. Click here to go online for more information. • Learn about the Network Diagnostic Utility and other troubleshooting tips. Click here to go online for more information. • Learn how to change from a USB to wireless connection. Click here to go online for more information. • Learn how to work with your firewall and anti-virus programs during printer setup. Click here to go online for more information. Connectivity 30 Connectivity
-
 1
1 -
2
-
3
-
4
-
5
-
6
-
7
-
8
-
9
-
10
-
11
-
12
-
13
-
14
-
15
-
16
-
17
-
18
-
19
-
20
-
21
-
22
-
23
-
24
-
25
-
26
-
27
-
 28
28 -
 29
29 -
 30
30 -
 31
31 -
 32
32 -
 33
33 -
 34
34 -
 35
35 -
 36
36 -
 37
37 -
 38
38 -
39
-
40
-
41
-
42
-
43
-
44
-
45
-
46
-
47
-
48
-
49
-
50
-
51
-
52
 |
 |