HP ProLiant SL390s HP ProLiant SL390s G7 2U half width Server Maintenance and - Page 40
IMPORTANT, CAUTION, Lift the retention plate to expose the socket body.
 |
View all HP ProLiant SL390s manuals
Add to My Manuals
Save this manual to your list of manuals |
Page 40 highlights
Figure 15 Removing the heat sink assembly IMPORTANT: If the heat sink has been removed for any reason on a previously installed processor, it is critical that you apply more thermal interface material to the integrated heat spreader on the processor to ensure proper thermal bonding between the processor and the heat sink. To remove a processor: 1. Disengage the load lever. 2. Lift the retention plate to expose the socket body. 3. Grasp the processor by its edges and lift it out of its socket. Figure 16 Removing the processor CAUTION: The pins of the socket are very fragile. Do not bend or damage them. CAUTION: Place the processor on a static-dissipating work surface or in an anti-static bag. Removal and Replacement Procedures 40
-
 1
1 -
2
-
3
-
4
-
5
-
6
-
7
-
8
-
9
-
10
-
11
-
12
-
13
-
14
-
15
-
16
-
17
-
18
-
19
-
20
-
21
-
22
-
23
-
24
-
25
-
26
-
27
-
28
-
29
-
30
-
31
-
32
-
33
-
34
-
 35
35 -
 36
36 -
 37
37 -
 38
38 -
 39
39 -
 40
40 -
 41
41 -
 42
42 -
 43
43 -
 44
44 -
 45
45 -
46
-
47
-
48
-
49
-
50
-
51
-
52
-
53
-
54
-
55
-
56
-
57
-
58
-
59
-
60
-
61
-
62
-
63
-
64
-
65
-
66
-
67
-
68
-
69
-
70
-
71
-
72
-
73
-
74
-
75
-
76
-
77
-
78
-
79
-
80
-
81
-
82
-
83
-
84
 |
 |

Removal and Replacement Procedures 40
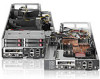
Figure 15
Removing the heat sink assembly
IMPORTANT:
If the heat sink has been removed for any reason on a previously installed processor, it
is critical that you apply more thermal interface material to the integrated heat spreader on the
processor to ensure proper thermal bonding between the processor and the heat sink.
To remove a processor:
1.
Disengage the load lever.
2.
Lift the retention plate to expose the socket body.
3.
Grasp the processor by its edges and lift it out of its socket.
Figure 16
Removing the processor
CAUTION:
The pins of the socket are very fragile. Do not bend or damage them.
CAUTION:
Place the processor on a static-dissipating work surface or in an anti-static bag.