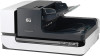
HP ScanJet Enterprise Flow N9120 Scanjet Enterprise N9120/Flow N9120 User Guid - Page 18
Position the imprinter, Tools, Imprinter, Cartridge Status, Record Replacement
 |
View all HP ScanJet Enterprise Flow N9120 manuals
Add to My Manuals
Save this manual to your list of manuals |
Page 18 highlights
Chapter 2 8. Grasp the center of the ADF input tray, and then lower the ADF input tray into position for scanning. 9. Update the imprinter history: a. Press the Tools ( ) button on the scanner front panel to open the HP Scanner Tools Utility. Click the Imprinter tab. b. In the Cartridge Status section, click Record Replacement. Position the imprinter The position of the imprinter determines the left-right location of the imprinter mark on the scanned page. NOTE: For narrow pages, if the imprinter is positioned outside of the width of the paper in the ADF input tray, the imprinter is not able to print on the scanned pages. In this case, the scan does not complete and an error message is displayed on the computer screen. 1. Raise the ADF input tray until it clicks into place. 2. Lift the green lever slightly, and then slide the imprinter to the position that you want. NOTE: Several paper sizes are indicated in the imprinter carriage. If you set the imprinter at the position for the paper size that you are using, the imprinter mark is printed about 5 mm (.2 in) from the side of the page. You can select any position that prints on the size of the paper that you are using. If you leave the imprinter between the marked positions, the imprinter might shift during scanning, and the imprinter mark will be of poor quality. 3. Grasp the center of the ADF input tray, and then lower the ADF input tray into position for scanning. Test the imprinter Test the imprinter to verify that the print cartridge is loaded properly and to check the placement of the imprinter mark on the page. NOTE: To prevent the counter value from changing during the test, the imprinter test prints a preset mark in the configured location. 16 Useful scanner features
-
 1
1 -
2
-
3
-
4
-
5
-
6
-
7
-
8
-
9
-
10
-
11
-
12
-
 13
13 -
 14
14 -
 15
15 -
 16
16 -
 17
17 -
 18
18 -
 19
19 -
 20
20 -
 21
21 -
 22
22 -
 23
23 -
24
-
25
-
26
-
27
-
28
-
29
-
30
-
31
-
32
-
33
-
34
-
35
-
36
-
37
-
38
-
39
-
40
-
41
-
42
 |
 |
