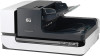
HP ScanJet Enterprise Flow N9120 Scanjet Enterprise N9120/Flow N9120 User Guid - Page 24
Replace the feed roller and separation pad, HP Scanner Tools Utility scanner maintenance information
 |
View all HP ScanJet Enterprise Flow N9120 manuals
Add to My Manuals
Save this manual to your list of manuals |
Page 24 highlights
Chapter 3 NOTE: If the filter is damaged, replace it with a new filter. To order a replacement part, go to www.hp.com/support 4. Inspect the filter cover. If it is dirty, use a clean, damp, lint-free cloth to remove the dirt. 5. Ensure that the filter and the filter cover are completely dry. CAUTION: A wet filter can damage the scanner. 6. Place the clean, dry filter in the filter cover, and then replace the cover on the scanner. 7. Reconnect the USB cable and power cable to the scanner, and then press the Power switch to the on position. Replace the feed roller and separation pad Replace the feed roller and separation pad under either of the following conditions: • Streaks on scans or paper jams occur repeatedly and cleaning the automatic document feeder does not help. • The HP Scanner Tools Utility Maintenance tab indicates that maintenance is due. The feed roller replacement kit contains a feed roller and installation instructions. The separation pad replacement kit contains a separation pad and installation instructions. To order replacement kits, go to www.hp.com/support. 1. Press the Power switch to the off position, and then disconnect the USB cable and power cable from the scanner. 2. Inspect and clean the two customer-accessible fan filters. 3. Open the top ADF access door, and then replace the feed roller and separation pad as described in the installation instructions that were included with the replacement kits. 4. Close all ADF access doors, and then reconnect the USB cable and power cable to the scanner. 5. Press the Power switch to the on position, and then update the scanner maintenance history: a. Press the Tools ( ) button on the scanner front panel to open the HP Scanner Tools Utility. Click the Maintenance tab. b. In the Feed Roller Maintenance and Separation Pad Maintenance sections, click Record Replacement. For more information, see the HP Scanner Tools Utility help. See also • Clean the scanner fan filters HP Scanner Tools Utility scanner maintenance information The Maintenance tab of the HP Scanner Tools Utility displays the scanner usage and maintenance history. You can use this tab to record scanner maintenance. The Imprinter tab of the HP Scanner Tools Utility displays information about the scanner imprinter and the imprinter print cartridge. You can use this tab to record that the print cartridge has been replaced. To open the HP Scanner Tools Utility, press the Tools button on the scanner front panel. 22 Care and maintenance
-
 1
1 -
2
-
3
-
4
-
5
-
6
-
7
-
8
-
9
-
10
-
11
-
12
-
13
-
14
-
15
-
16
-
17
-
18
-
 19
19 -
 20
20 -
 21
21 -
 22
22 -
 23
23 -
 24
24 -
 25
25 -
 26
26 -
 27
27 -
 28
28 -
 29
29 -
30
-
31
-
32
-
33
-
34
-
35
-
36
-
37
-
38
-
39
-
40
-
41
-
42
 |
 |
