IBM 2681 Hardware Maintenance Manual - Page 83
directions
 |
UPC - 087944884422
View all IBM 2681 manuals
Add to My Manuals
Save this manual to your list of manuals |
Page 83 highlights
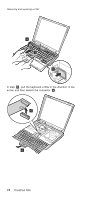
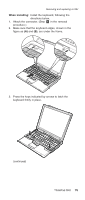
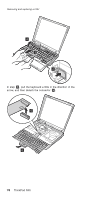
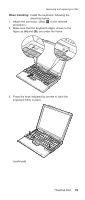
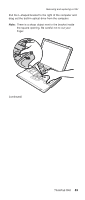
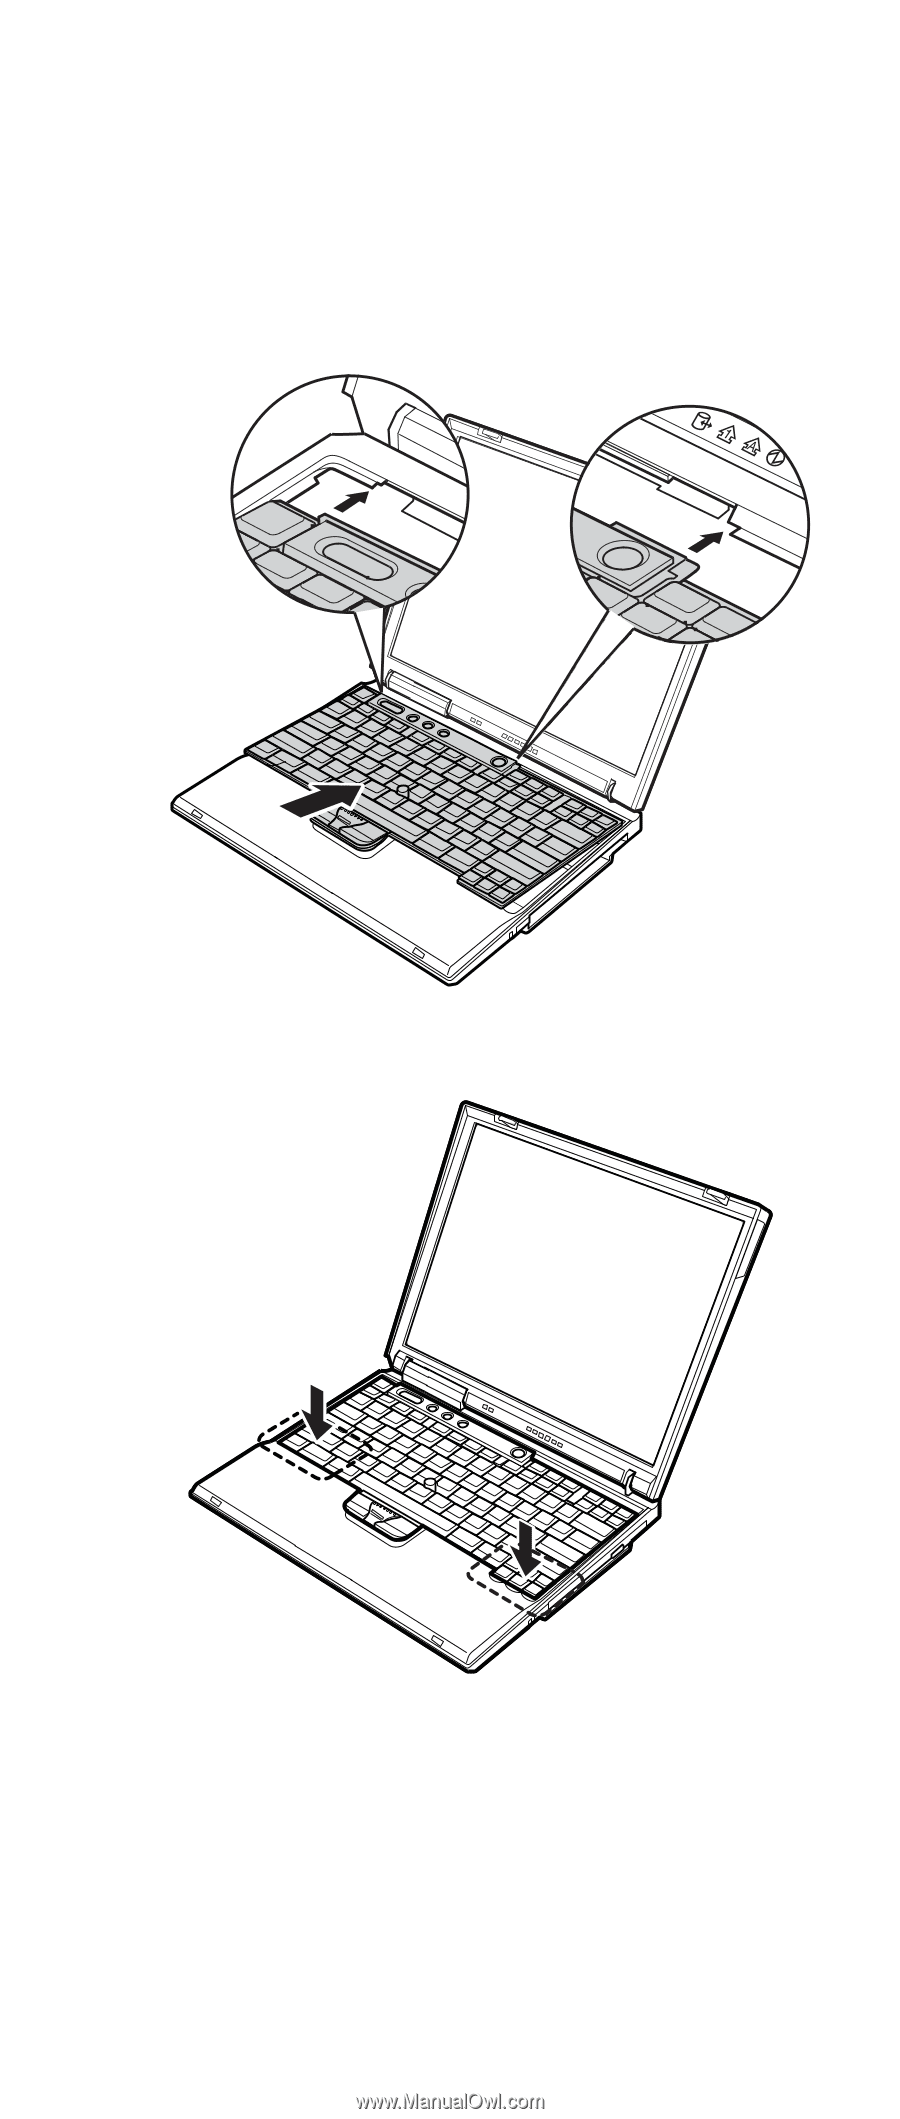
Removing and replacing a FRU When installing: Install the keyboard, following the directions below. 1. Attach the connector. (Step 6 in the removal procedure.) 2. Make sure that the keyboard edges, shown in the figure as (A) and (B), are under the frame. (A) (B) 3. Press the keys indicated by arrows to latch the keyboard firmly in place. (continued) ThinkPad R40 79
-
 1
1 -
2
-
3
-
4
-
5
-
6
-
7
-
8
-
9
-
10
-
11
-
12
-
13
-
14
-
15
-
16
-
17
-
18
-
19
-
20
-
21
-
22
-
23
-
24
-
25
-
26
-
27
-
28
-
29
-
30
-
31
-
32
-
33
-
34
-
35
-
36
-
37
-
38
-
39
-
40
-
41
-
42
-
43
-
44
-
45
-
46
-
47
-
48
-
49
-
50
-
51
-
52
-
53
-
54
-
55
-
56
-
57
-
58
-
59
-
60
-
61
-
62
-
63
-
64
-
65
-
66
-
67
-
68
-
69
-
70
-
71
-
72
-
73
-
74
-
75
-
76
-
77
-
 78
78 -
 79
79 -
 80
80 -
 81
81 -
 82
82 -
 83
83 -
 84
84 -
 85
85 -
 86
86 -
 87
87 -
 88
88 -
89
-
90
-
91
-
92
-
93
-
94
-
95
-
96
-
97
-
98
-
99
-
100
-
101
-
102
-
103
-
104
-
105
-
106
-
107
-
108
-
109
-
110
-
111
-
112
-
113
-
114
-
115
-
116
-
117
-
118
-
119
-
120
-
121
-
122
-
123
-
124
-
125
-
126
-
127
-
128
-
129
-
130
-
131
-
132
-
133
-
134
-
135
-
136
-
137
-
138
-
139
-
140
-
141
-
142
-
143
-
144
-
145
-
146
-
147
-
148
-
149
-
150
-
151
-
152
-
153
-
154
-
155
-
156
-
157
-
158
-
159
-
160
-
161
-
162
-
163
-
164
-
165
-
166
-
167
-
168
-
169
-
170
-
171
-
172
-
173
-
174
-
175
-
176
-
177
-
178
-
179
-
180
-
181
-
182
-
183
-
184
 |
 |
When
installing:
Install
the
keyboard,
following
the
directions
below.
1.
Attach
the
connector.
(Step
±6²
in
the
removal
procedure.)
2.
Make
sure
that
the
keyboard
edges,
shown
in
the
figure
as
(A)
and
(B)
,
are
under
the
frame.
(A)
(B)
3.
Press
the
keys
indicated
by
arrows
to
latch
the
keyboard
firmly
in
place.
(continued)
Removing
and
replacing
a
FRU
ThinkPad
R40
79