IBM 84802AX Installation Guide - Page 26
Installing internal drives
 |
View all IBM 84802AX manuals
Add to My Manuals
Save this manual to your list of manuals |
Page 26 highlights
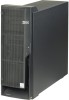
Installing internal drives Your server comes with an IDE CD-ROM drive installed in bay 1 and a 3.5-in., 1.44 MB diskette drive in bay 3. Some models have a hard disk drive installed in bay 5. Bay 1 Bay 2 Bay 3 Bay 4 Bay 5 Bay 6 Bay 7 14 Book Title Before you install an internal drive, review the following information: • Diskette drives, tape drives, and CD-ROM drives are removable-media drives. You can install removable-media drives in bays 1, 2, 3, and 4. • You can install a 3.5-in., slim-high or a 5.25-in., half-high, removable-media drive, such as a tape backup drive, in bay 2. • You can install only a 3.5-in., slim-high, removable-media drive in bay 4. • The xSeries 205 server supports only one diskette drive, which uses 1 MB and 2 MB diskettes. • Before you install a 3.5-in. drive in a 5.25-in. bay, you must attach the 5.25-in. conversion kit, supplied with your option, to the 3.5-in. drive. See the documentation that comes with the option for the conversion kit installation instructions. Note: Only 3.5-in. options that come with proper mounting hardware are supported in the 5.25-in. bays. • If you have a tape backup drive in your server, use a dry-process cleaning cartridge to clean the tape head 2 hours after you first use a new data cartridge. Then, clean the tape head once a month, or after each 8 hours of continuous read/write operations, whichever occurs first. For complete details about the tape backup drive, see the documentation that comes with your server or your backup option. • The electromagnetic interference (EMI) integrity and cooling of the server are both protected by having bays 1 through 4 covered or occupied. When you install a drive, save the EMC shield and filler panel from the bay, in case you later remove the drive and do not replace it with another.
-
 1
1 -
2
-
3
-
4
-
5
-
6
-
7
-
8
-
9
-
10
-
11
-
12
-
13
-
14
-
15
-
16
-
17
-
18
-
19
-
20
-
 21
21 -
 22
22 -
 23
23 -
 24
24 -
 25
25 -
 26
26 -
 27
27 -
 28
28 -
 29
29 -
 30
30 -
 31
31 -
32
-
33
-
34
-
35
-
36
-
37
-
38
-
39
-
40
-
41
-
42
-
43
-
44
-
45
-
46
-
47
-
48
-
49
-
50
-
51
-
52
-
53
-
54
-
55
-
56
-
57
-
58
-
59
-
60
-
61
-
62
-
63
-
64
-
65
-
66
-
67
-
68
-
69
-
70
-
71
-
72
-
73
-
74
-
75
-
76
-
77
-
78
 |
 |
