Insignia NS-39L240A13 User Manual (English) - Page 46
Restoring settings to the defaults, Using INlink, Turning INlink on or off, Retail Banner
 |
View all Insignia NS-39L240A13 manuals
Add to My Manuals
Save this manual to your list of manuals |
Page 46 highlights
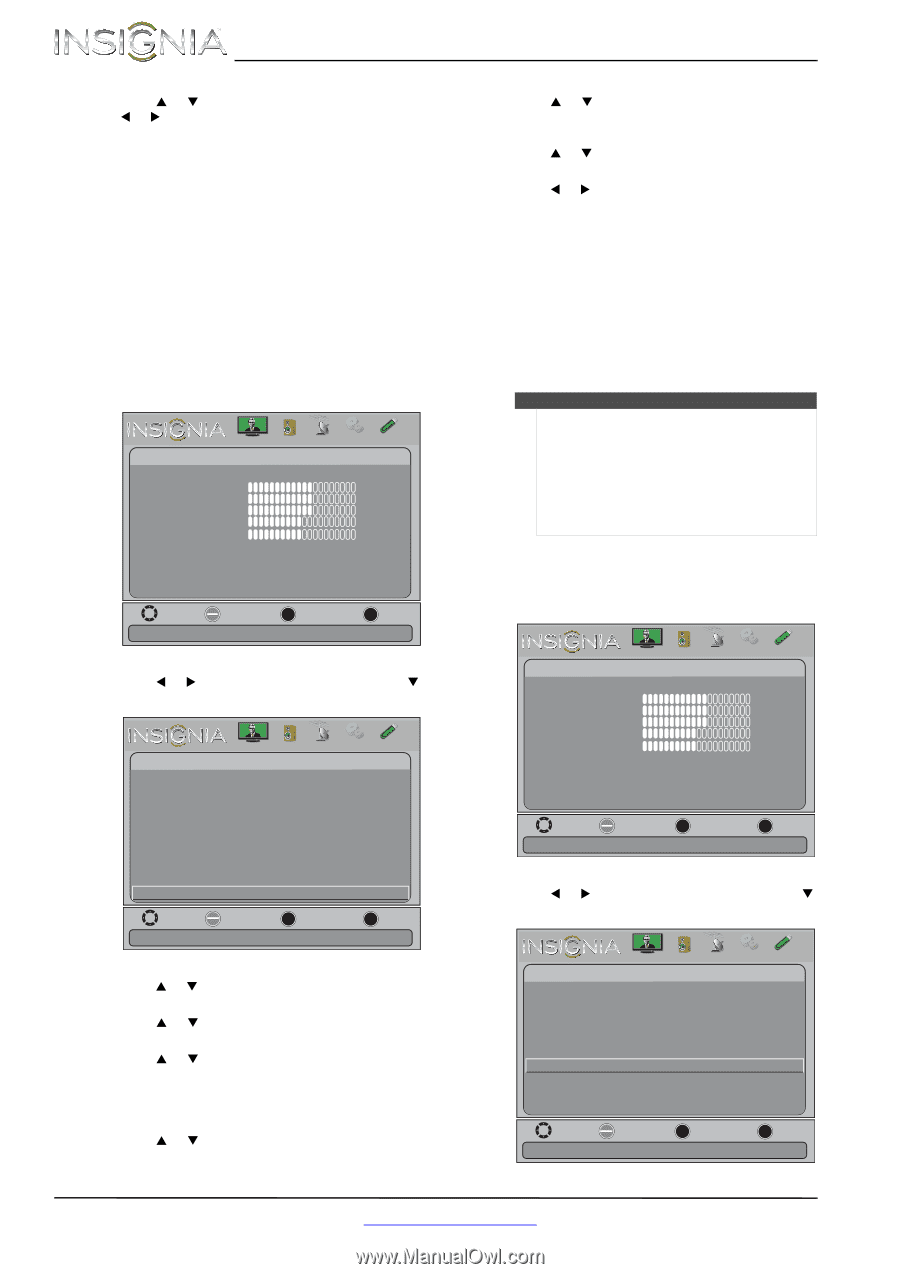
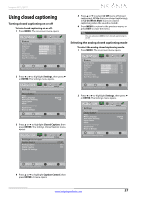
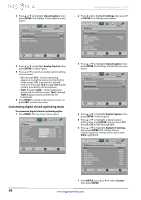
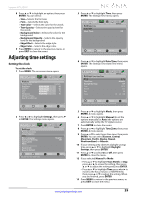
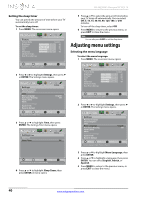
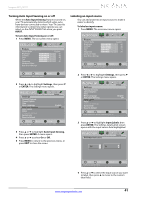
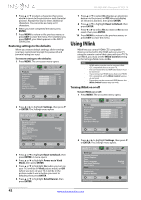
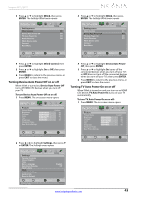
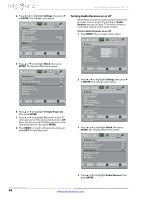
NS-39L240A13 Insignia 39" LCD TV 5 Press S or T to select a character, then press W or X to move to the previous or next character position. Repeat this step to enter additional characters. You can enter as many as 10 characters. 6 When you have completed the label, press ENTER. 7 Press MENU to return to the previous menu or press EXIT to close the menu. The next time you press INPUT, your label appears in the INPUT SOURCE list. Restoring settings to the defaults When you restore default settings, all the settings you have customized (except the password and parental rating) are reset. To restore settings to the defaults: 1 Press MENU. The on-screen menu opens. Picture Picture Picture Mode Brightness Contrast Color Tint Sharpness Advanced Video Reset Picture Settings Audio Channels Settings Photos Custom 60 60 60 0 50 Move OK ENTER Select MENU Previous Adjust settings to affect picture quality EXIT Exit 2 Press W or X to highlight Settings, then press T or ENTER. The Settings menu opens. Picture Settings Parental Controls Closed Caption Time Menu Settings Auto Input Sensing Input Labels INlink Computer Settings System Info Reset to Default Audio Channels Settings Photos English Off Move OK ENTER Select MENU Previous Change power on options or reset TV to factory default EXIT Exit 3 Press S or T to highlight Reset to Default, then press ENTER. A menu opens. 4 Press S or T to highlight Power on in Vivid Mode, then press ENTER. 5 Press S or T to highlight On (when you turn on your TV, it will be in Vivid picture mode) or Off (when you turn on your TV, it will be in the picture mode it was in before you reset to defaults), then press ENTER. 6 Press S or T to highlight Retail Banner, then press ENTER. 7 Press S or T to select On (displays an electronic banner on the screen) or Off (does not display an electronic banner), then press ENTER. 8 Press S or T to highlight Reset to Default, then press ENTER. 9 Press W or X to select Yes (to reset) or No (to not reset), then press ENTER. 10 Press MENU to return to the previous menu, or press EXIT to close the menu. Using INlink INlink lets you control HDMI CEC-compatible devices connected to the HDMI jacks on your TV using the remote control that came with your TV. To use INlink, you must set the INlink Control setting on the Settings-INlink menu to On. Note • • • • HDMI cables must be used to connect HDMI CEC-compatible devices to your TV. The connected device's HDMI CEC feature must be turned on. If you connect an HDMI device that is not HDMI CEC-compatible, all the INlink Control features do not work. Depending on the connected HDMI device, the INlink Control feature may not work. Turning INlink on or off To turn INlink on or off: 1 Press MENU. The on-screen menu opens. Picture Picture Picture Mode Brightness Contrast Color Tint Sharpness Advanced Video Reset Picture Settings Audio Channels Settings Photos Custom 60 60 60 0 50 Move OK ENTER Select MENU Previous Adjust settings to affect picture quality EXIT Exit 2 Press W or X to highlight Settings, then press T or ENTER. The Settings menu opens. Picture Settings Parental Controls Closed Caption Time Menu Language Auto Input Sensing Input Labels INlink Computer Settings System Info Reset to Default Audio Channels Settings Photos English Off Move OK ENTER Select MENU Previous EXIT Exit Allow the TV to automatically control CEC devices connected to the TV via HDMI 42 www.insigniaproducts.com
-
 1
1 -
2
-
3
-
4
-
5
-
6
-
7
-
8
-
9
-
10
-
11
-
12
-
13
-
14
-
15
-
16
-
17
-
18
-
19
-
20
-
21
-
22
-
23
-
24
-
25
-
26
-
27
-
28
-
29
-
30
-
31
-
32
-
33
-
34
-
35
-
36
-
37
-
38
-
39
-
40
-
 41
41 -
 42
42 -
 43
43 -
 44
44 -
 45
45 -
 46
46 -
 47
47 -
 48
48 -
 49
49 -
 50
50 -
 51
51 -
52
-
53
-
54
-
55
-
56
-
57
-
58
-
59
-
60
-
61
 |
 |