Invacare XPO100 Owners Manual - Page 23
Charging the Supplemental Battery Only
 |
View all Invacare XPO100 manuals
Add to My Manuals
Save this manual to your list of manuals |
Page 23 highlights
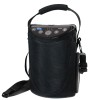
SECTION 6-OPERATING INSTRUCTIONS Charging the Supplemental Battery Only NOTE: For this procedure, refer to FIGURE 6.4 on page 24. 1. Connect the AC (Detail "A") or DC (Detail "B") power adapter to the supplemental battery pack. 2. Connect the other end of the AC (Detail "A") or DC (Detail "B") power adapter into the appropriate power source. NOTE: If completely discharged, the supplemental battery will fully charge in approximately 3 to 4 hours. Supplemental Battery Gauge indicator lights DO NOT illuminate during charging. Supplemental Battery Status Button NOTE: For this procedure, refer to Detail "C" in FIGURE 6.4 on page 24. NOTE: Pressing the battery status button while charging turns the battery gauge On and shows the status of the battery capacity. The battery gauge also flashes "the last" or highest light bar to show that the battery pack is charging. The flashing bar shows the battery is actually being charged. The lit bars show the status of the battery capacity being restored. Part No 1148112 23 Invacare XPO2™
-
 1
1 -
2
-
3
-
4
-
5
-
6
-
7
-
8
-
9
-
10
-
11
-
12
-
13
-
14
-
15
-
16
-
17
-
 18
18 -
 19
19 -
 20
20 -
 21
21 -
 22
22 -
 23
23 -
 24
24 -
 25
25 -
 26
26 -
 27
27 -
 28
28 -
29
-
30
-
31
-
32
-
33
-
34
-
35
-
36
-
37
-
38
-
39
-
40
-
41
-
42
-
43
-
44
-
45
-
46
-
47
-
48
 |
 |
