Iomega 34543 Quick Start Guide - Page 6
Hard Drive Replacement - performance
 |
UPC - 742709345432
View all Iomega 34543 manuals
Add to My Manuals
Save this manual to your list of manuals |
Page 6 highlights
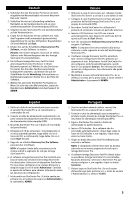
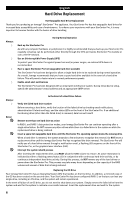
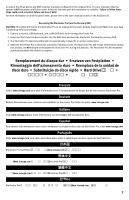
Hard Drive Replacement Hot-Swappable Hard Drive Replacement Thank you for purchasing an Iomega® StorCenter™ Pro appliance. Your StorCenter Pro has hot-swappable hard drives for increased data accessibility and ease of maintenance. To enhance your experience with your StorCenter Pro, it is very important to become familiar with the basics of drive handling. Always: l l l l During Normal Operation Back up the StorCenter Pro As with any computer hardware or peripheral, it is highly recommended that you back up your StorCenter Pro regularly. A backup can be performed either directly through the SCSI port (some StorCenter Pro models) or over a TCP/IP network. Use an Uninterruptible Power Supply (UPS) To protect your StorCenter Pro against power loss and/or power surges, an external UPS device is recommended. Have a spare StorCenter Pro hot-swappable hard drive available The StorCenter Pro has been designed to allow a single hard drive to be replaced during normal operation. As a result, Iomega recommends that you have a spare hard drive available in the event of a hard drive failure. This will permit a faster return to normal performance speeds. Enable email alert notifications The StorCenter Pro has been designed with an email alert notification system. During initial device setup, specify the administrator's email address and an appropriate SMTP server. Always: l Never: In the Event of a Hard Drive Failure Verify the failed hard drive number Before removing a hard drive, verify the location of the failed drive by checking email notifications, administration UI alerts and logs, and the status LEDs on the front of the StorCenter Pro. If an additional functioning drive (other than the failed drive) is removed, data loss will result! Remove more than one hard drive at a time In RAID 1 and RAID 5 data protection modes, your Iomega StorCenter Pro can continue operating after a single drive failure. Do NOT remove any other drives while there is a failed drive in the system or while the replacement drive is being restored. Insert a spare hot-swappable hard drive until the StorCenter Pro operating system shows the missing drive When a hard drive is removed, the system may take a few minutes to recognize the removal. Do NOT insert a replacement drive until the Iomega StorCenter Pro has recognized the drive removal. The StorCenter Pro will notify you of a hard drive removal through a notification email, a flashing LED sequence on the front of the StorCenter Pro, or the graphical user interface (GUI). Interrupt the system rebuild process After inserting the replacement drive, you MUST allow the RAID volume to restore. An active restoration is indicated by either a flashing power/status LED in conjunction with continuous hard drive activity, or by continuous independent hard drive activity. During this process, do NOT remove any of the hard drives or power down the StorCenter Pro. This process may take many hours depending on the capacity of the RAID volume and amount of data that is being restored. Replacing the OS Drive Your Iomega StorCenter Pro has an Operating System (OS) that resides on the first drive. In addition, a mirrored copy of the OS has been created on the second drive. Your StorCenter Pro has been configured (RAID 1) so that you can lose any single drive, including an OS drive, and the system will remain operational. In the event of failure of an OS drive, you do not need to shut down your system. Simply remove the failed drive from the system and wait for the system to indicate a successful removal. Insert the replacement drive and wait for the system 6
-
 1
1 -
 2
2 -
 3
3 -
 4
4 -
 5
5 -
 6
6 -
 7
7 -
 8
8 -
 9
9 -
 10
10 -
 11
11 -
 12
12 -
13
-
14
-
15
-
16
-
17
-
18
-
19
-
20
 |
 |