JVC GZ-MG20 Instruction Manual
JVC GZ-MG20 - Everio Camcorder - 25 x Optical Zoom Manual
 |
View all JVC GZ-MG20 manuals
Add to My Manuals
Save this manual to your list of manuals |
JVC GZ-MG20 manual content summary:
- JVC GZ-MG20 | Instruction Manual - Page 1
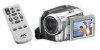
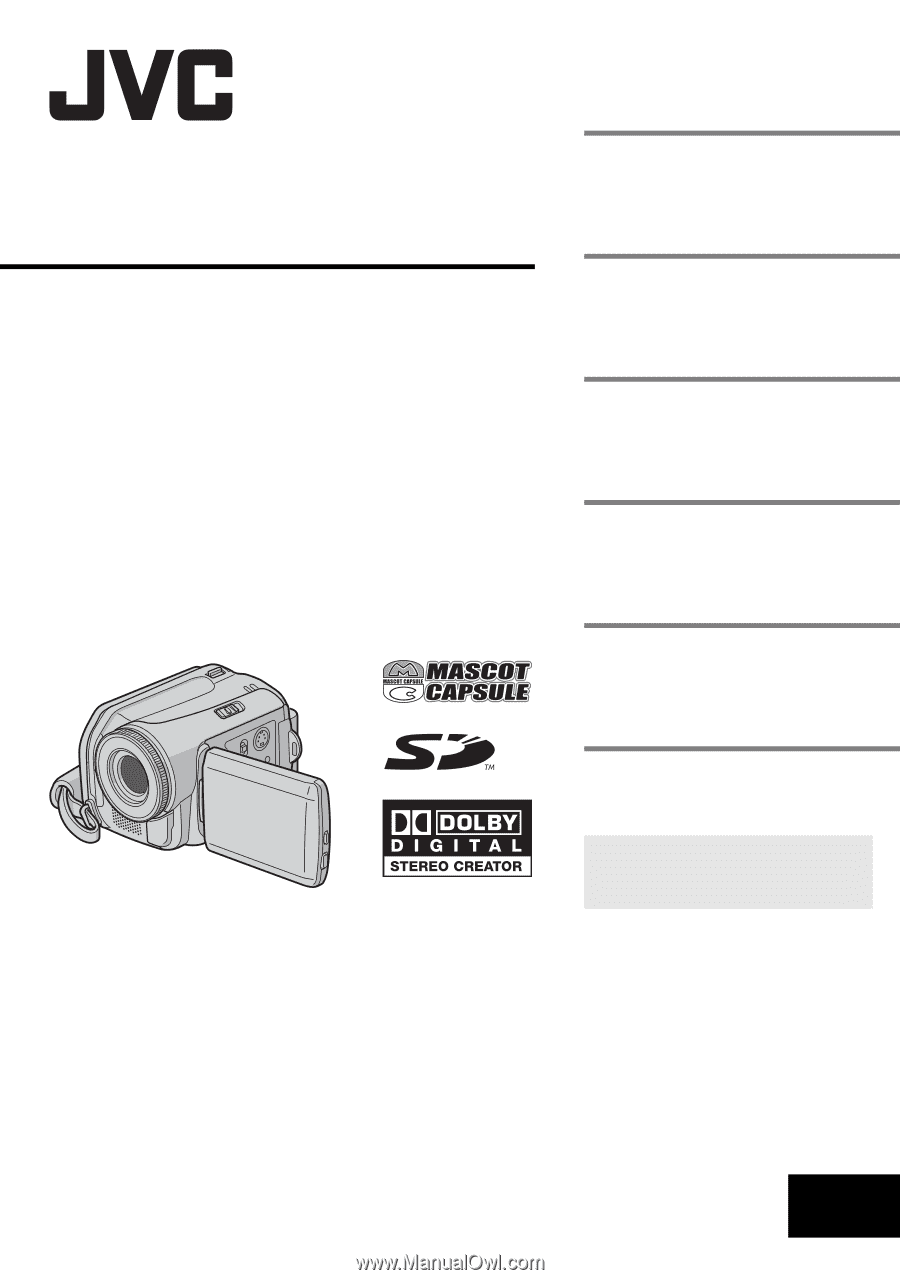
CAMCORDER GZ-MG50E/EK GZ-MG40E/EK GZ-MG30E/EK GZ-MG20E/EK GETTING STARTED ENGLISH 7 VIDEO RECORDING & PLAYBACK 22 28 STILL IMAGE RECORDING & PLAYBACK 31 ADVANCED OPERATIONS MENU SETTINGS 48 REFERENCES 52 To deactivate the demonstration, set "DEMO MODE" to "OFF". (੬ pg. 48) INSTRUCTIONS - JVC GZ-MG20 | Instruction Manual - Page 2
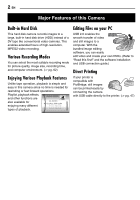
Editing Files on your PC USB 2.0 enables the smooth transfer of video and still images to a computer. With the bundled image editing software, you can easily edit video and create your own DVDs. (Refer to "Read this first!" and the software installation and USB connection guide.) Direct Printing If - JVC GZ-MG20 | Instruction Manual - Page 3
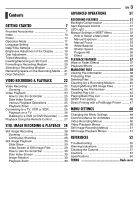
Accessories 7 Index 10 Power 14 Operation Mode 17 Language Setting 18 Date/Time Settings 18 Brightness Adjustment of the Display 19 Grip Adjustment 19 Tripod Mounting 19 Inserting/Removing an SD Card Recorder) ....... 26 Playback Using the Remote Control 27 STILL IMAGE RECORDING & PLAYBACK - JVC GZ-MG20 | Instruction Manual - Page 4
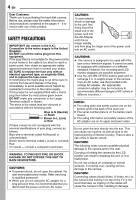
fitted with a mains plug then follow the instructions given below: DO NOT make any connection to shock, do not open the cabinet. No user serviceable parts inside. Refer servicing to qualified personnel. ● When you are JVC BN-VF707U battery pack and, to recharge it or to supply power to the camera - JVC GZ-MG20 | Instruction Manual - Page 5
waste disposal service or the shop users) If you wish to dispose of this product, please visit our web page www.jvc batteries, environmental problems must be considered and the local rules or laws governing the disposal of these batteries DO read the operating instructions before you attempt to - JVC GZ-MG20 | Instruction Manual - Page 6
software installation and USB connection guide. Important notes when requesting repair or inspection When the camera is repaired or inspected, data may be erased, and the hard disk may be formatted. Back up all data before requesting repair or inspection. If a problem occurs with the SD Memory Card - JVC GZ-MG20 | Instruction Manual - Page 7
BN-VF707U d Audio/Video Cable e USB Cable (Refer to the software installation and USB connection guide.) f Shoulder Strap (See page 8 for attachment) g Lens Cap (See page 8 for attachment) h CD-ROM i Remote Control Unit RM-V730UE j Lithium Battery CR 2025* (for remote control unit) k Core Filter for - JVC GZ-MG20 | Instruction Manual - Page 8
Close the velcro strip. Attaching the Lens Cap To protect the lens, attach the provided lens cap to the camera as shown in the illustration. NOTE: To confirm the lens cap is on correctly, make sure the cap is flush to the camera. 1 2 Eyelet 3 Strap Guide 5 4 Place here during recording. Buckle - JVC GZ-MG20 | Instruction Manual - Page 9
of cable between the cable plug and the core filter. S-Video/Audio/Video/USB cable Wind the cable once around the outside of the core filter as shown Close the core filter until it clicks shut. S-Video/Audio/Video/ USB Cable DC Cord NOTES: ● Take care not to damage the cable. ● When connecting - JVC GZ-MG20 | Instruction Manual - Page 10
10 EN GETTING STARTED Index ATTENTION: ● Be careful not to cover b, c, d, and e during shooting. ● Be careful not to cover Y during playback. - JVC GZ-MG20 | Instruction Manual - Page 11
Hole [RESET] (੬ pg. 52) X LCD Monitor Y Speaker (੬ pg. 24) a Battery Pack Mount (੬ pg. 14) b Remote Sensor (੬ pg. 27) Camera Sensor c Lens d LED Light (੬ pg. 31) e Stereo Microphone f Shoulder Strap Eyelet (੬ pg. 8) g Grip Strap (੬ pg. 19) h SD Card Cover (੬ pg. 20) i Stud Hole (੬ pg. 19) j Tripod - JVC GZ-MG20 | Instruction Manual - Page 12
Control Indicator (੬ pg. 19, 49) h Battery Indicator (੬ pg. 55) i Date/Time (੬ pg. 49) j Selected Medium Indicator (੬ pg. 21, 49) k Drop Detection Indicator (੬ pg. 21) l Manual pg. 22) h Digital Image Stabiliser (DIS) . 51) * Not available for GZ-MG30E/EK/GZ-MG20E/EK. d Picture Quality: FINE - JVC GZ-MG20 | Instruction Manual - Page 13
Indicator (੬ pg. 37, 50) 11:30 10. 11. 2005 a Mode Indicator (੬ pg. 17) b Folder/File Number c Slide Show Playback Indicator (੬ pg. 29) d Battery Indicator (੬ pg. 55) e Date/Time (੬ pg. 49) f Selected Medium Indicator (੬ pg. 21, 49) NOTE: When the mode indicators disappear or blink, the functions - JVC GZ-MG20 | Instruction Manual - Page 14
is finished. Unplug the power cord from the AC outlet. Disconnect the AC adapter from the camera. To detach the battery pack While sliding BATT., remove the battery pack. Required charging time Battery pack BN-VF707U* BN-VF714U BN-VF733U * Provided Charging time Approx. 1 hr. 30 min. Approx - JVC GZ-MG20 | Instruction Manual - Page 15
use it only in well-ventilated areas. ● Using the optional AA-VF7 battery charger, you can charge the BN-VF707U/VF714U/VF733U battery pack without the camera. ● After 5 minutes has elapsed in record-standby mode, the camera will automatically turn off its power supplied from the AC adapter. In this - JVC GZ-MG20 | Instruction Manual - Page 16
status even though you tried to press INFO/ several times, there may be a problem with your battery. In such a case, consult your nearest JVC dealer. ● The recordable time display should only be used as a guide. It is displayed in 10 minute units. Using AC Power Perform step 4 in "Charging the - JVC GZ-MG20 | Instruction Manual - Page 17
mode: Manual recording is possible by setting various functions. (੬ pg. 31 - 37) To return to the auto recording mode Press ( / ) again so that the indicator appears. 4 Power-Linked Operation When the power switch is set to , you can also turn on/off the camera by opening/closing the LCD monitor - JVC GZ-MG20 | Instruction Manual - Page 18
to the normal screen. CLOCK ADJUST DATE TIME 31 01 2005 11 : 07 Built-in Clock's Rechargeable Lithium Battery If the camera is not used for approx. 3 months, the clock's lithium battery will become discharged and the date/time stored in memory will be lost. When this occurs, first connect the - JVC GZ-MG20 | Instruction Manual - Page 19
press 49. The brightness control indicator appears. 6 Press / until the appropriate brightness is reached. 7 Press 49 to clear the brightness control indicator from the display. preference. Tripod Mounting To attach the camera to a tripod, align the direction stud and screw to the mounting socket and - JVC GZ-MG20 | Instruction Manual - Page 20
: Do not insert or remove the SD card while the camera is turned on, as this may cause the SD card to be corrupted or cause the camera to become unable to recognise whether or not the SD card is installed. You can format (initialise) the built-in hard disk (HDD) or SD cards. You have to format the - JVC GZ-MG20 | Instruction Manual - Page 21
an SD card 1 Set the power switch to or . 2 Press MENU. The menu screen appears. 3 Press / to select [REC MEDIA SETTING], DIS CAMERA Drop Detection This function turns off the power automatically to prevent HDD damage when the camera is accidentally dropped. This function is set to on at - JVC GZ-MG20 | Instruction Manual - Page 22
playback (video or still image) for 5 minutes when using the battery pack, the camera is turned off automatically to conserve power. To turn the camera on again, set the power switch to OFF, then to or . When using the AC adapter, the camera enters the sleep mode (the access lamp lights and the LCD - JVC GZ-MG20 | Instruction Manual - Page 23
the manual focus (੬ pg. 33), then zoom in or out during recording. ● During digital zoom, the quality of image may suffer. ● Macro shooting is possible as close as approx. 5 cm to the subject when the zoom lever is set all the way to W. ● When you zoom into a subject close to the lens, the camera - JVC GZ-MG20 | Instruction Manual - Page 24
If the power is turned off while video playback is paused, the camera memorizes the scene where the video was stopped. In this case, ] folder, press the recording start/stop button or START/ STOP button on the remote control while the index screen is displayed in step 2, and then proceed to step 3 - JVC GZ-MG20 | Instruction Manual - Page 25
How to Use the Scroll Bar You can use the vertical scroll bar on the index screen to find the desired files quickly. The scroll bar is useful when deleting files (੬ pg. 39), creating play list (੬ pg. 42), etc. 1 Slide the zoom lever Scroll bar towards W to select the VIDEO 7/53 scroll bar - JVC GZ-MG20 | Instruction Manual - Page 26
's instruction manual. 4 Turn on the camera, JVC Service battery pack. (੬ pg. 16) ● Make sure you adjust the TV sound volume to its minimum level to avoid a sudden burst of sound when the camera is turned on. ● To connect the camera to a PC, refer to the software installation and USB connection guide - JVC GZ-MG20 | Instruction Manual - Page 27
m. Use the remote control in front of the camera facing toward the lens. Remote sensor NOTE: The transmitted beam may not be effective or may cause incorrect operation when the remote sensor is directly exposed to sunlight or powerful lighting. A Infrared Beam Transmitting Window ● Transmits the - JVC GZ-MG20 | Instruction Manual - Page 28
, see page 23. Continuous Shooting Lock Button Zoom Lever MODE Recording Start/Stop Button 1 Set the power switch to . 2 Set the MODE switch to . ● The camera is programmed to record still images on the built-in hard disk by the factory-preset. To switch the recording medium, see pages 21, 48 - JVC GZ-MG20 | Instruction Manual - Page 29
STILL IMAGE RECORDING & PLAYBACK EN 29 Still Image Playback Power Switch Lock Button MODE Zoom Lever 49 INFO/ Slide Show You can playback all the images stored in recording media automatically. 1 Set the power switch to . 2 Set the MODE switch to . ● A still image is displayed. ● To switch the - JVC GZ-MG20 | Instruction Manual - Page 30
30 EN STILL IMAGE RECORDING & PLAYBACK How to Use the Scroll Bar Playback Zoom You can use the vertical scroll bar on the index screen to find the desired files quickly. The scroll bar is useful when deleting files (੬ pg. 39), setting DPOF (੬ pg. 46), etc. 1 Slide the zoom lever Scroll bar - JVC GZ-MG20 | Instruction Manual - Page 31
when there is insufficient light. To turn off the light Press LIGHT repeatedly so that / disappears. indicator ADVANCED OPERATIONS Spot Exposure Control / Selection of a spot metering area enables more precise exposure compensation. You can select one of the three metering areas. 1 Set the - JVC GZ-MG20 | Instruction Manual - Page 32
, then press 49. There are 6 items in the AUTO AUTO AUTO AUTO OFF OFF AE AF WB S.SP P.AE EF MSET menu. AE: Manual Exposure (੬ pg. 32) AF: Manual Focus (੬ pg. 33) WB: White Balance (੬ pg. 34) S.SP: Shutter Speed (੬ pg. 35) P.AE: Program AE (੬ pg. 36) EF: Effect (੬ pg. 36) Step - JVC GZ-MG20 | Instruction Manual - Page 33
Focus The camera's Full Range AF system offers continuous focusing ability from close-up to infinity. However, the correct focus may not be obtained depending on the shooting condition. In this case, use the manual focus mode. 1 Select [AF] in the MSET menu. (੬ pg. 32) 2 If [AUTO] is selected - JVC GZ-MG20 | Instruction Manual - Page 34
white balance manually depending on the light source. ੬ "Manual White Balance Adjustment automatic white balance Select [AUTO] in step 2. Manual White Balance Adjustment 1 Select [MWB] in WB such a case, adjust with manual focusing. (੬ pg. 33 manually, the setting is retained even if the power is - JVC GZ-MG20 | Instruction Manual - Page 35
RECORDING FEATURES EN 35 Shutter Speed You can set the shutter speed manually. A fast shutter speed can freeze the motion of a fastmoving subject and a slow shutter speed can blur the subject to give the impression of motion. 1 Select [S. - JVC GZ-MG20 | Instruction Manual - Page 36
36 EN RECORDING FEATURES Program AE You can use the program AE settings for specific shooting situations. 1 Select [P.AE] in the MSET menu. (੬ pg. 32) 2 Press / to select the desired mode. TWILIGHT: Makes evening scenes look more natural. SPOTLIGHT: The - JVC GZ-MG20 | Instruction Manual - Page 37
on a black screen from the upper right to the lower left corner, or wipe out from lower left to upper right, leaving a black screen. WIPE-WINDOW: The scene starts in the centre of a black screen and wipes in toward the corners, or comes in from the corners, gradually wiping out to - JVC GZ-MG20 | Instruction Manual - Page 38
38 EN MANAGING FILES Viewing File Information / You can view the file information in playback mode. Information on Video Files Press INFO/ while video playback is paused. File information appears. FILE: File name FOLDER: Folder name DATE/TIME: Date and time of the recording PB TIME: Playback - JVC GZ-MG20 | Instruction Manual - Page 39
off the power) during protection. Also, be sure to use the provided AC adapter, as the recording medium may be corrupted if the battery becomes exhausted during protection. If the recording medium becomes corrupted, format it. (੬ pg. 20) MANAGING FILES EN 39 Deleting Files / You can delete - JVC GZ-MG20 | Instruction Manual - Page 40
medium may be corrupted if the battery becomes exhausted during deletion. If the cleanup function is equivalent to "Defragmentation" of PC's function. NOTES: ● Make sure to Press / to select [HDD] or [SD], then press 49. ● If the AC adapter is not connected to the camera, a warning message appears. - JVC GZ-MG20 | Instruction Manual - Page 41
disk (HDD) and SD card using the on-screen display. Before proceeding to following steps, ● Make sure that SD card is inserted in the SD slot. . 10 Press / to select [EXECUTE], then press 49. 11 File transfer starts. ● To stop the file transfer, press 49, then select [EXECUTE] and press 49. 12 When - JVC GZ-MG20 | Instruction Manual - Page 42
42 EN MANAGING FILES Resetting the File Number / By resetting the file number (name), a new folder will be made. The new files you are going to make will be stored in the new folder. It is convenient to separate the new files from previously recorded files. 1 Set the power switch to or . 2 Press - JVC GZ-MG20 | Instruction Manual - Page 43
You can display the play list menu simply by pressing the PLAYLIST button on the remote control. ● Maximum up to 99 play lists can be created. ● Each play 2005 23:00 03 25.11 2005 11:00 depending on the country where this camera is sold.) ● The scroll bar can also be used with the zoom lever - JVC GZ-MG20 | Instruction Manual - Page 44
44 EN MANAGING FILES Add/Delete Files in Play List Changing Play List Name You can edit existing play lists by adding or deleting files. 1 Set the power switch to . 2 Set the MODE switch to . 3 Press MENU. The menu screen appears. 4 Press / to select [PLAY LIST], then press 49. 5 Press / to - JVC GZ-MG20 | Instruction Manual - Page 45
List Dubbing to an external device using a play list is possible. 1 Connect the camera and your VCR with the S/AV cable. (੬ pg. 26) 2 Set the VCR seconds, start recording on the VCR. (Refer to your VCR's instruction manual.) 12 To stop dubbing, stop recording on the VCR while the black screen - JVC GZ-MG20 | Instruction Manual - Page 46
camera is compatible with DPOF (Digital Print Order Format). You can set which images to be printed and the number of prints with this camera images stored on the SD card. To specify still images stored on the hard disk, you must first copy the image files onto the SD card before setting printing. (੬ - JVC GZ-MG20 | Instruction Manual - Page 47
Direct Printing with a PictBridge Printer If your printer is compatible with PictBridge, still images can be printed easily by connecting the camera with the USB cable directly to the printer. DPOF setting can also be used. (੬ pg. 46) NOTE: After selecting [DIRECT PRINT] in the menu, connect the - JVC GZ-MG20 | Instruction Manual - Page 48
guide, press INFO/ when the menu screen is displayed. (The operation guide is not displayed depending on the type of the menu.) To remove the operation guide only works with DC cord connected, not with battery. ● If an SD card is in the camera, demonstration will not take place even if it is - JVC GZ-MG20 | Instruction Manual - Page 49
hard disk if the camera is accidentally dropped. REC MEDIA SETTING VIDEO MODE [HDD] / SD IMAGE MODE [HDD] / SD Media selection can be set for each recording and playback mode: video ( ) or still image ( ). HDD: The built-in hard disk is selected as a recording medium. SD: SD card is selected as - JVC GZ-MG20 | Instruction Manual - Page 50
mode, refer to your wide-screen TV's instruction manual. During playback/recording on 4:3 TVs, black bands may be inserted at the top and bottom of the screen. NOTES: ● The 16:9 WIDE mode cannot be used when using ECONOMY mode. ● Use software that supports wide display when playing videos that were - JVC GZ-MG20 | Instruction Manual - Page 51
1024 x 768 / 640 x 480 Select the desired image size. * Not available for GZ-MG30E/EK/GZ-MG20E/EK. SELF-TIMER [OFF] / 2SEC / 10SEC By setting the self-timer, a brightened. But the overall appearance may become grainy. CAMERA SETTING MENU SETTINGS TELE MACRO The menu item of TELE MACRO is the - JVC GZ-MG20 | Instruction Manual - Page 52
EN REFERENCES Troubleshooting The camera is a microcomputer-controlled device. External noise and interference (from a TV, a radio, etc.) might prevent it from functioning properly. HTo solve the problem, follow the Instructions below at first. HIf the problem is not solved, reset the camera. (Refer - JVC GZ-MG20 | Instruction Manual - Page 53
to run check disk regularly on the PC, on condition that there is no data on the hard disk of the camera. Advanced features The focus does not adjust automatically. ● Focus is set to the manual mode. HSet focus to the automatic mode. (੬ pg. 33) ● The lens is dirty or covered with condensation - JVC GZ-MG20 | Instruction Manual - Page 54
light reaches the end of its service life, images on the LCD monitor become dark. HConsult your nearest JVC dealer. Coloured bright spots appear all (Effective dots: more than 99.99 %) The SD card cannot be removed from the camera. HPush in the SD card a few more times. (੬ pg. 20) Picture - JVC GZ-MG20 | Instruction Manual - Page 55
lithium) battery is discharged and the previously set date/time is erased. (੬ pg. 18) LENS CAP Appears for 5 seconds after power is turned on with the power switch set to , if the lens cap is attached or when it is dark. PLEASE INSERT MEMORY CARD! Appears when no SD card is inserted in the SD slot - JVC GZ-MG20 | Instruction Manual - Page 56
. See page 62 for the guaranteed media to work with this camera. ● The recording medium was subjected to vibrations or jolts. Be careful not to subject the recording medium to vibrations or jolts. RECORDING MAY NOT BE CORRECT ON THE MEMORY CARD The data may not be recorded on the recording medium - JVC GZ-MG20 | Instruction Manual - Page 57
to the battery. If the battery cap is misplaced, carry the battery in a plastic bag. ... do not modify or disassemble. ... do not expose the battery to temperatures exceeding 60°C, as this may cause the battery to overheat, explode or catch fire. ... use only specified chargers. REFERENCES - JVC GZ-MG20 | Instruction Manual - Page 58
is recommended that only genuine JVC batteries are used in this camera. Using generic non-JVC batteries can cause damage to the internal charging circuitry. ● It is normal for the battery pack to be warm after charging, or after use. Temperature range specifications Charging: 10°C to 35°C Operation - JVC GZ-MG20 | Instruction Manual - Page 59
by your dealer or JVC service centre, be sure to bring your camera together with the recording medium. If one of them is not included, the cause cannot be diagnosed, and the repair cannot be made properly. The camera is a microcomputer-controlled device. External noise and interference - JVC GZ-MG20 | Instruction Manual - Page 60
60 EN REFERENCES Specifications Camera For general Power supply DC 11 V (Using AC adapter) DC 7.2 V (Using battery pack) Power consumption Approx. 4.5 (4.8)* W * When using the LED light Dimensions (W x H x D) 67 mm x 70 mm x 109 mm Weight Approx. 320 g (without battery, lens cap and strap) Approx. - JVC GZ-MG20 | Instruction Manual - Page 61
(1152 x 864 / 1024 x 768 / 640 x 480) GZ-MG30E/EK/GZ-MG20E/EK: Only 1 mode (640 x 480) Picture quality 2 modes (FINE/STANDARD) AC Adapter Power requirement AC 110 V to 240 Vd, 50 Hz/60 Hz Output DC 11 V , 1 A Remote Control Power supply DC 3 V Battery life Approx. 1 year (depending on the frequency - JVC GZ-MG20 | Instruction Manual - Page 62
SD cards have been guaranteed to work with this camera. Others are not guaranteed to work, so buy such products with caution. SD memory cards Quality GZ-MG50E/EK GZ-MG40E/EK GZ-MG30E/EK GZ-MG20E/EK ULTRA FINE 430 290 FINE 640 430 NORMAL 850 570 ECONOMY 2250 1500 ● SD card Quality - JVC GZ-MG20 | Instruction Manual - Page 63
quality GZ-MG30E/EK GZ-MG20E/EK 640 x 480/ FINE 9999 9999 640 x 480/ STANDARD 9999 9999 1024 x 768/ FINE* 9999 9999 1024 x 768/ STANDARD* 9999 9999 1152 x 864/ FINE* 9999 9999 1152 x 864/ STANDARD* 9999 9999 * For GZ-MG50E/EK/GZ-MG40E/EK only. REFERENCES EN 63 ● SD card Image - JVC GZ-MG20 | Instruction Manual - Page 64
31 M Manual Exposure 32, 33 Manual Focus 33 MSET Menu 32 O Operation Sound 48 P Picture Quality 50, 51 Play List 42 - 45, 50 Power-Linked Operation 17 Program AE 36 Protecting Files 38, 50 R Remote Control 27 Resetting The File Number 42, 49 S Scroll Bar 25, 30 SD Memory Card 20 Self - JVC GZ-MG20 | Instruction Manual - Page 65
ENGLISH SOFTWARE INSTALLATION AND USB CONNECTION GUIDE EN LYT1473-001A - JVC GZ-MG20 | Instruction Manual - Page 66
6 System Requirements 8 Software Installation (Windows 11 Connections (Windows 13 Viewing the Contents of a Recording Medium (Windows 14 Copying Files to the PC (Windows 16 Playing Back Files on the PC (Windows®) .... 17 Disconnecting the USB cable (Windows®) .... 17 User's Guide/Help/Readme - JVC GZ-MG20 | Instruction Manual - Page 67
distribute, rent, lease or transfer the Program to any third party or otherwise let them use the Program. 4 LIMITED WARRANTY JVC warrants that any media in MATERIALS. SHOULD THERE BE ANY PROBLEM ARISING FROM OR CAUSED BY THE PROGRAM, YOU SHOULD SETTLE ALL SUCH PROBLEM AT YOUR OWN COST AND EXPENSE - JVC GZ-MG20 | Instruction Manual - Page 68
in Federal Acquisition Regulation (FAR) part 2.101 (g) consisting unpublished "Commercial Computer Software" as those items are used at FAR part 12.212 and is only licensed to You with the same use rights JVC grants all commercial end users pursuant to the terms of this Agreement. 9 GENERAL (1) No - JVC GZ-MG20 | Instruction Manual - Page 69
. ● Use only the provided CD-ROM. Never use any other CD-ROM to run this software. ● Do not attempt to modify this software. ● Changes or modifications not approved by JVC could void user's authority to operate the equipment. How to handle a CD-ROM ● Take care not to soil or scratch the mirror - JVC GZ-MG20 | Instruction Manual - Page 70
of your PC, or questions regarding specifications or performance of the OS, other applications or drivers. CyberLink For details of CyberLink's technical support service, refer to the "Readme" of each software or the following list. To access "Readme", refer to "User's Guide/Help/Readme (Windows - JVC GZ-MG20 | Instruction Manual - Page 71
the PIXELA User Support Center in your region. Region North America Europe Asia Location Los Angeles U.K. Philippines Phone # +1-213-341-0163 +44-1489-564-764 +63-2-438-0090 Please check the PIXELA website for latest information and downloading. http://www.pixela.co.jp/oem/jvc/e/index.html - JVC GZ-MG20 | Instruction Manual - Page 72
Photo Navigator The following requirements must be satisfied to connect a camera to a PC and to use Digital Photo Navigator. OS CPU RAM Free hard disk space Connector Display Miscellaneous : Windows® 2000 Professional SP4 [2000] (pre-installed), Windows® XP Home Edition [XP] (pre-installed), or - JVC GZ-MG20 | Instruction Manual - Page 73
Display Miscellaneous Supported media : Windows® 2000 Professional SP4 [2000] (pre-installed), Windows® XP Home Edition [XP] (pre-installed), or Windows® XP least 10 GB recommended For creating VCD, at least 1 GB recommended : USB 2.0 connector : Must be capable of displaying 1024 x 600 dots : - JVC GZ-MG20 | Instruction Manual - Page 74
of Apple Computer, Inc. ● Other product and company names included in this instruction manual are trademarks and/or registered trademarks of their respective holders. ● If your PC does not meet the system requirements above, you can use the optional USB reader/ writer CU-VUSD70, the PC card adapter - JVC GZ-MG20 | Instruction Manual - Page 75
SETUP] screen, you can install the desired software. ● If the [SETUP] screen does not appear, double- click the CD-ROM icon in the [My Computer] window. 2 Click [Install] on the right side of the desired software and follow the on screen instructions to complete the installation. The installation of - JVC GZ-MG20 | Instruction Manual - Page 76
the installation is finished and [Setup Complete] screen appears. 10 Click [Finish] then restart the PC. Install all of the desired software in the same way. To display [SETUP] screen, double-click the CDROM icon in the [My Computer] window. [Choose Destination Location] screen appears. - 12 - - JVC GZ-MG20 | Instruction Manual - Page 77
running during installation, [Information] screen appears. Connections (Windows®) Connecting the USB cable Connect the USB cable to copy still images and video files in a recording medium to the PC. PC Camera To USB connector To close Windows Messenger: 1) While holding [Ctrl + Alt] key, click - JVC GZ-MG20 | Instruction Manual - Page 78
(Windows®) 1 If you want to view the contents in the SD Memory Card, make sure that the card is set in the camera. 2 Set the camera's power switch to the playback mode while pressing down the lock button located on the switch. The camera turns on. 3 Connect the camera to the PC with a USB cable - JVC GZ-MG20 | Instruction Manual - Page 79
blinks. ● If you are using a brand new SD card, you need to format it with the camera first. You may not be able to copy files from the SD card to the PC without doing so. ● The file extension may not appear depending on the [FOLDER] option setting of Windows®. How to play back video files from - JVC GZ-MG20 | Instruction Manual - Page 80
be copied to the PC and played back on the PC. 1 Perform the procedure in "Viewing the Contents of a Recording Medium (Windows®)" (੬ pg. 14). the USB cable while the ACCESS lamp on the camera lights or blinks. ● File transfer takes considerable time in PCs. Usage of a PC that supports USB 2.0 is - JVC GZ-MG20 | Instruction Manual - Page 81
back properly due to the inadequate processing speeds or other problems. Before loading or unloading recording mediums or turning off the PC, first disconnect the USB cable and turn off the camera. 1 Confirm that the ACCESS lamp on the camera does not light or blink. ● If the ACCESS lamp lights - JVC GZ-MG20 | Instruction Manual - Page 82
click [OK] and then click [Close]. User's Guide/Help/Readme (Windows®) * The model name depends on the connected camera. This manual only refers to software installation and PC connection. For more details of each software, refer to its User's Guide/Help/Readme. 8 CyberLink DVD Solution Following - JVC GZ-MG20 | Instruction Manual - Page 83
from Adobe's web site: http://www.adobe.com/ Backing Up Video files (Windows®) 1 Set the camera to playback mode. 2 Connect the camera to the PC with the USB cable. 3 The message [USB MASSSTORAGE] is displayed on the LCD screen. When using Windows® XP: Select [Open folders to view files using - JVC GZ-MG20 | Instruction Manual - Page 84
[SD_VIDEO] folder. When returning folders backed up to the PC back to the camera, be sure to first erase the [SD_VIDEO] folder in the camera HDD before copying the [SD_VIDEO] folder of the PC. Playing Back Copied Video (Windows®) Creating play lists using multiple files and viewing video 1 Click - JVC GZ-MG20 | Instruction Manual - Page 85
How To Create DVDs simply (Windows®) 1 Start PowerDirector Express NE and click [Load a media folder] of the import button, then select the folder that you have copied to PC to register it to the must be squeeze processed first by using the Digital Photo Navigator. - 21 - CONTINUED ON NEXT PAGE - JVC GZ-MG20 | Instruction Manual - Page 86
4 Select [DVD Format] and click [Next]. ● If the video is [ULTRA FINE], [FINE], or [NORMAL], select [High Quality NTSC (or PAL) DVD]. If the video is [ECONOMY], select [Long Play NTSC (or PAL) DVD]. Encoding is not performed on unedited video, and high-speed processing is performed at the original - JVC GZ-MG20 | Instruction Manual - Page 87
(Windows®) 1 Connect the camera to the PC with the USB cable, or remove the SD Memory Card from the camera and connect it to the PC using the card reader details for creating a DVDs, refer to the User's Guide of PowerDirector and PowerProducer installed on the PC. (੬ pg. 18) "PRG001" folder 2 - JVC GZ-MG20 | Instruction Manual - Page 88
If a still image is inserted into video in 16:9 aspect ratio, the image must be squeeze processed first by using the Digital Photo Navigator. 4 Select [Create a File (Everio Series)], and then select [Next]. (Example of transition) 5 Select the same mode as the recording mode of the editing data - JVC GZ-MG20 | Instruction Manual - Page 89
6 Click [Start]. This starts conversion of the edited file. The file is saved to the location displayed in the storage location. Before creating slideshows or titles on a DVD that includes video in 16:9 aspect ratio, still images must first undergo the squeeze process. 11Click [Open media files]. - JVC GZ-MG20 | Instruction Manual - Page 90
any other software you are using. Capty MPEG Edit EX This application is used to edit video files (MPEG-2 format) and write them into QuickTime and a variety of formats. 1 Load the provided CD-ROM into the PC. Double click the CD-ROM icon. 2 Double-click the [Capty MPEG Edit EX for Everio] folder - JVC GZ-MG20 | Instruction Manual - Page 91
. 12Click [Close] after you will confirm the message that tells you the installation has been completed. 10Click [Upgrade] if you perform a basic installation of the software. Authenticate screen appears. 13Click [Close] when the installation is finished and eject the CD-ROM. - 27 - - JVC GZ-MG20 | Instruction Manual - Page 92
in the SD Memory Card, make sure that the card is set in the camera. 2 Set the camera's power switch to the playback mode while pressing down the lock button located on the switch. 3 Connect the camera to the PC with a USB cable. (੬ pg. 28) On the camera's LCD monitor [USB MASSSTORAGE] appears - JVC GZ-MG20 | Instruction Manual - Page 93
and files within the medium on PC. ● Never disconnect the USB cable while the ACCESS lamp on the camera lights or blinks. ● If you are using a brand new SD card, you need to format it with the camera first. You may not be able to copy files from the SD cards to the PC without doing so. ● If the - JVC GZ-MG20 | Instruction Manual - Page 94
, and then drag and drop that folder in the destination folder. Disconnecting the USB cable (Macintosh) Before loading or unloading recording medium or turning off the PC, first disconnect the USB cable and turn off the camera. 1 Drop the recording medium icon on the desktop into the [Trash] icon - JVC GZ-MG20 | Instruction Manual - Page 95
Help/Readme (Macintosh) File Combination (Macintosh) This manual only refers to software installation and PC connection. For more details of the software, refer to its Help/Readme. 8 Capty MPEG Edit EX 1 Open the [Capty MPEG Edit EX for Everio] folder in the [Applications] folder. 2 Double-click - JVC GZ-MG20 | Instruction Manual - Page 96
File]. 5 The files are arranged in playback order in the File Combination Mode window. 6 After the files are arranged, click [Create] to create the file. the files in that order. ● Use the default audio setting of [Dolby Digital] and the bit rate. Change the bit rate according to the video quality. - JVC GZ-MG20 | Instruction Manual - Page 97
Step4 Select the file format. Normally, select MPEG (system stream) format. See Help for other file formats. 1 Select the file format, and click [Execute]. File Trimming (Macintosh) Skip to Step9 if you do not edit video files. Step5 Switching to Trimming Mode. 1 Click [View] from the Capty MPEG - JVC GZ-MG20 | Instruction Manual - Page 98
Step7 Editing 1 The point selected first in the trimming range is displayed in the GOP list or frame list. To edit in frame units, insert a check mark to display the frame in the frame list. ● Note that the scroll function will become slower. 2 Drag and drop the IN point in the trimming range (point - JVC GZ-MG20 | Instruction Manual - Page 99
quality degradation due to editing. ● Wide-screen video is supported. ● Video files in the Everio hard disk can be used without conversion. For more information, co.jp/oem/jvc/e/ NOTES: ● MPEG files edited with the [Create a File (Everio Series)] command through the Windows version of CyberLink's - JVC GZ-MG20 | Instruction Manual - Page 100
EN SOFTWARE INSTALLATION AND USB CONNECTION GUIDE © 2005 Victor Company of Japan, Limited Printed in Japan M5E3 0605FOH-AL-VP - JVC GZ-MG20 | Instruction Manual - Page 101
the camera. Refer to "Troubleshooting" of the instruction manual. 8 If a problem occurs with the SD Memory Card, bring the card together with the camera When requesting repairs for breakdowns by your dealer or JVC service center, be sure to bring your camera together with the SD Memory Card. If
-
 1
1 -
 2
2 -
 3
3 -
 4
4 -
 5
5 -
 6
6 -
 7
7 -
8
-
9
-
10
-
11
-
12
-
13
-
14
-
15
-
16
-
17
-
18
-
19
-
20
-
21
-
22
-
23
-
24
-
25
-
26
-
27
-
28
-
29
-
30
-
31
-
32
-
33
-
34
-
35
-
36
-
37
-
38
-
39
-
40
-
41
-
42
-
43
-
44
-
45
-
46
-
47
-
48
-
49
-
50
-
51
-
52
-
53
-
54
-
55
-
56
-
57
-
58
-
59
-
60
-
61
-
62
-
63
-
64
-
65
-
66
-
67
-
68
-
69
-
70
-
71
-
72
-
73
-
74
-
75
-
76
-
77
-
78
-
79
-
80
-
81
-
82
-
83
-
84
-
85
-
86
-
87
-
88
-
89
-
90
-
91
-
92
-
93
-
94
-
95
-
96
-
97
-
98
-
99
-
100
-
101
 |
 |
GZ-MG50E/EK
GZ-MG40E/EK
GZ-MG30E/EK
GZ-MG20E/EK
LYT1472-001C
EN
ENGLISH
HARD DISK CAMCORDER
GETTING STARTED
7
VIDEO RECORDING &
PLAYBACK
22
MENU SETTINGS
48
52
To deactivate the demonstration,
set “DEMO MODE” to “OFF”.
(
±
pg. 48)
REFERENCES
INSTRUCTIONS
STILL IMAGE RECORDING
& PLAYBACK
28
ADVANCED OPERATIONS
31