JVC KD-X260BT Instruction Manual America
JVC KD-X260BT Manual
 |
View all JVC KD-X260BT manuals
Add to My Manuals
Save this manual to your list of manuals |
JVC KD-X260BT manual content summary:
- JVC KD-X260BT | Instruction Manual America - Page 1
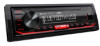
KD-X360BTS / KD-X260BT / KD-SX25BT DIGITAL MEDIA RECEIVER INSTRUCTION MANUAL RÉCEPTEUR MULTIMÉDIA NUMÉRIQUE MANUEL D'INSTRUCTIONS RECEPTOR DE MEDIOS DIGITALES MANUAL DE INSTRUCCIONES ENGLISH FRANÇAIS ESPAÑOL For customer Use: Enter below the Model No. and Serial No. which are located on the top or - JVC KD-X260BT | Instruction Manual America - Page 2
approved in the instruction manual. The user could lose the authority to operate this equipment if an unauthorized change or modification is Declaration of Conformity Trade Name: JVC Products: DIGITAL MEDIA RECEIVER Model Name: KD-X360BTS/KD-X260BT/KD-SX25BT Responsible Party: JVCKENWOOD USA - JVC KD-X260BT | Instruction Manual America - Page 3
low levels of RF energy that it deemed to comply without maximum permissive exposure evaluation (MPE). But it is desirable that it should be installed and operated keeping the radiator at least 20 cm or more away from person's body. ATTENTION Cet équipement est conforme aux limites d'exposition aux - JVC KD-X260BT | Instruction Manual America - Page 4
use the Licensed Software according to the directions described in the operation manual or help file, and is prohibited to use or duplicate any data Licensed Software embedded in the Product (including any related materials, updates and upgrades) on condition that no original, copies or related - JVC KD-X260BT | Instruction Manual America - Page 5
Article 10 Protection of Copyright 1. The copyright and all the other intellectual property rights relating to the Licensed Software shall belong to the Licensor and the Original Rightholder, and in no event shall they be under the ownership of the User. 2. The User shall, whenever it uses the - JVC KD-X260BT | Instruction Manual America - Page 6
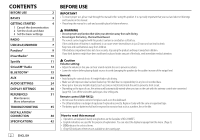
TROUBLESHOOTING 35 INSTALLATION/ CONNECTION 38 SPECIFICATIONS 42 2 ENGLISH BEFORE USE IMPORTANT • To ensure proper use, please read through this manual digital sources the antenna control wire connected (page 40 manual • Operations are explained mainly using buttons on the faceplate of KD - JVC KD-X260BT | Instruction Manual America - Page 7
window KD-X260BT/ KD-SX25BT Remote control (RM-RK52) (except for KD-SX25BT) This unit can be remotely controlled with an optionally purchased remote control. Remote sensor (Do not expose to bright sunlight.) Detach button Attach To Turn on the power Adjust the volume Select a source Change the - JVC KD-X260BT | Instruction Manual America - Page 8
GETTING STARTED 1 Cancel the demonstration When you turn on the power for the first time (or [FACTORY RESET] is set to [YES], see page 5), the display shows: "CANCEL DEMO" "PRESS" "VOLUME KNOB" 1 Press the volume knob. [YES] is selected for the initial setup. 2 Press the volume knob again. "DEMO - JVC KD-X260BT | Instruction Manual America - Page 9
For details on how to update the firmware, visit . [ • "ST" or "STEREO" lights up when receiving an FM stereo broadcast with sufficient signal strength. "M" flashes, then press repeatedly to search for a station manually. Settings in memory You can store up to 18 stations - JVC KD-X260BT | Instruction Manual America - Page 10
Repeat step 2 until the desired item is selected/activated or follow the instructions stated on the selected item. 4 Press to exit. To return to same PTY code as you have selected, that station is tuned in. *1 KD-X360BTS: Selectable only when SiriusXM Vehicle Tuner is connected. (Page 12) *2 - JVC KD-X260BT | Instruction Manual America - Page 11
The source changes automatically and playback starts. USB input terminal USB USB 2.0 cable*1 (commercially available) iPod/iPhone Accessory of the iPod/ iPhone*1 ANDROID*2 USB cable*1 (commercially available) Selectable source: • KD-X360BTS: USB/iPod USB/ANDROID • KD-X260BT/KD-SX25BT: USB - JVC KD-X260BT | Instruction Manual America - Page 12
is designed to control the JVC car receiver's operations from the following devices. KD-X360BTS: iPhone/iPod (via Bluetooth or via USB input terminal) or Android smartphone (via Bluetooth) KD-X260BT/KD-SX25BT: Android smartphone (via Bluetooth) Preparation: • Install the latest version of - JVC KD-X260BT | Instruction Manual America - Page 13
(via Bluetooth or via USB input terminal) or Android smartphone (via Bluetooth) KD-X260BT/KD-SX25BT: Android smartphone (via Bluetooth) Preparation: Install the latest version of the Pandora application on your device (iPhone/ iPod touch), then create an account and log in to Pandora. • Select - JVC KD-X260BT | Instruction Manual America - Page 14
(via Bluetooth or via USB input terminal) or Android smartphone (via Bluetooth) KD-X260BT/KD-SX25BT: Android smartphone (via Bluetooth) Preparation: Install the latest version of iHeartAuto application on your device (iPhone/ iPod touch), then create an account and log in to iHeartRadio. • Select - JVC KD-X260BT | Instruction Manual America - Page 15
(via Bluetooth or via USB input terminal) or Android smartphone (via Bluetooth) KD-X260BT/KD-SX25BT: Android smartphone (via Bluetooth) Preparation: Install the latest version of the Spotify application on your device (iPhone/ iPod touch), then create an account and log in to Spotify. • Select - JVC KD-X260BT | Instruction Manual America - Page 16
KD to select SIRIUS XM to start updating. Start listening 1 Press B SRC a channel manually. • Pressing and holding S / T changes the channel rapidly . If a locked channel or a mature channel is selected, a pass code input screen appears. Enter the pass code to receive - JVC KD-X260BT | Instruction Manual America - Page 17
SiriusXM® Radio (for KD-X360BTS) SiriusXM Replay™ While listening to a channel... 1 Press the volume knob. " " lights up and the unit memorizes this paused position. 2 Press the volume knob to - JVC KD-X260BT | Instruction Manual America - Page 18
KD is selected/activated or follow the instructions stated on the selected item. entry position. 4 Repeat steps 2 and 3 to enter a new 4-digit pass code. 5 Press the volume knob to confirm. 6 Repeat steps ]/[STRONG]) of the current received signal. [BUFFER USAGE] supports SmartFavorites. 14 ENGLISH - JVC KD-X260BT | Instruction Manual America - Page 19
firmware version of your mobile phone, Bluetooth features may not work with this unit. BLUETOOTH - Connection Supported the name of your receiver ("KD-X3 BTS"/"KD-X2 BT"/ "KD-SX2 BT") on "XXXXXX" is a 6-digit passkey randomly generated during the Bluetooth device. You can change to a desired PIN code - JVC KD-X260BT | Instruction Manual America - Page 20
to the instruction manual of the Bluetooth device for more information. Auto Pairing (for KD-X360BTS) When you connect iPhone/iPod touch Receive a call When there is an incoming call: • KD-X360BTS: The buttons will blink in the color you have selected in [RING COLOR]. (Page 18) KD-X260BT/KD-SX25BT - JVC KD-X260BT | Instruction Manual America - Page 21
+05] ([LEVEL 00]): Adjust the echo cancellation delay time until the least echo is being heard during a phone conversation. Make the settings for receiving a call 1 Press to enter Bluetooth mode. 2 Turn the volume knob to select an item (page 18), then press the knob. 3 Repeat step 2 until - JVC KD-X260BT | Instruction Manual America - Page 22
time (in seconds). ; [OFF]: Cancels. [RING COLOR] KD-X360BTS: [COLOR 01] to [COLOR 49] ([COLOR 08]): Selects the illumination color for the buttons as notification when there is an incoming call and during a call. ; [OFF]: Cancels. [RING ILLUMI] KD-X260BT/1/KD-SX25BT: [BLINK 01] to [BLINK 05 - JVC KD-X260BT | Instruction Manual America - Page 23
is selected/activated or follow the instructions stated on the selected item. 4 the knob. [PIN CODE EDIT] (0000) Changes the PIN code (up to 6 digits). 1 Turn the volume knob to select the supported Bluetooth device (iPhone/iPod the name of your receiver ("KD-X3 BTS"/ "KD-X2 BT"/"KD-SX2 BT"). ; - JVC KD-X260BT | Instruction Manual America - Page 24
of the supported profile between the Bluetooth device and the unit. • Make sure there is no Bluetooth device paired. 1 Press and hold . "BLUETOOTH" "CHECK MODE" appears. "SEARCH NOW USING PHONE" "PIN IS 0000" scrolls on the display. 2 Search and select the name of your receiver ("KD-X3 BTS - JVC KD-X260BT | Instruction Manual America - Page 25
BLUETOOTH® BLUETOOTH - Audio While in BT AUDIO source, you can connect to five Bluetooth audio devices and switch between these five devices. Audio player via Bluetooth 1 Press B SRC repeatedly to select BT AUDIO (or press SOURCE on the remote control). • Pressing enters BT AUDIO directly. 2 - JVC KD-X260BT | Instruction Manual America - Page 26
is designed to control the JVC car receiver's operations from the following devices. KD-X360BTS: iPhone/iPod (via Bluetooth or via USB input terminal) or Android smartphone (via Bluetooth) KD-X260BT/KD-SX25BT: Android smartphone (via Bluetooth) Preparation: • Install the latest version of - JVC KD-X260BT | Instruction Manual America - Page 27
following devices via Bluetooth on this unit. • Make sure the USB input terminal is not connected to any device. KD-X360BTS: iPhone/iPod touch/Android device KD-X260BT/KD-SX25BT: Android device Listen to Pandora Preparation: Select [ON] for [PANDORA SRC] in [SOURCE SELECT]. (Page 4) 1 Start up - JVC KD-X260BT | Instruction Manual America - Page 28
select an item (see the following table), then press the knob. 3 Repeat step 2 until the desired item is selected/activated or follow the instructions stated on the selected item. 4 Press to exit. To return to the previous setting item, press . Default: [XX] [EQ SETTING] [PRESET EQ] [EASY - JVC KD-X260BT | Instruction Manual America - Page 29
crossover type is selected. [DTA SETTINGS] [CAR SETTINGS] [X ' OVER TYPE] [2-WAY] [3-WAY] For settings, see "Digital Time Alignment settings" on page 29. Caution: Adjusts the volume before changing the [X ' OVER TYPE] to avoid the sudden increase or decrease of the output level. (Displayed only - JVC KD-X260BT | Instruction Manual America - Page 30
( Not available ) ( Not available ) ( Not available ) [SUB.W/SUB.W] Front speakers output L (left): Subwoofer output Subwoofer output R (right): (Mute) KD-X260BT/KD-SX25BT: Setting on [SPK/PRE OUT] Audio signal through lineout terminal REAR/SW [REAR/REAR] Rear speakers output [REAR/SUB - JVC KD-X260BT | Instruction Manual America - Page 31
AUDIO SETTINGS Crossover settings Below are the available setting items for 2-way crossover and 3-way crossover. Caution Select a crossover type according to how the speakers are connected. (Page 40, 41) If you select a wrong type: • The speakers may be damaged. • The output sound level may be - JVC KD-X260BT | Instruction Manual America - Page 32
[REVERSE] (180°)/[NORMAL] (0°) [GAIN] [-08DB] to [00DB] *1 Displayed only when [SPK/PRE OUT] is set to [REAR/REAR] or [REAR/SUB.W]. (Page 26) *2 KD-X260BT/KD-SX25BT: Displayed only when [SPK/PRE OUT] is set to [REAR/SUB.W] or [SUB.W/SUB.W]. (Page 26)) *3 Displayed only when [SUBWOOFER SET] is set - JVC KD-X260BT | Instruction Manual America - Page 33
AUDIO SETTINGS Digital Time Alignment settings Digital Time Alignment sets the delay time of the speaker output to create a more suitable environment for your vehicle. • For more information, see "Determining the value - JVC KD-X260BT | Instruction Manual America - Page 34
item is selected/activated or follow the instructions stated on the selected item. 4 Brightness changes to [DAY] setting. [ON]: Dimmer is turned on. Brightness changes to Cancels. [FORMAT]*3 KD-X360BTS: Below information the date. *1 The illumination control wire connection is required. (Page 40 - JVC KD-X260BT | Instruction Manual America - Page 35
connector. Connector (on the reverse More information side of the faceplate) For: - Latest firmware updates and latest compatible item list - JVC original application - Any other latest information Visit . Playable files • Playable audio file for USB mass storage class - JVC KD-X260BT | Instruction Manual America - Page 36
. About Spotify • Spotify application supports: - iPhone 4S, 5, 5S, 5C, 6, 6 Plus, 6S, 6S Plus, SE, 7, 7 Plus (iOS 8 or later) - iPod touch (5th and 6th generation) - Android OS 4.0.3 or later • Spotify is a third party service, therefore the specifications are subject to change without prior notice - JVC KD-X260BT | Instruction Manual America - Page 37
display information Each time you press , the display information changes. • If the information is unavailable or not recorded, "NO TEXT", "NO NAME", or other information (eg. station name) appears or display will be blank. KD-X360BTS: Main display Supplementary display*1 Clock display or Level - JVC KD-X260BT | Instruction Manual America - Page 38
back to the beginning *2 During Music Synchronization Effect, the illumination color or brightness level of the buttons changes and synchronizes with the music level (depending on the color setting made for [PRESET] on page 31). KD-X260BT/KD-SX25BT: Main display Source name FM or AM Level meter - JVC KD-X260BT | Instruction Manual America - Page 39
wires are insulated properly. Turn the power on again. "PROTECTING SEND SERVICE" Send the unit to the nearest service problem, turn the power off and on (or reset the unit) before replacing with another USB device. The iPod/iPhone does not • Check the connection between this unit and iPod/iPhone - JVC KD-X260BT | Instruction Manual America - Page 40
the current media player application or use another media player application. • Restart the Android device. • If this does not solve the problem, the deleting unnecessary stations from your device. "UPGRADE APP" Make sure you have installed the latest version of the Pandora application on - JVC KD-X260BT | Instruction Manual America - Page 41
TROUBLESHOOTING antenna is mounted outside the vehicle. "SUBSCRIPTION UPDATED - PRESS ENTER TO CONTINUE." Your subscription is updated. Press the volume knob to continue. connected Bluetooth audio player supports Audio/Video Remote Control Profile (AVRCP). (Refer to the instructions of your audio - JVC KD-X260BT | Instruction Manual America - Page 42
ERROR" appears again, consult your nearest service center. The connected phones might not support phone switching feature. Delete the unused registered Bluetooth device from the unit. (Page 19) If you have any troubles, try the following: 1 Check TROUBLESHOOTING 2 Reset the unit (page 3) 3 Contact - JVC KD-X260BT | Instruction Manual America - Page 43
Do the required wiring. (Page 40) (C) Mounting sleeve (×1) (D) Wiring harness (×1) (E) Extraction key (×2) Basic procedure 1 Remove the key from the ignition switch, then disconnect the terminal of the car battery. 2 Connect the wires properly. See "Wiring connection" on page 40. 3 Install the unit - JVC KD-X260BT | Instruction Manual America - Page 44
connection IMPORTANT We recommend installing the unit with a commercially available custom wiring harness specific for your car and leave this job to professionals for your safety. Consult your car audio dealer. Fuse (10 A) Ignition switch Car fuse block Separate red wire Make this connection if - JVC KD-X260BT | Instruction Manual America - Page 45
output 3-way crossover setting Tweeter output Mid Range output Woofer output Woofer output JVC Amplifier*2 Remote wire (not supplied) To remote lead (blue/white) of the wiring harness. (Page 40) *2 Firmly connect the ground wire of the amplifier to the car's chassis to avoid damaging the unit - JVC KD-X260BT | Instruction Manual America - Page 46
Devices File System Maximum Supply Current Digital Filter (D/A) Converter Frequency Response (±1 Layer-3 Compliant with Windows Media Audio AAC-LC ".aac", ".m4a" files (for KD-X360BTS) Linear-PCM FLAC Ω) 22 W × 4 4 Ω - 8 Ω KD-X360BTS: 4 000 mV/10 kΩ load KD-X260BT/KD-SX25BT: USB: 2 500 mV/10 kΩ load - JVC KD-X260BT | Instruction Manual America - Page 47
General Operating Voltage Installation Size (W × H × D) Net Weight (includes Trimplate, Mounting Sleeve) 12 V DC car battery 182 mm × 53 mm × 100 mm (7-3/16" × 2-1/8" × 3-15/16") KD-X360BTS: 0.7 kg (1.5 lbs) KD-X260BT/KD-SX25BT: 0.6 kg (1.3 lbs) Subject to change without notice. ENGLISH - JVC KD-X260BT | Instruction Manual America - Page 48
RENCES 31 Entretien Plus d'informations GUIDE DE DÉPANNAGE 35 INSTALLATION/ RACCORDEMENT 38 SPÉCIFICATIONS 42 Les opérations sont expliquées principalement en utilisant les touches de la façade du KD-X360BTS. • Les indications en anglais sont utilisées dans un but explicatif. Vous pouvez - JVC KD-X260BT | Instruction Manual America - Page 49
FONCTIONNEMENT DE BASE Façade Bouton de volume Fenêtre d'affichage KD-X260BT/ KD-SX25BT Télécommande (RM-RK52) (sauf pour KD-SX25BT) Cet appareil peut être commandé à distance avec une télécommande vendue séparément. Capteur de télécommande (Ne l'exposez Pas à la lumière directe du soleil.) - JVC KD-X260BT | Instruction Manual America - Page 50
PANDORA/PANDORA BT dans la sélection de source. ; [OFF]: Hors service. (Page 9) [IHEART SRC]* [ON]: Met en service IHEARTRADIO dans la sélection de la source. ; [OFF]: Hors service. (Page 10) [SPOTIFY SRC]* [ON]: Met en service SPOTIFY/SPOTIFY BT dans la sélection de source. ; [OFF]: Hors - JVC KD-X260BT | Instruction Manual America - Page 51
PRISE EN MAIN RADIO [F/W UPDATE] [UPDATE SYSTEM] [F/W UP xxxx] [YES]: Démarrer la mise à niveau du micrologiciel. ; [NO]: Annulation (la mise à niveau n'est pas activée). Pour en savoir plus sur la mise à niveau du micrologiciel, consultez . [FACTORY RESET] [YES]: - JVC KD-X260BT | Instruction Manual America - Page 52
sélectionné/activé ou suivez les instructions données pour l'élément sélectionné. DAILY]/[WEEKLY]/[OFF]: Sélectionnez la fréquence de mise en service de la minuterie. 2 [FM]/[AM]/[SIRIUS XM]*1: Sélectionner avez choisi, la station est accordée. *1 KD-X360BTS: Sélectionnable quand le tuner SiriusXM - JVC KD-X260BT | Instruction Manual America - Page 53
change automatiquement et le lecture démarre. Prise d'entrée USB USB Câble USB 2.0*1 (en vente dans le commerce) iPod/iPhone Accessoire du iPod/iPhone*1 ANDROID*2 Câble USB*1 (en vente dans le commerce) Source sélectionnable: • KD-X360BTS: USB/iPod USB/ANDROID • KD-X260BT/KD édia installée sur - JVC KD-X260BT | Instruction Manual America - Page 54
pour utiliser une application JVC Remote L'application JVC Remote est conçue pour commander l'autoradio JVC à partir des périphériques suivants. KD-X360BTS: iPhone/iPod (via Bluetooth ou via la prise d'entrée USB) ou Smartphone Android (via Bluetooth) KD-X260BT/KD-SX25BT: Smartphone Android - JVC KD-X260BT | Instruction Manual America - Page 55
via la prise d'entrée USB (voir ce qui suit) ou via Bluetooth (page 23). KD-X360BTS: iPhone/iPod (via Bluetooth ou via la prise d'entrée USB) ou Smartphone Android (via Bluetooth) KD-X260BT/KD-SX25BT: Smartphone Android (via Bluetooth) Préparation: Installez la dernière version de l'application - JVC KD-X260BT | Instruction Manual America - Page 56
via la prise d'entrée USB (voir ce qui suit) ou via Bluetooth (page 23). KD-X360BTS: iPhone/iPod (via Bluetooth ou via la prise d'entrée USB) ou Smartphone Android (via Bluetooth) KD-X260BT/KD-SX25BT: Smartphone Android (via Bluetooth) Préparation: Installez la dernière version de l'application - JVC KD-X260BT | Instruction Manual America - Page 57
via la prise d'entrée USB (voir ce qui suit) ou via Bluetooth (page 23). KD-X360BTS: iPhone/iPod (via Bluetooth ou via la prise d'entrée USB) ou Smartphone Android (via Bluetooth) KD-X260BT/KD-SX25BT: Smartphone Android (via Bluetooth) Préparation: Installez la dernière version de l'application - JVC KD-X260BT | Instruction Manual America - Page 58
Radio SiriusXM® (pour KD-X360BTS) Seul SiriusXM® vous apporte plus de ce que vous aimez écouter, en un seul endroit. Obtenez plus de 140 canaux, y compris de la musique - JVC KD-X260BT | Instruction Manual America - Page 59
Radio SiriusXM® (pour KD-X360BTS) Relecture SiriusXM™ Lors de l'écoute d'un canal... 1 Appuyez sur le bouton de volume. " " s'allume et l'appareil mémorise la position de pause. 2 Appuyez sur le - JVC KD-X260BT | Instruction Manual America - Page 60
Radio SiriusXM® (pour KD-X360BTS) TuneScan™ Vous pouvez obtenir un bref aperçu des . 3 Répétez l'étape 2 jusqu'à ce que l'élément souhaité soit sélectionné/activé ou suivez les instructions données pour l'élément sélectionné. 4 Appuyez sur pour quitter. Pour retourner à l'option de réglage - JVC KD-X260BT | Instruction Manual America - Page 61
sous tension. 2 Recherchez et sélectionnez le nom de votre récepteur ("KD-X3 BTS"/"KD-X2 BT"/ "KD-SX2 BT") sur le périphérique Bluetooth. "BT PAIRING" clignote é et "O" s'allume quand la connexion Bluetooth est établie. Pour le KD-X360BTS, la batterie et la force du signal du périphérique Bluetooth - JVC KD-X260BT | Instruction Manual America - Page 62
au manuel d'instructions de votre périphérique Bluetooth pour en savoir plus. Pairage automatique (pour KD-X360BTS) Quand vous connectez un iPhone/iPod touch à dans la couleur que vous avez sélectionnée dans [RING COLOR]. (Page 18) KD-X260BT/KD-SX25BT: Les touches s'arrêtent de clignoter. • Si - JVC KD-X260BT | Instruction Manual America - Page 63
BLUETOOTH® Les opérations suivantes peuvent différer ou peuvent ne pas être disponibles en fonction du téléphone connecté. Pour Sur la façade Premier appel entrant... Répondre à un appel Appuyez sur ou sur le bouton de volume. Refuser un appel Maintenez enfoncé ou le bouton de volume. - JVC KD-X260BT | Instruction Manual America - Page 64
COLOR] KD-X360BTS: [COLOR 01] à [COLOR 49] ([COLOR 08]): Sélectionne la couleur l'éclairage pour les touches comme notification quand il y a un appel entrant et pendant un appel. ; [OFF]: Annulation. [RING ILLUMI] KD-X260BT/1/KD lectionné/activé ou suivez les instructions données pour l'élément - JVC KD-X260BT | Instruction Manual America - Page 65
lectionné/activé ou suivez les instructions données pour l'élément sé le bouton. [PIN CODE EDIT] (0000) Change le code PIN (6 chiffres maximum). 1 Tournez riphérique Bluetooth pris en charge (iPhone/iPod touch) quand il est connect de votre autoradio ("KD-X3 BTS"/ "KD-X2 BT"/"KD-SX2 BT"). ; - JVC KD-X260BT | Instruction Manual America - Page 66
MODE" apparaît. "SEARCH NOW USING PHONE" "PIN IS 0000" défile sur l'affichage. 2 Recherchez et sélectionnez le nom de votre récepteur ("KD-X3 BTS"/ "KD-X2 BT"/"KD-SX2 BT") sur le périphérique Bluetooth avant 3 minutes. 3 Réalisez (A), (B) ou (C) en fonction de ce qui apparait sur l'affichage - JVC KD-X260BT | Instruction Manual America - Page 67
BLUETOOTH® BLUETOOTH - Audio Quand la source est BT AUDIO, vous pouvez vous connecter à cinq périphériques audio Bluetooth et commuter parmi ces cinq périphériques. Lecteur audio via Bluetooth 1 Appuyez répétitivement sur B SRC pour sélectionner BT AUDIO (ou appuyez sur SOURCE sur la télécommande - JVC KD-X260BT | Instruction Manual America - Page 68
pour utiliser une application JVC Remote L'application JVC Remote est conçue pour commander l'autoradio JVC à partir des périphériques suivants. KD-X360BTS: iPhone/iPod (via Bluetooth ou via la prise d'entrée USB) ou Smartphone Android (via Bluetooth) KD-X260BT/KD-SX25BT: Smartphone Android - JVC KD-X260BT | Instruction Manual America - Page 69
n'est connectée à aucun périphérique. KD-X360BTS: Périphérique iPhone/iPod touch/Android KD-X260BT/KD-SX25BT: Périphérique Android Écoute de Appuyez répétitivement sur B SRC pour choisir IHEARTRADIO. La source change et l'émission démarre automatiquement. • Vous pouvez commander iHeartRadio de - JVC KD-X260BT | Instruction Manual America - Page 70
le tableau suivant), puis appuyez sur le bouton. 3 Répétez l'étape 2 jusqu'à ce que l'élément souhaité soit sélectionné/activé ou suivez les instructions données pour l'élément sélectionné. 4 Appuyez sur pour quitter. Pour retourner à l'option de réglage précédente, appuyez sur . Défaut: [XX - JVC KD-X260BT | Instruction Manual America - Page 71
grave connecté aux prises de sortie de ligne (SW ou REAR/SW) via un amplificateur extérieur. (Page 41) [SUBWOOFER [ON]: Met en service la sortie du caisson de grave. ; [OFF]: Annulation. SET]*3 [FADER] (Non applicable quand la transition 3 voies est sélectionnée.) [POSITION R15] à [POSITION F15 - JVC KD-X260BT | Instruction Manual America - Page 72
( Non disponible ) [SUB.W/SUB.W] Sortie des enceintes L (gauche): Sortie de caisson Sortie de caisson avant de grave de grave R (droite): (Sourdine) KD-X260BT/KD-SX25BT: Réglage sur [SPK/PRE OUT] Signal audio via la prise de sortie de ligne REAR/SW [REAR/REAR] Sortie des enceintes arrière - JVC KD-X260BT | Instruction Manual America - Page 73
RÉGLAGES AUDIO Réglages de transition Voici les options de réglage disponibles pour la transition 2 voies et la transition 3 voies. Précautions Sélectionnez un type de transition en fonction de la connexion de vos enceintes. (Page 40, 41) Si vous sélectionnez une mauvais type: • Les enceintes - JVC KD-X260BT | Instruction Manual America - Page 74
(180°)/[NORMAL] (0°) [GAIN] [-08DB] à [00DB] *1 Affiché uniquement quand [SPK/PRE OUT] est réglé sur [REAR/REAR] ou [REAR/SUB.W]. (Page 26) *2 KD-X260BT/KD-SX25BT: Affiché uniquement quand [SPK/PRE OUT] est réglé sur [REAR/SUB.W] ou [SUB.W/SUB.W]. (Page 26) *3 Affiché uniquement quand [SUBWOOFER - JVC KD-X260BT | Instruction Manual America - Page 75
RÉGLAGES AUDIO Réglages de l'alignement temporel numérique L'alignement temporel numérique règle la temporisation de la sortie d'enceinte pour créer un environnement qui convient mieux à votre véhicule. • Pour plus d'informations, voir "Déterminez la valeur pour [DISTANCE] et [GAIN] de [DTA - JVC KD-X260BT | Instruction Manual America - Page 76
é/activé ou suivez les instructions données pour l'élément change sur le réglage [NIGHT]. (Voir "[BRIGHTNESS]"ci-dessous.) [DIMMER TIME]: Réglez l'heure de mise en et hors service du gradateur. 1 Tournez le bouton de volume pour régler l'heure de mise en service . [FORMAT]*3 KD-X360BTS: Les - JVC KD-X260BT | Instruction Manual America - Page 77
[NIGHT COLOR] ou [DAY COLOR] est changé quand vous jvc.net/cs/car/>. Fichiers pouvant être lus • Fichier audio compatible pour les périphérique USB à mémoire de grande capacité: KD-X360BTS: MP3 (.mp3), WMA (.wma), AAC (.aac), AAC (.m4a), WAV (.wav), FLAC (.flac) KD-X260BT/KD support ou périphériques - JVC KD-X260BT | Instruction Manual America - Page 78
cet appareil peut être différent de celui de iPod/iPhone. • Il n'est pas possible d'utiliser un iPod lorsque"JVC"ou" "est affiché sur l'iPod. • En fonction de veuillez contacter Pandora à . À propos de iHeartRadio • iHeartRadio® est un service tiers, et par conséquent - JVC KD-X260BT | Instruction Manual America - Page 79
n'est enregistrée, "NO TEXT", "NO NAME", ou une autre information (par ex. le nom de la station) apparaît ou l'affichage est vide. KD-X360BTS: Affichage principal Affichage supplémentaire*1 Affichage de l'horloge ou Indicateur de niveau *1 La date sera remplacée par la batterie et la puissance - JVC KD-X260BT | Instruction Manual America - Page 80
musicale, la couleur de l'éclairage ou le niveau de luminosité des touches change et est synchronisé avec le niveau de la musique (en fonction du réglage de la couleur réalisé pour [PRESET] à la page 31). KD-X260BT/KD-SX25BT: Affichage principal Indicateur de niveau Nom de la source FM ou AM - JVC KD-X260BT | Instruction Manual America - Page 81
WIRING THEN PWR ON" apparaît. Mettez l'appareil hors tension, puis assurez-vous que les prises des câbles d'enceinte sont correctement isolées. Mettez de nouveau l'appareil sous tension. "PROTECTING SEND SERVICE (USB/iPod/iPhone). Symptôme IS NOT SUPPORTED" Cet appareil source ne change pas sur - JVC KD-X260BT | Instruction Manual America - Page 82
GUIDE DE DÉPANNAGE Symptôme Remède • Aucun son ne peut être • Reconnectez le périph de nouveau après avoir supprimer des stations inutiles de votre appareil. "UPGRADE APP" Assurez-vous que vous avez bien installé la dernière version de l'application Pandora sur votre appareil. "CONNECT ERR - JVC KD-X260BT | Instruction Manual America - Page 83
GUIDE extérieure du véhicule. Radio SiriusXM® "SUBSCRIPTION UPDATED - PRESS ENTER TO CONTINUE." Votre abonnement a été Remote Control Profile). (Référez-vous aux instructions de votre lecteur audio.) • Déconnectez de nouveau le périphérique. "NOT SUPPORT" Le téléphone connecté ne prend pas en - JVC KD-X260BT | Instruction Manual America - Page 84
GUIDE DE DÉPANNAGE 2 Réinitialisez l'appareil (page 3) 3 Contactez (USA uniquement) Appelez: 1-800-252-5722 ( ou ) consultez: - JVC KD-X260BT | Instruction Manual America - Page 85
Tordez les languettes appropriées pour maintenir le manchon en place. Installation de l'appareil (sans le manchon de montage) 1 Retirez le manchon appareil. 2 Alignez les entailles de l'appareil (des deux côtés) avec le support de montage du véhicule et fixez l'appareil avec les vis (en vente - JVC KD-X260BT | Instruction Manual America - Page 86
/RACCORDEMENT Connexions IMPORTANTES Nous recommandons d'installer l'appareil en utilisant un harnais de câblage en vente dans le commerce recommandé spécifiquement pour votre voiture et, pour votre sécurité, de laisser ce - JVC KD-X260BT | Instruction Manual America - Page 87
INSTALLATION/RACCORDEMENT Connexion d'appareils extérieurs KD-X360BTS: MIC (prise d'entrée microphone) (page 15) KD-X360BTS: Port d'extension (12 V 500 mA): Au tuner SiriusXM Vehicle optionnel (en vente dans le commerce) (page 12) KD-X260BT/KD de l'enceinte des graves JVC Amplificateur*2 Fil de - JVC KD-X260BT | Instruction Manual America - Page 88
avec le format MPEG-1/2 Audio Layer-3 Compatible Windows Media Audio Fichiers AAC-LC ".aac", ".m4a" (pour KD-X360BTS) PCM linéaire Fichier FLAC jusqu'à 24 × 1 (Caisson de grave = 4 Ω) 22 W × 4 4 Ω - 8 Ω KD-X360BTS: 4 000 mV/10 kΩ en charge KD-X260BT/KD-SX25BT: USB: 2 500 mV/10 kΩ en charge ≤ 600 Ω - JVC KD-X260BT | Instruction Manual America - Page 89
de fonctionnement Dimensions d'installation (L × H × P) Poids net (y compris la plaque d'assemblage et le manchon de montage) Batterie de voiture 12 V CC 182 mm × 53 mm × 100 mm (7-3/16 pouces × 2-1/8 pouces × 3-15/16 pouces) KD-X360BTS: 0,7 kg (1,5 livres) KD-X260BT/KD-SX25BT: 0,6 kg (1,3 livres - JVC KD-X260BT | Instruction Manual America - Page 90
no debe exponerse a una fuente de calor excesiva, como luz solar, fuego o similar. Cómo leer este manual • Las operaciones se explican utilizando principalmente los botones de la placa frontal del KD-X360BTS. • Se utilizan indicaciones en inglés para las explicaciones. Puede seleccionar el idioma de - JVC KD-X260BT | Instruction Manual America - Page 91
PUNTOS BÁSICOS Placa frontal Rueda de volumen Ventanilla de visualización KD-X260BT/ KD-SX25BT Mando a distancia (RM-RK52) (excepto para KD-SX25BT) Esta unidad puede controlarse a distancia mediante un mando a distancia adquirido a opción. Sensor remoto (DO lo exponga a la luz solar brillante.) - JVC KD-X260BT | Instruction Manual America - Page 92
PROCEDIMIENTOS INICIALES Para volver al elemento de ajuste anterior, pulse . 1 Cancele la demostración Cuando enciende la unidad por primera vez (o [FACTORY RESET] está ajustado a [YES], consulte la página 5), en la pantalla se muestra: "CANCEL DEMO" "PRESS" "VOLUME KNOB" 1 Pulse la rueda de - JVC KD-X260BT | Instruction Manual America - Page 93
UPDATE] [UPDATE SYSTEM] [F/W UP xxxx] [YES]: Se empieza a actualizar el firmware. ; [NO]: Se cancela (la actualización no se activa). Para obtener información sobre cómo actualizar el firmware, visite - JVC KD-X260BT | Instruction Manual America - Page 94
hay una emisora que esta difundiendo un programa que tenga el mismo código PTY que el seleccionado por usted, se sintonizará esa emisora. *1 KD-X360BTS: Solo es posible seleccionarlo si el sintonizador para vehículos SiriusXM está conectado. (Página 12) *2 Puede seleccionarse solo si se selecciona - JVC KD-X260BT | Instruction Manual America - Page 95
de entrada USB USB Cable USB 2.0*1 (disponible en el mercado) iPod/iPhone Accesorio del iPod/iPhone*1 ANDROID*2 Cable USB*1 (disponible en el mercado) Fuente seleccionable: • KD-X360BTS: USB/iPod USB/ANDROID • KD-X260BT/KD-SX25BT: USB/ANDROID Para En la placa frontal En el mando a distancia - JVC KD-X260BT | Instruction Manual America - Page 96
automóvil JVC desde los siguientes dispositivos. KD-X360BTS: iPhone/iPod (a través de Bluetooth o a través del terminal de entrada USB) o smartphone Android (a través de Bluetooth) KD-X260BT/KD-SX25BT: Smartphone Android (a través de Bluetooth) Preparativos: • Antes de la conexión, instale la - JVC KD-X260BT | Instruction Manual America - Page 97
del terminal de entrada USB) o smartphone Android (a través de Bluetooth) KD-X260BT/KD-SX25BT: Smartphone Android (a través de Bluetooth) Preparativos: Instale la última versión de la aplicación Pandora en su dispositivo (iPhone/iPod touch) y, a continuación, cree una cuenta e inicie sesión en - JVC KD-X260BT | Instruction Manual America - Page 98
terminal de entrada USB) o smartphone Android (a través de Bluetooth) KD-X260BT/KD-SX25BT: Smartphone Android (a través de Bluetooth) Preparativos: Instale la última versión de la aplicación iHeartAuto en su dispositivo (iPhone/iPod touch) y, a continuación, cree una cuenta e inicie sesión en - JVC KD-X260BT | Instruction Manual America - Page 99
del terminal de entrada USB) o smartphone Android (a través de Bluetooth) KD-X260BT/KD-SX25BT: Smartphone Android (a través de Bluetooth) Preparativos: Instale la última versión de la aplicación Spotify en su dispositivo (iPhone/iPod touch) y, a continuación, cree una cuenta e inicie sesión en - JVC KD-X260BT | Instruction Manual America - Page 100
Radio SiriusXM® (para KD-X360BTS) Solo SiriusXM® ofrece todo lo que quiere escuchar, en un para seleccionar un canal y, a continuación, pulse la rueda. (o) Pulse S / T para la búsqueda manual de un canal. • Para cambiar rápidamente de canal mantenga pulsado S / T. La pantalla de entrada del - JVC KD-X260BT | Instruction Manual America - Page 101
Radio SiriusXM® (para KD-X360BTS) SiriusXM Replay™ Mientras escucha un canal... 1 Pulse la rueda de volumen. " " se ilumina y la unidad memoriza la posición en pausa. 2 Pulse la rueda de - JVC KD-X260BT | Instruction Manual America - Page 102
Radio SiriusXM® (para KD-X360BTS) TuneScan™ Puede obtener una pequeña vista previa de las canciones que se perdió en cada uno de los canales de música SmartFavorites o el canal - JVC KD-X260BT | Instruction Manual America - Page 103
con esta unidad, dependiendo del sistema operativo y de la versión de firmware de su teléfono móvil. BLUETOOTH - Conexión Perfiles Bluetooth compatibles la unidad. 2 Busque y seleccione el nombre de su receptor ("KD-X3 BTS"/"KD-X2 BT"/"KD-SX2 BT") en el dispositivo Bluetooth. "BT PAIRING" parpadea en - JVC KD-X260BT | Instruction Manual America - Page 104
manual de instrucciones del dispositivo Bluetooth. Emparejamiento automático (para KD-X360BTS) La solicitud de emparejamiento (a través de Bluetooth) se activa automáticamente si hay un iPhone KD-X360BTS: Los botones parpadean en el color que ha seleccionado en [RING COLOR]. (Página 18) KD-X260BT/KD- - JVC KD-X260BT | Instruction Manual America - Page 105
BLUETOOTH® Las siguientes operaciones pueden diferir o no estar disponibles dependiendo del teléfono que se haya conectado. Para En la placa frontal Primera llamada entrante... Contestar una llamada Pulse o la rueda de volumen. Rechazar una llamada Mantenga pulsado o la rueda de volumen. - JVC KD-X260BT | Instruction Manual America - Page 106
COLOR] KD-X360BTS: [COLOR 01] a [COLOR 49] ([COLOR 08]): Selecciona el color de iluminación de los botones como notificación cuando se recibe una llamada entrante y durante la llamada. ; [OFF]: Se cancela. [RING ILLUMI] KD-X260BT/1/KD el manual de instrucciones del teléfono conectado. 18 ESPAÑOL - JVC KD-X260BT | Instruction Manual America - Page 107
La unidad se empareja automáticamente con el dispositivo Bluetooth compatible (iPhone/iPod touch) cuando se conecta a través del terminal de entrada [INFORMATION] [MY BT NAME]: Muestra el nombre de su receptor ("KD-X3 BTS"/ "KD-X2 BT"/"KD-SX2 BT"). ; [MY ADDRESS]: Muestra la dirección de la unidad - JVC KD-X260BT | Instruction Manual America - Page 108
"CHECK MODE". "SEARCH NOW USING PHONE" "PIN IS 0000" se desplazan en la pantalla. 2 Busque y seleccione el nombre de su receptor ("KD-X3 BTS"/ "KD-X2 BT"/"KD-SX2 BT") en el dispositivo Bluetooth en el lapso de 3 minutos. 3 Realice (A), (B) o (C) dependiendo de los datos mostrados en la pantalla - JVC KD-X260BT | Instruction Manual America - Page 109
BLUETOOTH® BLUETOOTH - Audio Mientras está activada la fuente BT AUDIO, es posible conectar a cinco dispositivos de audio Bluetooth y cambiar entre los cinco dispositivos. Reproductor de audio a través de Bluetooth 1 Pulse B SRC repetidamente para seleccionar BT AUDIO (o pulse SOURCE en el mando a - JVC KD-X260BT | Instruction Manual America - Page 110
automóvil JVC desde los siguientes dispositivos. KD-X360BTS: iPhone/iPod (a través de Bluetooth o a través del terminal de entrada USB) o smartphone Android (a través de Bluetooth) KD-X260BT/KD-SX25BT: Smartphone Android (a través de Bluetooth) Preparativos: • Antes de la conexión, instale la - JVC KD-X260BT | Instruction Manual America - Page 111
esta unidad. • Asegúrese de que el terminal de entrada USB no esté conectado a ningún dispositivo. KD-X360BTS: Dispositivo iPhone/iPod touch/Android KD-X260BT/KD-SX25BT: Dispositivo Android Escuchar Pandora Preparativos: Seleccione [ON] para [PANDORA SRC] en [SOURCE SELECT]. (Página 4) 1 Inicie - JVC KD-X260BT | Instruction Manual America - Page 112
AUX Preparativos: La música de un reproductor de audio portátil se puede escuchar a través de una toma de entrada auxiliar. • Seleccione [ON] para [BUILT-IN AUX] en [SOURCE SELECT]. (Página 4) AJUSTES DE AUDIO Comience a escuchar 1 Conecte un reproductor de audio portátil (disponible en el mercado - JVC KD-X260BT | Instruction Manual America - Page 113
27.) Por defecto, se ha seleccionado el tipo crossover de 2 vías. [DTA SETTINGS] Para los ajustes, consulte"Ajustes de la alineación del tiempo digital"en la [CAR SETTINGS] página 29. [X ' OVER TYPE] Precaución: Ajusta el volumen antes de cambiar [X ' OVER TYPE], para evitar un repentino aumento - JVC KD-X260BT | Instruction Manual America - Page 114
No disponible ) ( No disponible ) Salida de los altavoces L (izquierdo): Salida del delanteros subwoofer R (derecho): (Silencio) Salida del subwoofer 26 ESPAÑOL KD-X260BT/KD-SX25BT: Configuración de [SPK/PRE OUT] Señal de audio a través de la terminal de salida de línea REAR/SW [REAR/REAR - JVC KD-X260BT | Instruction Manual America - Page 115
AJUSTES DE AUDIO Ajustes de crossover A continuación se describen los elementos de ajuste disponibles para crossover de 2 vías y crossover de 3 vías. Precaución Seleccione el tipo de crossover de acuerdo con la conexión de los altavoces. (Página 40, 41) Si selecciona un tipo incorrecto: • Se podrán - JVC KD-X260BT | Instruction Manual America - Page 116
180°)/[NORMAL] (0°) [GAIN] [-08DB] a [00DB] *1 Se visualiza sólo cuando [SPK/PRE OUT] se ajusta a [REAR/REAR] o [REAR/SUB.W]. (Página 26) *2 KD-X260BT/KD-SX25BT: Se visualiza sólo cuando [SPK/PRE OUT] se ajusta a [REAR/SUB.W] o [SUB.W/SUB.W]. (Página 26) *3 Se visualiza sólo cuando [SUBWOOFER SET - JVC KD-X260BT | Instruction Manual America - Page 117
AJUSTES DE AUDIO Ajustes de la alineación del tiempo digital La Alineación de Tiempo Digital ajusta el tiempo de retardo de la salida de los altavoces creando un entorno más adecuado para su vehículo. • Para obtener más información, consulte "Calculando el - JVC KD-X260BT | Instruction Manual America - Page 118
una vez la información en pantalla. ; [SCROLL AUTO]: El desplazamiento se repite a intervalos de 5 segundos. ; [SCROLL OFF]: Se cancela. [FORMAT]*3 KD-X360BTS: La siguiente información se muestra en la pantalla suplementaria cuando se conecta un dispositivo Bluetooth. (Página 33) [BATT/SIGNAL - JVC KD-X260BT | Instruction Manual America - Page 119
ón más reciente Visite . Archivos reproducibles • Archivos de audio que pueden reproducirse para el dispositivo de clase de almacenamiento masivo USB: KD-X360BTS: MP3 (.mp3), WMA (.wma), AAC (.aac), AAC (.m4a), WAV (.wav), FLAC (.flac) KD-X260BT/KD-SX25BT: MP3 (.mp3), WMA - JVC KD-X260BT | Instruction Manual America - Page 120
el iPod/iPhone. • El iPod no se puede utilizar si se visualiza"JVC"o" "en el iPod. • Según la versión del sistema operativo del iPod/iPhone, algunas sobre el uso de esta aplicación, póngase en contacto con . Acerca de iHeartRadio • Debido a que iHeartRadio® es - JVC KD-X260BT | Instruction Manual America - Page 121
o no está registrada, aparecerá "NO TEXT", "NO NAME", u otra información (por ej., nombre de la emisora) o la pantalla quedará en blanco. KD-X360BTS: Nombre de la fuente iPod USB/iPod BT Visualización principal ANDROID Pantalla suplementaria*1 Pantalla del reloj o Medidor de nivel *1 Si - JVC KD-X260BT | Instruction Manual America - Page 122
de brillo de los botones cambia y se sincroniza con el nivel de música (dependiendo del ajuste de color realizado para [PRESET] en la página 31). KD-X260BT/KD-SX25BT: Visualización principal Medidor de nivel Nombre de la fuente FM o AM Información en pantalla: Principal Frecuencia Frecuencia - JVC KD-X260BT | Instruction Manual America - Page 123
las conexiones. Aparece "MISWIRING CHECK WIRING THEN PWR ON". Apague la Aparece "PROTECTING SEND SERVICE". Lleve la unidad al conectar el dispositivo (USB/iPod/iPhone). Síntoma Solución Aparece "UNSUPPORTED conectarlo. Aparece "USB HUB IS NOT SUPPORTED". No es posible conectar un dispositivo - JVC KD-X260BT | Instruction Manual America - Page 124
" Se alcanzó el número límite de emisoras registradas. Vuelva a intentarlo después de eliminar emisoras que no necesite de su dispositivo. "UPGRADE APP" Asegúrese de haber instalado la última versión de la aplicación Pandora en su dispositivo. "CONNECT ERR" La comunicación es inestable. Radio - JVC KD-X260BT | Instruction Manual America - Page 125
Síntoma "CHECK ANTENNA" "CHECK TUNER" "NO SIGNAL" "SUBSCRIPTION UPDATED - PRESS ENTER TO CONTINUE." "CODE ERROR" "NO CONTENT" "SCAN y encienda la unidad; a continuación, vuelva a conectar el dispositivo. "NOT SUPPORT" El teléfono conectado no es compatible con la función de reconocimiento de voz - JVC KD-X260BT | Instruction Manual America - Page 126
UU.) Llame al: 1-800-252-5722 ( o ) visite: Advertencia • La unidad puede utilizarse solamente con una fuente de alimentación de montaje. Consulte con un distribuidor de productos de audio para automóviles. • Instale esta unidad en la consola de su vehículo. No toque las partes - JVC KD-X260BT | Instruction Manual America - Page 127
encendido; después, desconecte el terminal de la batería del automóvil. 2 Conecte los cables correctamente. Consulte "Conexión del cableado" en la página 40 3 Instale la unidad en su automóvil. Consulte "Instalación de la unidad (montaje en el tablero)". 4 Conecte el terminal de la batería del autom - JVC KD-X260BT | Instruction Manual America - Page 128
de 12 V". 40 ESPAÑOL Luz azul/amarilla Al adaptador del mando a distancia del volante de la dirección Junte los cables del mismo color. Azul/blanco: Remoto (12 V 350 mA) Naranja/blanco: Iluminación Amarillo: Batería de 12 V Rojo: Encendido de 12 V Negro: Tierra Gris: Altavoz delantero/Para - JVC KD-X260BT | Instruction Manual America - Page 129
ófono (página 15) Conexión de amplificadores externos a través de los terminales de salida KD-X360BTS KD-X260BT/ KD-SX25BT Terminales de salida Cable de señal (no suministrado) Amplificador de JVC*2 Cable remoto (no suministrado) Al cable remoto (azul/blanco) del mazo de conductores. (Página - JVC KD-X260BT | Instruction Manual America - Page 130
de alimentación Convertidor de filtro digital (D/A) Respuesta de frecuencia (±1 dB Compatible con Windows Media Audio Archivos AAC-LC ".aac", ".m4a" (para KD-X360BTS) PCM lineal Ω Nivel de salida de preamplificador/ carga KD-X360BTS: 4 000 mV/10 kΩ de carga KD-X260BT/KD-SX25BT: USB: 2 500 mV/10 - JVC KD-X260BT | Instruction Manual America - Page 131
(incluyendo placa embellecedora, manguito de montaje) Batería de 12V CC para vehículos 182 mm × 53 mm × 100 mm (7-3/16 pulgada × 2-1/8 pulgada × 3-15/16 pulgada) KD-X360BTS: 0,7 kg (1,5 lbs) KD-X260BT/KD-SX25BT: 0,6 kg (1,3 lbs) Sujeto a cambios sin previo aviso. ESPAÑOL 43 - JVC KD-X260BT | Instruction Manual America - Page 132
, PROCUREMENT OF SUBSTITUTE GOODS OR SERVICES; LOSS OF USE, DATA, OF SUCH DAMAGE. • Microsoft and Windows Media are either registered trademarks or trademarks of Microsoft may affect wireless performance. • Apple, iPhone, iPod, iPod nano, iPod touch, JVC KENWOOD Corporation is under license. Other trademarks and
-
 1
1 -
 2
2 -
 3
3 -
 4
4 -
 5
5 -
 6
6 -
 7
7 -
8
-
9
-
10
-
11
-
12
-
13
-
14
-
15
-
16
-
17
-
18
-
19
-
20
-
21
-
22
-
23
-
24
-
25
-
26
-
27
-
28
-
29
-
30
-
31
-
32
-
33
-
34
-
35
-
36
-
37
-
38
-
39
-
40
-
41
-
42
-
43
-
44
-
45
-
46
-
47
-
48
-
49
-
50
-
51
-
52
-
53
-
54
-
55
-
56
-
57
-
58
-
59
-
60
-
61
-
62
-
63
-
64
-
65
-
66
-
67
-
68
-
69
-
70
-
71
-
72
-
73
-
74
-
75
-
76
-
77
-
78
-
79
-
80
-
81
-
82
-
83
-
84
-
85
-
86
-
87
-
88
-
89
-
90
-
91
-
92
-
93
-
94
-
95
-
96
-
97
-
98
-
99
-
100
-
101
-
102
-
103
-
104
-
105
-
106
-
107
-
108
-
109
-
110
-
111
-
112
-
113
-
114
-
115
-
116
-
117
-
118
-
119
-
120
-
121
-
122
-
123
-
124
-
125
-
126
-
127
-
128
-
129
-
130
-
131
-
132
 |
 |

ENGLISH
FRANÇAIS
ESPAÑOL
B5A-2626-10 [K]
KD-X360BTS / KD-X260BT / KD-SX25BT
DIGITAL MEDIA RECEIVER
INSTRUCTION MANUAL
RÉCEPTEUR MULTIMÉDIA NUMÉRIQUE
MANUEL D’INSTRUCTIONS
RECEPTOR DE MEDIOS DIGITALES
MANUAL DE INSTRUCCIONES
For customer Use:
Enter below the Model No. and Serial No. which are
located on the top or bottom of the cabinet. Retain this
information for future reference.
Model No.
Serial No.