JVC LT-37X688 Instructions
JVC LT-37X688 - 37" LCD TV Manual
 |
UPC - 046838030543
View all JVC LT-37X688 manuals
Add to My Manuals
Save this manual to your list of manuals |
JVC LT-37X688 manual content summary:
- JVC LT-37X688 | Instructions - Page 1
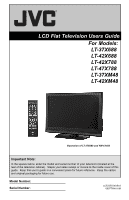
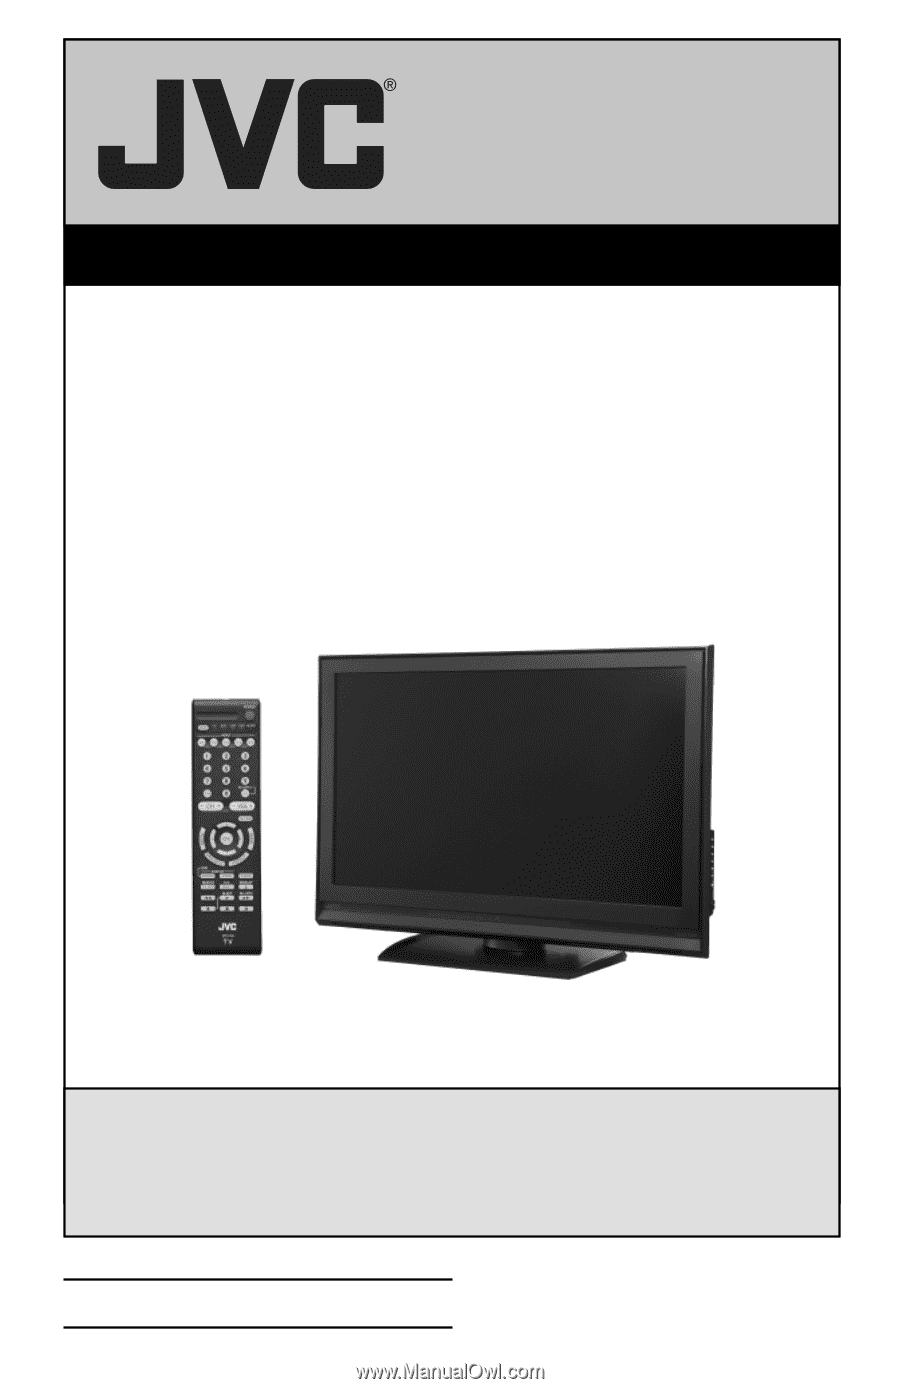
LCD Flat Television Users Guide For Models: LT-37X688 LT-42X688 LT-42X788 LT-47X788 LT-37XM48 LT-42XM48 Illustration of LT-37X688 and RM-C1450 Important Note: In the spaces below, enter the model and serial number of your television (located at the rear of the television cabinet). Staple your - JVC LT-37X688 | Instructions - Page 2
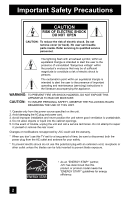
serviceable parts inside. Refer servicing to qualified service personnel maintenance (servicing) instructions in the service technician. Do not attempt to repair it yourself or remove the rear cover. Changes or modifications not approved by JVC could void the warranty. * When you don't use this TV - JVC LT-37X688 | Instructions - Page 3
org IMPORTANT SAFETY INSTRUCTIONS 1) Read these instructions. 2) Keep these instructions. 3) Heed all warnings. 4) Follow all instructions. 5) Do /accessories specified by the manufacturer. 12) Use only with a cart, stand, tripod, bracket, or table specified by the manufacturer, or sold with - JVC LT-37X688 | Instructions - Page 4
when unused for long periods of time. 14) Refer all servicing to qualified service personnel. Servicing is required when the apparatus has been damaged in any way, as sunshine, fire or the like. 20) When this TV is connected to the wall outlet, it is always on standby even when all the LED lamps are - JVC LT-37X688 | Instructions - Page 5
who subscribe to basic cable services (do not have a separate cable box) and plan to use their JVC TV remote control to select channels. Once you run the Auto Tuner Setup (which detects and programs all the channels your TV is receiving through the RF input), every channel number available from - JVC LT-37X688 | Instructions - Page 6
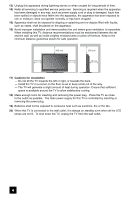
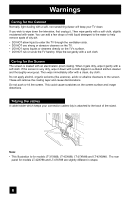
on the screen surface and image distortions. Tidying the cables A cable holder which keeps your connection cables tidy is attached to the back of the stand. Note: • This illustration is for models LT-37X688, LT-42X688, LT-37XM48 and LT-42XM48. The rear panel for models LT-42X788 and LT-47X788 are - JVC LT-37X688 | Instructions - Page 7
is for models LT-37X688, LT-42X688, LT-37XM48 and LT-42XM48. You can disconnect the stand for models LT-42X788 and LT-47X788 using the same method. 1) Place the TV face down on a soft cloth on a table. 2) Remove the four screws from the back of the TV. 3) Pull out the stand from the TV. 4) Cover the - JVC LT-37X688 | Instructions - Page 8
62 Menu 63 OK 63 Back 63 ML/MTS 64 C.C 64 Favorite 65 Guide 65 Mode 66 External device control buttons . . . . . 66 Remote Programming 67 OSD Information 73 Weak Signal 73 Audio/Data Only Channel 73 Troubleshooting 74 Specifications 76 Warranty 78 Authorized Service Center . . . 79 8 - JVC LT-37X688 | Instructions - Page 9
a JVC LCD Flat Television. Before you begin setting up your new television, please check to make sure you have all of the following items. In addition to this guide, your television box should include: Television x 1 POWER + AA Alkaline - + AA Alkaline - BACK F Remote Control x 1 POWER MODE TV - JVC LT-37X688 | Instructions - Page 10
Quick Setup TV Models Before you connect your television to another device, please refer to the proper diagrams for your specific TV and remote. These will help assist you in understanding how to connect your television to another device, as well as use the remote to set up your television. Rear - JVC LT-37X688 | Instructions - Page 11
MODE TV STB VCR DVD AUDIO INPUT V1 V2 V3 V4 V5 1 2 3 4 5 6 7 8 9 RETURN + TUNE 0 TV - CH + - VOL + MUTING BACK F OK AVORITE DVR STATUS SOUND VIDEO ASPECT GUIDE SUB CH TV/VCR C.C. SUB T. DISPLAY SLEEP ML/MTS RM-C1450 TV RM-C1450 Notes: • For information on remote control - JVC LT-37X688 | Instructions - Page 12
this manual. Step 1 - The Remote Control Before you can operate your remote remote. If this is the first time you are turning on the TV, the interactive plug-in menu appears. • At first, to watch your TV, select the TV mode by pressing the MODE button on the remote control before you turn the TV - JVC LT-37X688 | Instructions - Page 13
work properly, contact your local cable operator. • To connect a DVD player, see VCR Connection. • If you have a satellite television system, refer to the satellite TV manual. No VCR Connection Cable or Antenna Output Coaxial Cable TV Rear Panel 75 Ω (VHF/UHF) PHOTO VIEWER INPUT 1 SERVICE - JVC LT-37X688 | Instructions - Page 14
common colors for DVD cables. Some models may vary colors. Please consult the user's manual for your DVD player for more INPUT 1 SERVICE INPUT 2 DIGITAL AUDIO OPTICAL OUT TV Rear Panel Green Blue Red Y PB PR OUT AUDIO OUT R L DVD Player Note: • If this connection setup does not work - JVC LT-37X688 | Instructions - Page 15
AUDIO COMPONENT INPUT 3 S-VIDEO Y VIDEO PB L PR R INPUT 4 INPUT 5 / INPUT 1 AUDIO AUDIO OUT Y VIDEO VIDEO PB L L L PR R R R Green Blue Red Y PB PR OUT AUDIO OUT R L DVD Player 75 Ω (VHF/UHF) PHOTO VIEWER INPUT 1 SERVICE INPUT 2 DIGITAL AUDIO OPTICAL OUT TV Rear Panel - JVC LT-37X688 | Instructions - Page 16
to a Camcorder You can connect a camcorder to your television by using the input jacks located on the back of the TV. TV Rear Panel CAMCORDER INPUT 3 S-VIDEO Y VIDEO PB L PR R INPUT 4 INPUT 5 / INPUT 1 AUDIO AUDIO OUT Y VIDEO VIDEO PB L L L PR R R R AUDIO AUDIO AUDIO COMPONENT - JVC LT-37X688 | Instructions - Page 17
the LEFT AUDIO OUTPUT on the back of the TV to the LEFT AUDIO INPUT on the amplifier. 2) Connect a red cable from the RIGHT AUDIO OUTPUT on the back of the TV to the RIGHT AUDIO INPUT on the amplifier. Notes: • Refer to your amplifier's manual for more information. • You can use AUDIO OUTPUT for - JVC LT-37X688 | Instructions - Page 18
After the connections have been made, tighten the screw to secure the cables. HDMI to DVI Cable LR AUDIO OUT DIGITAL OUT 75 Ω (VHF/UHF) PHOTO VIEWER INPUT 1 SERVICE INPUT 2 DIGITAL AUDIO OPTICAL OUT DTV Decoder TV Rear Panel 1) Connect the HDMI to DVI Cable from the DIGITAL OUT on the - JVC LT-37X688 | Instructions - Page 19
LR AUDIO OUT DIGITAL OUT 75 Ω (VHF/UHF) PHOTO VIEWER INPUT 1 SERVICE INPUT 2 DIGITAL AUDIO OPTICAL OUT TV Rear Panel 1) Connect the HDMI Cable from the DIGITAL OUT on the back of your DTV or HDMI device to the HDMI INPUT-1 on the back of the TV. Notes: • When you do the above connection, set - JVC LT-37X688 | Instructions - Page 20
DOLBY DIGITAL. 75 Ω (VHF/UHF) PHOTO VIEWER INPUT 1 SERVICE INPUT 2 DIGITAL AUDIO OPTICAL OUT Amplifier TV Rear Panel 1) Connect the optical cable from underneath Menu. See page 40. • Refer to your owners manual on using your amplifier. • You cannot output sound from your Optical Output connection - JVC LT-37X688 | Instructions - Page 21
Receiver's PR MONITOR OUT, into the PR VIDEO INPUT-3 on the back of the TV. Notes: • Please refer to your AV Receiver instruction manual for more information on connecting your speakers and other devices like a DVD player. • Use your AV Receiver's remote to switch to the different devices you have - JVC LT-37X688 | Instructions - Page 22
timer functions will work properly. You can choose "Auto" or "Manual" for setting the clock. • The auto tuner setup of which channels you wish to receive. We recommend you complete the interactive plug-in items before you start using your television. After the first time you turn on your TV, you can - JVC LT-37X688 | Instructions - Page 23
Time feature automatically adjusts your TV's clock for Daylight Saving Manual" To "Time" To set the hour To minute To set the minute To "Time Zone" To select your time zone: (Atlantic, Eastern, Central, Mountain, Pacific, Alaska or Hawaii) † √® † To move to "D.S.T." (Daylight Savings Time) To turn - JVC LT-37X688 | Instructions - Page 24
Tuner Setup In auto tuner setup, the TV automatically scans through all available channels, memorizing television, or you can continue on in this guide for more information on programming your remote control, or using the JVC onscreen menu system to customize your television viewing experience - JVC LT-37X688 | Instructions - Page 25
you use the MENU button on the TV's side panel instead of the remote, Front Menu screen showing "Video Status", "Aspect", "Auto Tuner Setup" and "Menu" will appear (following right screen). Menu Initial Setup - + Tuner Setup External Input Picture Adjust Sound Adjust Clock/Timers Interactive Plug - JVC LT-37X688 | Instructions - Page 26
menu follow later in this guide. For information about the Interactive Plug-in Menu, see pages 22 - 24. 1. To open the onscreen menu system, press the MENU button on the remote control. The main menu will appear. Menu Initial Setup - + Tuner Setup External Input Picture Adjust Sound Adjust Clock - JVC LT-37X688 | Instructions - Page 27
Exit Picture Adjust 1/3 Select Operate Back Back Menu Exit Picture Adjust 2/3 Select Operate Back Back Menu Exit Picture Adjust 3/3 Note: • The HDMI Size menu can only be displayed when a 480p picture signal is input to the HDMI terminal and the picture is being displayed on the screen - JVC LT-37X688 | Instructions - Page 28
Menus Menu Initial Setup - + Tuner Setup External Input Picture Adjust Sound Adjust Clock/Timers Interactive Plug-in Photo to return to the previous menu screen Note: • For Auto Demo, see page 57. 28 Sound Adjust Bass [ 00 ] Treble [ 00 ] Balance[ 00 ] Turn On Volume Volume Limit Reset - JVC LT-37X688 | Instructions - Page 29
. - Use the remote control. - Press the MENU button on the side of the TV for more than 3 seconds. In this case, the OSD for "Front Panel Lock" will appear. Note: • To turn On/Off the TV, press the POWER button on the side of the TV for more than 3 seconds. This feature will remain On - JVC LT-37X688 | Instructions - Page 30
" To operate (Password input screen will appear) Enter the password by using the 10 keypad Initial Setup > V-Chip V-Chip On Set US TV Ratings Set Movie Ratings Set Canadian Ratings English Set Canadian Ratings French Advanced V-Chip Rating Advanced Canadian Rating Unrated Select Operate - JVC LT-37X688 | Instructions - Page 31
mild fantasy violence or comedic violence, which children should be able to discern from reality. Programs with the following ratings are designed for the entire audience. ❒ TV G stands for General Audience Most parents would find these programs suitable for all age groups. They contain little or no - JVC LT-37X688 | Instructions - Page 32
input screen will appear) Enter the password by using the 10 keypad The V-Chip main screen will appear To turn V-Chip "On" or "Off" To move to "Set US TV Ratings" To enter Initial Setup > V-Chip V-Chip Set US TV Ratings Set Movie Ratings Set Canadian Ratings English Set Canadian Ratings - JVC LT-37X688 | Instructions - Page 33
π† √® To "Initial Setup" To enter To "V-Chip" To operate (Password input screen will appear) Enter the password by using the 10 keypad √® π† √® The V-Chip main screen will appear To turn V-Chip "On" or "Off" To "Set Movie Ratings" To enter movies menu For example: To block viewing of X and NC - JVC LT-37X688 | Instructions - Page 34
Setup" To enter To "V-Chip" To operate (Password input screen will appear) Enter the password by using the 10 keypad The V-Chip main screen will appear √® π† √® To turn V-Chip "On" or "Off" To "Set Canadian Ratings English" To enter ratings menu For example: To block viewing of programming - JVC LT-37X688 | Instructions - Page 35
(Password input screen will appear) Enter the password by using the 10 keypad √® π† √® The V-Chip main screen will appear To turn V-Chip "On" or "Off" To "Unrated" To select "View" or "Block" Press MENU when done Initial Setup > V-Chip V-Chip On Set US TV Ratings Set Movie Ratings Set - JVC LT-37X688 | Instructions - Page 36
TV comes preset with a lock code of "0000". You may change the code to any four-digit number you wish. To change the lock code, follow the steps below. π† √® π† √® Press the MENU button To "Initial Setup" To enter To "Set Lock Code" To operate (Password input screen exceeds your rating limits. - JVC LT-37X688 | Instructions - Page 37
" To select a caption (CC1 to CC4) or text channel (Text1 to Text4) To "Digital Service" To select 1, 2, 3, 4, 5 or 6 To "Appearance" To enter To select "Auto" ("Manual", see page 38) Press the MENU button when finished Notes: • If you want to reset your settings to the default settings, select - JVC LT-37X688 | Instructions - Page 38
Font Style Text / Edge Opacity Background Opacity Select Operate Manual Standard Auto Solid Solid BACK Back MENU Exit Closed Caption The other channels are available for future use. • Closed captioning may not work correctly if the signal being received is weak or if you are playing a - JVC LT-37X688 | Instructions - Page 39
is lit as "Low" when there is no TV signal. Select OK BACK MENU Operate Back Exit • When the On Timer turns On, the LED is lit as "Low" when you turn the power off. • If you set a timer on the TV, the power indicator will light even if the TV is on stand by. 39 - JVC LT-37X688 | Instructions - Page 40
from your Optical Output connection if the audio source is from your HDMI device. Manufactured under license from Dolby Laboratories. "Dolby", and the double Start-up Quick Start-up allows you to lessen the time for the TV to turn on and ready for viewing. π† √® π† √® Press the MENU button To " - JVC LT-37X688 | Instructions - Page 41
your antenna cable and the settings for Tuner Mode/Scan Mode. • You can also access the "Front Menu" screen by using the MENU button on the side of the TV instead of the remote control. Choose "Auto Tuner Setup" by pressing MENU† on the side panel and enter by using the CHANNEL buttons - JVC LT-37X688 | Instructions - Page 42
Setup Channel Summary Channel summary allows you to customize the line-up of channels received by your TV. You can add or delete channels from the line-up or prevent any unauthorized viewers from watching " Press the OK button Your characters are now set Press the MENU button when finished 42 - JVC LT-37X688 | Instructions - Page 43
. Press the MENU button π† √® To "Tuner Setup" To enter π† To "Channel Summary" √® To enter π†√® To the Lock Column ( ) Press the OK button (Password input screen will appear) Enter the password by using the 10 keypad Press the OK button to lock or unlock that channel Press the MENU button - JVC LT-37X688 | Instructions - Page 44
Note: • If you are watching an analog channel, antenna level will not appear. Tuner Diagnostic (Service Use Only) Tuner Diagnostic menu is for service use only. It is used to diagnose your TV if there is a problem. π† √® π† √® Press the MENU button To "Tuner Setup" To enter To "Tuner Diagnostic - JVC LT-37X688 | Instructions - Page 45
only be selected in the External Input menu when an HDMI 480p picture signal is being input to the HDMI terminal. This option adjusts the position when an HDMI or DVI 480p picture signal is being displayed on the screen. There are two types of HDMI 480p picture signals: 640x480 and 720x480. If the - JVC LT-37X688 | Instructions - Page 46
the MENU button To "External Input" To enter To "Video Input Label" To enter To select the desired video input To select the desired preset input label (see chart below) Press the MENU button when finished External Input HDMI Size Video-1 Audio Video Input Label Select Operate Back Back Video - JVC LT-37X688 | Instructions - Page 47
setting Press the MENU button when finished Color Temperature You can decide how strong or dull the colors appear on the TV screen. π† √® π† √® π† Press the MENU button To "Picture Adjust" To enter To "Color Temperature" To enter To set "Low" or "High" Color Temperature Low High Press the MENU - JVC LT-37X688 | Instructions - Page 48
Press the MENU button when finished Dynamic Gamma JVC's Dynamic Gamma Circuitry (DGC) makes it easier to see dark areas when a picture has many dark areas, and makes it easier to see the bright areas when a picture has many bright areas. DGC is turned on, DGC analyzes and adjusts the total level - JVC LT-37X688 | Instructions - Page 49
the effect of VNR to maximum. Off: turns the effect of VNR off. Press the MENU problem of blurred edges which may occur when viewing a program originally shot on film (such as motion pictures the television rate of 30 frames-per-second. π† √® π† √® π† Press the MENU button To "Picture Adjust" To - JVC LT-37X688 | Instructions - Page 50
adjustment allows you to adjust the screen position horizontally when the aspect is set Panorama Zoom or Cinema Zoom for 1080i and 720p signals. • When you are receiving a 1080p signal, Position Adjustment can not be selected. Reset Reset resets all picture adjustments at once to the default - JVC LT-37X688 | Instructions - Page 51
once as the default setting when you select reset. See page 52. Turn On Volume Turn On Volume allows you to set the volume level when you turn the TV on. π† √® π† √® Press the MENU button To "Sound Adjust" To enter To "Turn On Volume" To set the volume level Current 00 01 02 03 50 - JVC LT-37X688 | Instructions - Page 52
maximum volume level Bass [ 00 ] Treble [ 00 ] Balance[ 00 ] Turn On Volume Volume Limit 00 01 02 Reset 48 49 50 Press the MENU button Bass [ 00 ] Treble [ 00 ] B a l a n c e[ 0 0 ] Turn On Volume Volume Limit The onscreen menu disappears for a moment, and then the settings are reset - JVC LT-37X688 | Instructions - Page 53
Menu. You can choose to set the clock automatically, or manually. If you need to set the clock again, follow the To "D.S.T." (daylight savings time) To turn D.S.T. "On" or "Off" To Auto, the Daylight Saving Time feature automatically adjusts your TV's clock for Daylight Saving. • The real time and - JVC LT-37X688 | Instructions - Page 54
To set the hour (AM/PM) you want the TV to turn on To move to minutes To set the minutes To accept "On Time" work, the clock must be set. • After a power interruption, the timer settings must be reset. • If your clock is not set, "Please set clock first !" will appear on the screen. Please see Manual - JVC LT-37X688 | Instructions - Page 55
. 4) Connect your device to the Photo Viewer Terminal on this TV by using a USB cable. JVC Everio Camera (Example) TV Rear Panel 75 Ω (VHF/UHF) PHOTO VIEWER INPUT 1 SERVICE INPUT 2 DIGITAL AUDIO OPTICAL OUT USB Cable 5) The TV screen will display a "hourglass" icon and then display the Photo - JVC LT-37X688 | Instructions - Page 56
each press of the DISPLAY button, you can display the picture's information. BACK: Returns to the thumbnail screen MENU: Exit Notes: • When Multi Screen has more than one screen, if you press the page number using the 10- key pad on your remote, you will skip to that specific page. • Although the - JVC LT-37X688 | Instructions - Page 57
file size. • If the USB cable is disconnected or your USB device is turned off while the Photo Viewer is working, your device may not be recognized. In this case, turn Quick Start-up Off, turn the TV off and turn the TV back on. Interval Time You can set the time to change to the next - JVC LT-37X688 | Instructions - Page 58
Button Functions Power Turns the TV on or off. Press the POWER button Number Buttons - 10Key Pad Use the number buttons on the remote control to move directly to a specific channel. For example, to move to channel 12: 1 (ONE) 2 (TWO) Tune Lets you decide the input channel and select it. After you - JVC LT-37X688 | Instructions - Page 59
button. • You can also access by pressing the INPUT button on the side of the TV instead of the remote. Channel +/- Use these buttons to move up or down all the available channels your TV is able to receive. To move rapidly through the channels using JVC's Hyperscan feature, press and hold CH+ or CH - JVC LT-37X688 | Instructions - Page 60
effect, depending on the signal source. Muting The MUTING button instantly turns the volume down completely when you press it. Press MUTING and each input connected to the TV. • You can also access the "Front Menu" screen by using the MENU button on the side of the TV instead of the remote control. - JVC LT-37X688 | Instructions - Page 61
11:00PM - 11:30PM Football fun meeting TV PG D L S V NR 108-1 WEWEWEW • Clock Mode - Shows the current time. 10:15PM • Simple Mode - Shows the current channel and channel name or AV input. • Off - Turns the display off. 108-1 WEWEWEW Notes: • You may also turn off the display at any step by - JVC LT-37X688 | Instructions - Page 62
. Aspect Ratios Panorama - With this ratio a normal 4:3 aspect picture is stretched to fit the dimensions of the 16:9 aspect screen. Cinema - This ratio "zooms in" on the center part of a 4:3 aspect picture, blowing it up to fill the 16:9 screen. Regular - The regular ratio is used when you want - JVC LT-37X688 | Instructions - Page 63
picture position to center. • You can also access the "Front Menu" screen by using the MENU button on the side of the TV instead of the remote signal from your HDMI device, the aspect mode will turn to "Full" automatically. If the television receives a 4:3 signal from your HDMI device when you - JVC LT-37X688 | Instructions - Page 64
buttons. When receiving digital broadcast Press the MODE button to select TV Press the ML/MTS button By every press of the ML/MTS button, you change the language • ML/MTS will not work when you are using the HDMI. Multi Language English Spanish C.C. (Closed Caption) Use the C.C. (Closed Caption - JVC LT-37X688 | Instructions - Page 65
π† √® √® To select the channel you want to delete To enter The screen to the right will appear. To "Yes" Press the OK button The Remove Guide You can view the program information from the GUIDE. Notes: • The GUIDE function will work when you are receiving digital program only. • The GUIDE will - JVC LT-37X688 | Instructions - Page 66
of the Mode button, you can select the mode. TV STB VCR DVD AUDIO • The mode LED indicator on the remote control lights for 3 seconds each time the remote control is operated. External device control buttons You can use this remote control to operate the basic functions of your external devices - JVC LT-37X688 | Instructions - Page 67
on page 67. If your remote does not work after using the "Search Code Function", use the remote that came with your device. Your TV remote can not be guaranteed to work with all models, brands or operations. • When the television remote control does not operate, for a model that allows you to switch - JVC LT-37X688 | Instructions - Page 68
Remote Programming Programming Codes STB mode Cable Set Top Box 1535 1535 0869 0856, 1856 DBS/PVR Combination DirecTV Dish Network System Dishpro Echostar Expressvu Hughes Network Systems JVC Motorola Philips Proscan RCA Samsung Sony Star Choice 1377, 0392, 0639, 1142, 1076, 0099, 1392, - JVC LT-37X688 | Instructions - Page 69
Remote Programming VCR mode ABS Admiral Adventura Aiko Aiwa VCR Akai Alienware Headquarter Hewlett Packard HI-Q Hitachi Howard Computers HP Hughes Network Systems Humax Hush iBUYPOWER Jensen JVC KEC Kenwood KLH Kodak LG Linksys Lloyd's Logik LXI Magnasonic Magnavox Magnin Marantz 0047, 0104 - JVC LT-37X688 | Instructions - Page 70
Remote Programming VCR mode VCR Philips Pilot Pioneer Polk Audio Portland 0033, 0000, 0209, 0034, 0479, 1139, 1479 1972 DBS/PVR Combination Echostar Hughes Network Systems JVC Philips Samsung 1945 0739 1945 0739 0739 PVR ABS Alienware CyberPower Dell DirecTV Dish Network System Echostar Gateway - JVC LT-37X688 | Instructions - Page 71
Remote Programming DVD mode Accurian Advent Aiwa Akai Alco Allegro Apex Digital DVD 0646, 1158 0631 0522 0490, 1470 1158 0630, 0675 1033, 1431 0675 0741 Home Theater in Box Aiwa Audiovox JVC KLH Koss Oritron Polk Audio RCA Rio Sonic Blue Teac Venturer 0641 0790 1770, 1771, 1772, 1773 0790 0651 - JVC LT-37X688 | Instructions - Page 72
Remote Programming Audio mode Amplifier Amstrad Bose Curtis Mathes Durabrand GE Harman/Kardon JVC Left Coast Lenoxx 0331 0078, 0013 0354, 0133 Receiver ADC Aiwa Akai Alco Amphion Media Works AMW Anam Apex Digital Audiotronic Audiovox Bose Brix Cambridge Soundworks Capetronic Carver Classic - JVC LT-37X688 | Instructions - Page 73
received from an external source. No Program or Weak Signal Audio / Data Only Channel This OSD appears when the selected channel is not broadcasting any picture or sound, or is only broadcasting data information. Audio / Data Only Channel 73 - JVC LT-37X688 | Instructions - Page 74
, contact the JVC Service Center where you purchased the television. PROBLEMS There is no power CHECK • See if the power cord became unplugged. • Check for a blown fuse or circuit breaker or a power outage. There is no picture or sound • The antenna could be disconnected. • The input mode could - JVC LT-37X688 | Instructions - Page 75
Troubleshooting PROBLEMS CHECK Static electricity • It is normal to feel static electricity if you brush or touch the screen. You hear occasional • It is normal for the TV to make crackling sounds when first turned on or off. Unless crackling sounds the sound or picture become abnormal, this - JVC LT-37X688 | Instructions - Page 76
CABLE IN) Input 3, 4, 5 Terminal Input 3, 4 Terminal (Component Terminal) Input 1, 2 Terminal (HDMI Input Terminal) Audio Output Jacks (FIX) Optical Output Digital Audio Dimensions (inch/cm) W X H X D Weight (lbs / kg) Accessories LT-37X688 LT-37XM48 LT-42X688 LT-42XM48 LCD Flat Television NTSC - JVC LT-37X688 | Instructions - Page 77
(VHF/UHF, ATSC/DIGITAL CABLE IN) Input 3, 4, 5 Terminal Input 3, 4 Terminal (Component Terminal) Input 1, 2 Terminal (HDMI Input Terminal) Audio Output Jacks (FIX) Optical Output Digital Audio Dimensions (inch/cm) W X H X D Weight (lbs / kg) Accessories LCD Flat Television NTSC, BTSC System (Multi - JVC LT-37X688 | Instructions - Page 78
78 - JVC LT-37X688 | Instructions - Page 79
79 - JVC LT-37X688 | Instructions - Page 80
JVC COMPANY OF AMERICA Division of JVC Americas Corp. 1700 Valley Road Wayne, New Jersey, 07470 JVC CANADA, INC. 21 Finchdene Square Scarborough, Ontario Canada, M1X 1A7 - JVC LT-37X688 | Instructions - Page 81
Thank you very much for purchasing our television, model LT-47XC58. Note: While the TV model you purchased, LT-47XC58 does not appear in the instruction book, the instructions for this model are exactly the same as model LT-47X788. LCT2376-001A-A 0807ESI-II-IM
-
 1
1 -
 2
2 -
 3
3 -
 4
4 -
 5
5 -
 6
6 -
 7
7 -
8
-
9
-
10
-
11
-
12
-
13
-
14
-
15
-
16
-
17
-
18
-
19
-
20
-
21
-
22
-
23
-
24
-
25
-
26
-
27
-
28
-
29
-
30
-
31
-
32
-
33
-
34
-
35
-
36
-
37
-
38
-
39
-
40
-
41
-
42
-
43
-
44
-
45
-
46
-
47
-
48
-
49
-
50
-
51
-
52
-
53
-
54
-
55
-
56
-
57
-
58
-
59
-
60
-
61
-
62
-
63
-
64
-
65
-
66
-
67
-
68
-
69
-
70
-
71
-
72
-
73
-
74
-
75
-
76
-
77
-
78
-
79
-
80
-
81
 |
 |
Important Note:
In the spaces below, enter the model and serial number of your television (located at the
rear of the television cabinet).
Staple your sales receipt or invoice to the inside cover of this
guide.
Keep this user’s guide in a convenient place for future reference.
Keep the carton
and original packaging for future use.
LCT2275-001B-A
0607TNH-II-IM
Model Number:
Serial Number:
Illustration of LT-37X688 and RM-C1450
For Models:
LT-37X688
LT-42X688
LT-42X788
LT-47X788
LT-37XM48
LT-42XM48
LCD Flat Television Users Guide