JVC LT-37X688 Instructions - Page 27
Initial Setup 2/2, Tuner Setup, External Input, Picture Adjust 2/3, Press the M - powers on but then no picture
 |
UPC - 046838030543
View all JVC LT-37X688 manuals
Add to My Manuals
Save this manual to your list of manuals |
Page 27 highlights
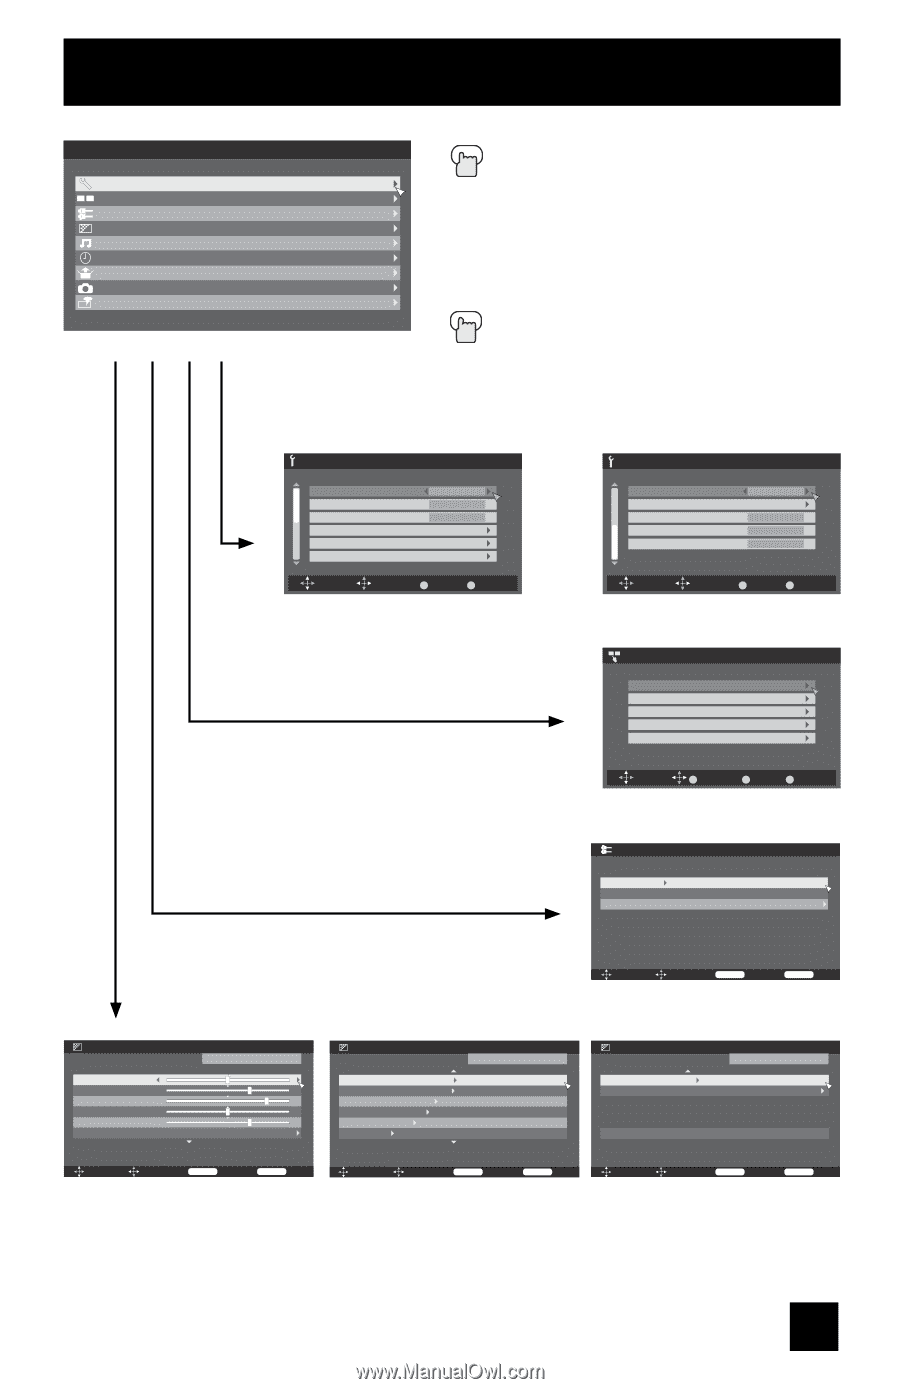
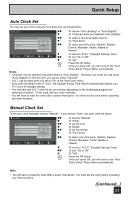
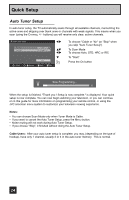
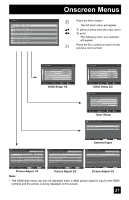
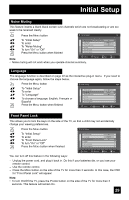
Menu Initial Setup - + Tuner Setup External Input Picture Adjust Sound Adjust Clock/Timers Interactive Plug-in Photo Viewer Auto Demo Menu Onscreen Menus π† √® Press the MENU button The left main menu will appear To select a menu from the main menu To enter The following menu you selected will appear Press the BACK button to return to the previous menu screen Initial Setup 1/2 Noise Muting Language Front Panel Lock V-Chip Set Lock Code Closed Caption On English Off Select Operate BACK Back MENU Exit Initial Setup 1/2 Initial Setup Auto Shut Off Software Version Power Indicator Optical Out Quick Start-up 2/2 Off High PCM Off Select Operate BACK Back MENU Exit Initial Setup 2/2 - + Tuner Setup Auto Tuner Setup Channel Summary Find Channel Digital Antenna Level Tuner Diagnostic (Service Use Only) Select OK BACK MENU Operate Back Exit Tuner Setup External Input HDMI Size Video-1 Audio Video Input Label Auto Auto Select Operate Back Back Menu Exit External Input Picture Adjust Tint [ 00 ] R Color [+06 ] Picture[+10 ] Bright [ 00 ] Detail [+06 ] Energy Saver Mode Dynamic 1/3 G Picture Adjust Color Temperature Color Management Dynamic Gamma Smart Picture Digital VNR MPEG NR Dynamic 2/3 High On On On Auto On Picture Adjust Dynamic 3/3 Natural Cinema Position Adjustment Auto Reset Select Operate Back Back Menu Exit Picture Adjust 1/3 Select Operate Back Back Menu Exit Picture Adjust 2/3 Select Operate Back Back Menu Exit Picture Adjust 3/3 Note: • The HDMI Size menu can only be displayed when a 480p picture signal is input to the HDMI terminal and the picture is being displayed on the screen. 27
-
 1
1 -
2
-
3
-
4
-
5
-
6
-
7
-
8
-
9
-
10
-
11
-
12
-
13
-
14
-
15
-
16
-
17
-
18
-
19
-
20
-
21
-
 22
22 -
 23
23 -
 24
24 -
 25
25 -
 26
26 -
 27
27 -
 28
28 -
 29
29 -
 30
30 -
 31
31 -
 32
32 -
33
-
34
-
35
-
36
-
37
-
38
-
39
-
40
-
41
-
42
-
43
-
44
-
45
-
46
-
47
-
48
-
49
-
50
-
51
-
52
-
53
-
54
-
55
-
56
-
57
-
58
-
59
-
60
-
61
-
62
-
63
-
64
-
65
-
66
-
67
-
68
-
69
-
70
-
71
-
72
-
73
-
74
-
75
-
76
-
77
-
78
-
79
-
80
-
81
 |
 |