Kenwood TH-D74A User Manual
Kenwood TH-D74A Manual
 |
View all Kenwood TH-D74A manuals
Add to My Manuals
Save this manual to your list of manuals |
Kenwood TH-D74A manual content summary:
- Kenwood TH-D74A | User Manual - Page 1
TH-D74A TH-D74E User MAnUAL This User Manual covers detailed operating instructions of the TH-D74A/E including basic operating instructions described in the User Guide comes with the product. B5A-1253-00/04 - Kenwood TH-D74A | User Manual - Page 2
ACCESSORIES 3-1 INSTALLING THE ANTENNA 3-1 INSTALLING THE BATTERY PACK 3-1 INSTALLING ALKALINE BATTERIES 3-1 INSTALLING THE BELT CLIP 3-2 INSTALLING THE HAND STRAP 3-2 CHARGING THE BATTERY PACK 3-2 BATTERY (DTMF 11-1 MANUAL DIALING 11-1 MESSAGE FUNCTIONS 14-9 PROGRAMMING A PACKET PATH 14 - Kenwood TH-D74A | User Manual - Page 3
25 WIRELESS CONTROL (TH-D74A ONLY 25-1 PREPARATION 25-1 CONTROL OPERATION 25-1 26 OPTIONS 26-1 27 MAINTENANCE 27-1 GENERAL INFORMATION 27-1 SERVICE 27-1 SERVICE NOTE 27-1 CLEANING 27-1 TROUBLESHOOTING 27-2 28 SPECIFICATIONS 28-1 Note: ◆◆ Display examples in this manual may not match the - Kenwood TH-D74A | User Manual - Page 4
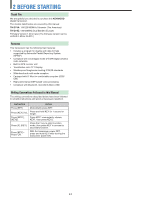
covered by this manual. TH-D74A: 144/220/430MHz Tribander (The Americas) TH-D74E: 144/430MHz Dual Bander (Europe) Firmware Version 1.09 or later.(The firmware version can be verified in Menu No.991.) Features This transceiver has the following main features: • Includes a program for dealing with - Kenwood TH-D74A | User Manual - Page 5
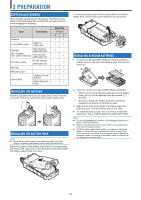
pack is provided uncharged, you must charge the battery pack before using it with the transceiver. Match the guides of the battery pack with the corresponding grooves on the upper rear of the transceiver, then firmly press the battery case to lock it in place. 2 Insert (or remove) six AAA (LR03 - Kenwood TH-D74A | User Manual - Page 6
the two supplied M3 x 6 mm binding screws. DC IN jack TH-D74A Note: ◆◆ Be careful not to pinch your fingers into the belt battery life cycle. ◆◆ If the battery pack is not used for a long time, the battery pack capacity temporarily decreases. In this case, charge the battery and use the battery - Kenwood TH-D74A | User Manual - Page 7
: 6 seconds, Stand-by: 48 seconds We recommend you carry extra battery packs with you, in case the battery pack becomes depleted. Battery Type KNB-75L Li-ion battery pack KNB-74L Li-ion battery pack KBP-9 Battery case Output Power H M L EL H M L EL H M L EL Operating Time/ Hours (Approx.) 6 8 12 - Kenwood TH-D74A | User Manual - Page 8
4 GETTING ACQUAINTED KEY AND CONTROL KNOB OPERATIONS Speaker LCD Display Microphone SP/MIC Jacks microSD memory card slot Micro-USB Connector (USB2.0, Type B) DC IN (External power supply) Jack [] Press [ ] (1s) to turn the transceiver power ON and OFF. Press [ ] to turn the backlight ON and - Kenwood TH-D74A | User Manual - Page 9
MHz mode. Press [MHz] (1s) to start the MHz scan. Press [F], [MHz] to enter Fine tuning function mode. [PF2] (#) Press [PF2] to activate its programmed function. Press [F], [PF2] to enter Frequency step setup mode or Fine step frequency setup mode. ON AIR/ Busy Indicator The indicator lights red in - Kenwood TH-D74A | User Manual - Page 10
the Shift function is set to plus. Appears when the Shift function is set to minus. Appears when the Shift function is set to -7.6 MHz. (TH-D74E only) Appears when the Reverse function is ON. Appears when the Attenuator function is ON. Appears when the packet communication speed in APRS mode - Kenwood TH-D74A | User Manual - Page 11
D-STAR (DV/DR mode) Display KEY GUIDE Display Area Indicator Description Appears when a message TH-D74A only.) Appears when the key lock is ON. Indicates the battery level. Appears during charging of the battery. Indicates the memory group number. Indicates the Weather Channel. (TH-D74A - Kenwood TH-D74A | User Manual - Page 12
the GPS satellite information. The default setting of the built-in GPS function is [On]. If the GPS information cannot be received, you can manually enter the date and time. 1 Access Menu No. 950. Date & Time screen appears by pressing [MENU], [PF1], [LIST], [MARK]. Setting examples When used in - Kenwood TH-D74A | User Manual - Page 13
VHF: 174 ~ 216 MHz (TH-D74A) 174 ~ 230 MHz (TH-D74E) • 220 MHz: 216 ~ 260 MHz (TH-D74A only) • 200/300 MHz: Band B 216 ~ 410 MHz (TH-D74A 230 ~ 410 MHz (TH-D74E) • 430 MHz: 410 Call Channel mode. VFO Mode VFO mode allows you to manually change the operating frequency. 1 Press [VFO] to enter - Kenwood TH-D74A | User Manual - Page 14
TH-D74E Band VHF (except DV/DR mode) VHF(DV/DR mode) UHF( low (EL) power. Battery Pack KNB-75L H KNB-74L Battery Case M KBP-9 (AAA Alkaline batteries) L Approx. 5 W Approx. 2 W Approx. 0.5 W External Power Supply EL Approx. 0.05 W Note: ◆◆ You can program different power settings for - Kenwood TH-D74A | User Manual - Page 15
MENU ACCESS Example: Setting the time for [Battery Saver] of Menu No. 920. 1 /RX) Software Key operation Software keys ([Back], [OK], etc.) are displayed in the key guide area of Press [PF1], [MR], [MARK] for Menu No.920. In this case, you can move to step 4. 2 Select [Configuration] with [ ]/[ - Kenwood TH-D74A | User Manual - Page 16
1 - 2 - 10 [sec] Off/ On Off/ On Off/ On (TH-D74A only) Offset frequency Auto repeater offset CALL key function 1750 Hz TX hold Varies with the selected frequency band Off/ On CALL (TH-D74A)/ 1750Hz (TH-D74E) Off/ On VOX on/ off VOX gain level VOX delay time VOX - Kenwood TH-D74A | User Manual - Page 17
Position Ambiguity 403 Operating Mode 404 Battery Saver 405 PC Output 406 , etc. (total 68 icons) Off Duty/ Enroute/ In Service/ Returning/ Committed/ Special/ PRIORITY/ CUSTOM0 ~ CUSTOM6/ EMERGENCY! PTT/ APRS Key: All unchecked Manual/ PTT/ Auto/ SmartBeaconing 0.2/ 0.5/ 1/ 2/ 3/ 5/ 10/ 20/ 30/ 60 - Kenwood TH-D74A | User Manual - Page 18
(26 10deg/speed) - 255 (10deg/speed) 5 - 60 - 180 [sec] Way point format Way point name length Way point output type NMEA/ MAGELLAN/ KENWOOD 6-Char/ 7-Char/ 8-Char/ 9-Char All/ Local/ Filtered Position limit Filter type User phrases Auto message reply Reply to Reply delay time Reply message text - Kenwood TH-D74A | User Manual - Page 19
USB Audio Out. Lvl. Configuration - Battery 920 Battery Saver 921 APO: Auto Power Off 922 Battery Level TX/RX EQ TX EQ Level All Off/ On Off/ On 1 - 3 - 10 [sec] - - - - - - Auto/ Auto (DC-IN)/ Manual/ On 3 - 10 - 60 [sec] High/ Medium/ Low Up to 16 characters Off/ GPS(Altitude) / GPS(GS)/ Date - Kenwood TH-D74A | User Manual - Page 20
Output(DV/DR) Language Firmware version Reset Recording - Voice Message 1-4 - Voice Guidance - Battery Level - VOX - Group TH-D74A only) - Key Lock/ Frequency Lock Off/ On Off/ On Off/ On mi/h, mile (TH-D74A)/ km/h, km (TH-D74E)/ knots, nm feet, inch (TH-D74A)/ m, mm (TH-D74E) °F (TH-D74A)/ °C (TH - Kenwood TH-D74A | User Manual - Page 21
value determined from your offset setting value and an offset direction depending on your selected frequency. Refer to the settings below for offset directions: TH-D74A: Under 145.100 MHz: No offset (Simplex operation) 145.100 ~ 145.499 MHz: - 600 kHz offset 145.500 ~ 145.599 MHz: No offset - Kenwood TH-D74A | User Manual - Page 22
" blinks on the display. • To quit the scan, press [ ]. • When a Tone frequency is identified, the identified frequency appears on the display and blinks. 3 Press [A/B] to program the identified frequency in place of the currently set tone frequency. 7-2 - Kenwood TH-D74A | User Manual - Page 23
TRANSMITTING A 1750 Hz TONE Most repeaters in Europe require that a transceiver transmit a 1750 Hz tone. On a TH-D74E, simply pressing [CALL] will transmit this tone. It is also possible to program [1750Hz] on the front panel as a [CALL] key for transmitting the 1750 Hz tone. 1 Access Menu No. 142. - Kenwood TH-D74A | User Manual - Page 24
. 200. Memory channel type Display [0] to [999] [L 0], [U 0] to [L49], [U49] [Pri] [A 1] to [A10] [C] Type Memory channels Program scan memory Priority scan memory Weather channels (TH-D74A only) CALL channels 3 Select the channel. You can select the channel by inputting the channel number from - Kenwood TH-D74A | User Manual - Page 25
is recalled, "±" appears on the display. ◆◆ A memory channel number cannot be recalled by keypad input if the memory channel is registered as program scan memory. Clearing a Memory Channel You can clear the specified channel of the registered memory channels. 1 Press [MR] to enter the memory - Kenwood TH-D74A | User Manual - Page 26
press [A/B]. The memory group selection screen appears. 2 Select [All Bands] or [Current Band]. [All Bands]: This allows you to recall all programmed memory channels. [Current Band]: This allows you to recall only those memory channels that have stored frequencies within the current frequency band - Kenwood TH-D74A | User Manual - Page 27
CALL CHANNEL MEMORY (SIMPLEX) The CALL channel can be used to store any frequency and related data that you will recall often. You may want to dedicate the CALL channel as an emergency channel within your group. 1 Select the frequency, mode, etc. 2 Press [F], [CALL]. Note: ◆◆ Storing new data in the - Kenwood TH-D74A | User Manual - Page 28
3 Select [Clear Group] and press [A/B]. The clear group selection screen appears. 4 Select the group to clear. 5 Press [ENT]. Each press adds or removes a check mark. 6 Press [A/B]. The group clear confirmation screen appears. • To end the operation without clearing the group, press [MODE] to - Kenwood TH-D74A | User Manual - Page 29
1 MHz decimal point blinks while scanning is in progress. Note: ◆◆ When starting a scan within the frequency range of the registered program scan memory, it is the program scan. 3 To quit band scan, press [VFO]. 2 Set the Scan Resume mode to [Time] (Time-Operated), [Carrier] (Carrier-Operated) or - Kenwood TH-D74A | User Manual - Page 30
memory frequency range. 2 To quit memory scan, press [MR]. Note: ◆◆ At least 2 Memory channels must contain data and must not be locked out of scan. ◆◆ Program scan memory and priority channel will be excluded from the memory scan. ◆◆ If the memory recall method is set to [Current Band], the memory - Kenwood TH-D74A | User Manual - Page 31
the right of the channel number. Note: ◆◆ This function can be set individually for all of the memory channels. However, it cannot be set for program scan memory (L0/U0 to L49/U49). ◆◆ The memory channel lockout function cannot be turned on or off in VFO mode or CALL channel mode - Kenwood TH-D74A | User Manual - Page 32
backlight function. [On]: Turns on the scan auto backlight function. Note: ◆◆ This function does not work when [Backlight Control] (Menu No.900) is [Manual]. ◆◆ The lighting duration of scan auto backlight cannot be changed. CALL SCAN Use Call Scan to monitor both the Call channel and either the - Kenwood TH-D74A | User Manual - Page 33
10 CTCSS/DCS/CROSS TONE CTCSS You may sometimes want to hear calls only from specific persons. The Continuous Tone Coded Squelch System (CTCSS) allows you to ignore (not hear) unwanted calls from other persons who are using the same frequency. To do so, select the same CTCSS tone as selected by - Kenwood TH-D74A | User Manual - Page 34
To quit the scan, press [ ]. • When a CTCSS frequency is identified, the identified frequency appears on the display and blinks. 3 Press [A/B] to program the identified frequency in place of the currently set CTCSS frequency. • The CTCSS function will remain On. To cancel CTCSS, press [TONE] until - Kenwood TH-D74A | User Manual - Page 35
on the display. • To quit the scan, press [ ]. • When a DCS code is identified, the identified code appears on the display and blinks. 3 Press [A/B] to program the identified code in place of the currently set DCS code. • The DCS function will remain on. To cancel DCS, press [TONE] until DCS no - Kenwood TH-D74A | User Manual - Page 36
to 16 digits. Some repeaters in the U.S.A. and Canada offer a service called Autopatch. You can access the public telephone network via such beginning to press keys when making a call. 1 Access Menu No. 162. MANUAL DIALING Manual Dialing requires only two steps to send DTMF tones. 1 Press and hold - Kenwood TH-D74A | User Manual - Page 37
allows you to communicate with other amateur radio stations over the Internet, using VoIP (voice-overIP) technology. The EchoLink software program allows worldwide connections to be made between stations, or from computer to station, greatly enhancing your communications capabilities. Official - Kenwood TH-D74A | User Manual - Page 38
7 Press [ENT]. EchoLink memory code is stored. • If you want to store another EchoLink memory channel, repeat the procedure from step 2. Transmitting EchoLink Memory 1 Press and hold [PTT]. 2 While transmitting, press [ENT]. • The last called EchoLink DTMF Memory channel name and number appears on - Kenwood TH-D74A | User Manual - Page 39
is essential in selecting your exact frequency. The default step size on the 144 MHz band is 5 kHz (TH-D74A) or 12.5 kHz (TH-D74E). The default on the 220 MHz band is 20 kHz (TH-D74A). The default on the 430 MHz band is 25 kHz. 1 Press [VFO] to enter VFO mode. 2 Press [A/B] to - Kenwood TH-D74A | User Manual - Page 40
limit. 6 Press [A/B] to set the selected value. Note: ◆◆ You cannot program the 100 kHz and subsequent digits. The exact 100 kHz and subsequent digits IF and detection signals from the speakers. Connecting diagrams with the PC TH-D74 Speaker output GND 2.5 mm To the LINE IN Jack 3.5 mm - Kenwood TH-D74A | User Manual - Page 41
is required to process IF signal or detection signal. JVCKENWOOD does not provide any support regarding the procedure to connect to a PC or the PC software. FM NARROW The FM mode band can be switched between normal and narrow. 1 Press [MODE] to set FM mode. 2 Access Menu No. 103. 2 Select [On - Kenwood TH-D74A | User Manual - Page 42
TIME-OUT TIMER The Time-out Timer limits the duration you transmit. Just before the transceiver stops the transmitting, a warning beep sounds. This function is necessary to protect the transceiver from thermal damage and can therefore not be turned OFF. 1 Access Menu No. 111. SETTING RECEIVING - Kenwood TH-D74A | User Manual - Page 43
-OPERATED TRANSMISSION) VOX eliminates the necessity of manually switching to Transmit mode each time you want VOX Delay Time is not reflected to the transmission. ◆◆ If you press [CALL] (if 1750 Hz is programmed) to transmit a 1750 Hz tone, the VOX Delay Time is not reflected. ◆◆ If the DCS function - Kenwood TH-D74A | User Manual - Page 44
LED CONTROL This function turns off the BUSY LED to reduce the consumption of battery power. With the default setting, the BUSY LED is always on when receiving Note: ◆◆ You can press [PTT] or [CALL] (if 1750 Hz is programmed) to transmit, regardless of the setting in Menu No. 153. PITCH FREQUENCY - Kenwood TH-D74A | User Manual - Page 45
. You can program your favorite message in place of the default message. 1 Access Menu 903. 2 Select [Auto], [Auto (DC-IN)], [Manual], or [On (DC-IN)]: When the battery is used, the operation is same as [Auto]. When DC-IN is used, the operation is same as [On]. [Manual]: The backlight turns on and - Kenwood TH-D74A | User Manual - Page 46
SINGLE BAND DISPLAY You can changes the displayed information during single band display. Selecting the Information to Display 1 Access Menu No. 904 Note: ◆◆ When selecting [GPS(Altitude)] or [GPS(GS)], set the built-in GPS to [ON]. METER TYPE This function changes the design of the S/RF meter. 1 - Kenwood TH-D74A | User Manual - Page 47
AUDIO EQUALIZER (TX/RX) This function turns on or off the equalizer setting for transmission and receiving. 1 Access Menu No. 911. 2 Select an item and press [ENT]. 3 Press [A/B]. Check to turn on the equalizer function. Uncheck to turn off the function. RX EQ: Receiving Equalizer Turns On/Off the - Kenwood TH-D74A | User Manual - Page 48
been performed (keys pressed, [ENC] control turned, etc.), and turns the transceiver power off if it has not been in use. To program the receiver shut-off period for the battery saver: 1 Access Menu No. 921. 2 Set the APO time limit to [15], [30], [60] minutes, or [Off]. • After the time limit - Kenwood TH-D74A | User Manual - Page 49
FUNCTION KEYS Transceiver PF Keys and Microphone PF keys Function name Recording Voice Message 1 Voice Message 2 Voice Message 3 Voice Message 4 Voice Guidance Battery Level VOX Group Name Balance GPS Track LOG SQL SHIFT STEP LOW Key Lock Lockout M>V T.SEL NEW Voice Alert LCD Brightness DTMF CH0 - Kenwood TH-D74A | User Manual - Page 50
KEY LOCK The Key Lock function ensures that your transceiver settings will remain unchanged if you accidentally press a key. To turn Key Lock On or Off, press [F] (1s). • When Key Lock is activated, the < > indicator will appear on the display. VOLUME LOCK This function locks the volume so that - Kenwood TH-D74A | User Manual - Page 51
Setting the Altitude, Rainfall 1 Access Menu No. 971. 2 Select [feet, inch] or [m, mm]. Setting the Temperature 1 Access Menu No. 972. OUTPUT DESTINATION INTERFACE (USB/ Bluetooth) Set the interface to use for each of the following applications. Select [USB] or [Bluetooth]. • GPS data (NMEA) output - Kenwood TH-D74A | User Manual - Page 52
not become KISS mode You can update the TH-D74A/E firmware by connecting the TH-D74A/E to the PC by using a commercially available Micro-USB cable. The latest firmware is available for download from the following URL. https://www.kenwood.com/i/products/info/amateur/software_ download.html (This - Kenwood TH-D74A | User Manual - Page 53
DATA This transceiver has 5 memory channels for storing position data. Program latitude and longitude data for up to 5 locations from which Longitude Entry The west/ east Longitude is entered. Position Ambiguity There may be cases where you do not know or do not want to report your precise locations - Kenwood TH-D74A | User Manual - Page 54
Displaying Position Information When the built-in GPS receiver is On, pressing [F], [MARK] will display "Latitude/longitude, time, altitude, heading, speed", then press [ ] to cycle the display between "Latitude/longitude, time, altitude, heading, speed" ➡ "Target point distance, Travel direction" ➡ - Kenwood TH-D74A | User Manual - Page 55
screen when FM radio mode is On [MARK] Switches to the registration mode of mark position. Battery Saver (GPS Save) This function will turn the GPS power source Off after the programmed timer expires if position data is not determined during the maximum catching time (approximately 5 minutes). To - Kenwood TH-D74A | User Manual - Page 56
following location information up to 100 points in the Position Memory List. You can edit all information except Registration time manually. • Position name • Icon (same as APRS) • Registration time • Longitude • Latitude • Altitude Checking Registered Position Memory 1 Press [MARK]. The position - Kenwood TH-D74A | User Manual - Page 57
Editing the Position (Latitude and Longitude) 1 Select [Position] and press [A/B]. The mode changes to the latitude and longitude edit mode. Key Name [ ]/[ ] or [ENC] [ENT] [MODE] Operation Changes the item. Confirms the editing. Cancels editing and returns to the previous screen. 2 Select - Kenwood TH-D74A | User Manual - Page 58
paused. ◆◆ The files stored on the microSD memory card are named as Track Log started date. Example: TH-D74A:05122018_124705.nme (File for which track logging started at 12:47:05 on May 12 2018.) TH-D74E:12052018_124705.nme (File for which track logging started at 12:47:05 on 12 May 2018 - Kenwood TH-D74A | User Manual - Page 59
Selecting the Track Log Acquisition Type You can set the conditions for saving portable Track information as GPS Logger. You can change the settings for travel speed, etc. 1 Access Menu No. 412. Clearing the Track Log Clear a Track Log saved in a microSD memory card. 1 Access Menu No. 411. 2 - Kenwood TH-D74A | User Manual - Page 60
, WB4APR. < APRS® is a software program and registered trademark of Bob Bruninga, WB4APR "NOCALL" is automatically set. In this case, the Position packet or Message packet cannot please read this instruction manual in detail and Home (/-) Yagi@QTH (/y) KENWOOD (\K) RADIO (\Y) RV (/R) - Kenwood TH-D74A | User Manual - Page 61
Tent) HAM Store School Hospital Red Cross Lighthouse Speedpost (Value Singpost) WorkZone Wreck/Obstruction Sheriff Fire Sunny Gale Flags Tornado National WX Service Site WX (Weather Station) Digipeater Mic-E Repeater QSO Repeater Circle IRLP EchoLink Node GATEway DF station Dish Antenna PC User SSTV - Kenwood TH-D74A | User Manual - Page 62
for preprogramming. Storing Status Text 1 Access Menu 503. The selectable comments are listed below: [Off Duty], [Enroute], [In Service], [Returning], [Committed], [Special], [PRIORITY], [CUSTOM 0 ~ CUSTOM 6], or [EMERGENCY!] • If you select [EMERGENCY!], a confirmation message appears. Press - Kenwood TH-D74A | User Manual - Page 63
to enter APRS mode. Each time a new APRS packet is received, the frequency display is interrupted to show information as below. Note: ◆◆ The APRS programs for PCs have entry fields for a position comment and status text. The data entered to these two fields are transmitted as separate packets. This - Kenwood TH-D74A | User Manual - Page 64
STATION LIST This transceiver is capable of receiving and storing APRS data received from up to 100 stations in memory. You can easily recall the information of the desired station. 1 Press [LIST] to show the list of stations. 2 Press [LIST] (1s) to change the list type to [Callsign + model name], - Kenwood TH-D74A | User Manual - Page 65
packet with MicEncoder format. Station for transmitting positional MicE-MSG information packet with MicEncoder. Object ID Status Telemetry Compress GRID-SQ TH-D7 TH-D72 TH-D74 TM-D700 TM-D710 VX-8 VX-8G FT1D FT2D FT3D FTM-100D FTM-350 FTM-400D Object data ID packet Status packet - Kenwood TH-D74A | User Manual - Page 66
Cursor Control Select a cursor control setting for station list screen. 1 Press [MODE] to change the cursor control type to [Followed] or [Fixed]. [Followed]: The Callsign with the indicating cursor will be followed. On the detailed list screen, the selected Callsign continues to be displayed. Sort - Kenwood TH-D74A | User Manual - Page 67
. Only Digipeater Stations are displayed. Only Weather Stations are displayed. Only Mobile Stations are displayed. Only Object Stations are displayed. KENWOOD Only KENWOOD TH-D74, TH-D72, THD7, TM-D700, TM-D710G, TM-D710, and RC-D710 Stations are displayed. NAVITRA QSY (Freq) 1-Way Others Only - Kenwood TH-D74A | User Manual - Page 68
detail screen. [A/B] To move to the message screen. Meaning Message addressed to you B Bulletin message ! Report by the National Weather Service A message for which a reception acknowledgment was returned G Group message • When a duplicate message from the same station is received, the reception - Kenwood TH-D74A | User Manual - Page 69
Transmitting a Message 1 Press [MSG]. The message list appears on the display. 2 Press [MENU]. The message list Menu appears on the display. 6 Select [Send] and press [A/B] to send the message. You can select the following items other than [Send], [Reply], [Edit], and [New] in message list Menu. [ - Kenwood TH-D74A | User Manual - Page 70
PROGRAMMING A PACKET PATH Select the packet path type from [New-N], [Relay], [Region], [Others1], [Others2], or [Others3]. When you press [A/B], the < > indicator appears on the right side - Kenwood TH-D74A | User Manual - Page 71
DCD Sense You can also select the method for inhibiting the built-in TNC from transmitting. 1 Access Menu No. 507. • A Packet path is the digipeat route of the packet data sent from My station. For example, if you want your packet to take the [W5DJY-1] > [W4DJY-1] route, enter [W5DJY-1, W4DJY-1], - Kenwood TH-D74A | User Manual - Page 72
are present, an APRS packet is not transmitted after the interval. After signals drop, transmitting is executed. 2 Select [Manual], [PTT], or [SmartBeaconing]. [Manual]: Each press [BCN] transmits the beacon. [PTT]: 1 Press [BCN] to switch the function ON. • < > appears and blinks. 2 Press - Kenwood TH-D74A | User Manual - Page 73
Decay Algorithm This function continuously extends the packet transmission interval in the case that there is no change of position information. 1 Access Menu No. 512. When jointly using a Decay Algorithm, if the speed is 1 knot or slower, a Decay - Kenwood TH-D74A | User Manual - Page 74
OBJECT FUNCTIONS Setting the Object Information. 1 Access Menu No. 516. Latitude/Longitude 2 Select [Object1], [Object2], or [Object3] and press [ENT]. • When you press [A/B], the < > indicator appears on the right side of the object item, showing the current used information. Object Name 6 Enter - Kenwood TH-D74A | User Manual - Page 75
Tune]. Transmitting QSY Information A properly configured functioning TH-D74 QSY station can automatically embed the voice case "T" indicates Wide. Tone frequency of 79.7 Hz. (Encoding) • "t079": A lower case "t" indicates Narrow. Tone frequency of 79.7 Hz. (Encoding) • "tOFF": A lower case - Kenwood TH-D74A | User Manual - Page 76
Operation When Receiving a QSY When QSY (frequency) information is received, the station list appears with the verified frequency. 1 Select [Tune], and press [A/B]. Slow Rate Low speed transmission interval time. 1 Access Menu No. 531. • The frequency is set in the voice channel (non-data band). - Kenwood TH-D74A | User Manual - Page 77
of Way point Format that is sent. 1 Access Menu No. 540. 2 Select [NMEA], [MAGELLAN] or [KENWOOD]. NMEA]: The data using the NMEA 0183 "$GPWPL" format. [MAGELLAN]: The data using the " $PMGNWPL" format. [KENWOOD]: The data using the " $PKWDWPL" format. Way Point Length Select the length of the Way - Kenwood TH-D74A | User Manual - Page 78
. STORING AUTO MESSAGE REPLY While you are driving, for example, you cannot immediately answer to received messages. On this transceiver, you can program the message to be automatically returned when a message is received. Auto Reply 1 Access Menu No. 561. 2 Select [On] or [Off]. • "AA:", meaning - Kenwood TH-D74A | User Manual - Page 79
immediately following an acknowledged received message. Reply Message Text 1 Access Menu No. 564. TX Beep When your beacon is transmitted in a manner other than manually, you can select whether or not it emits a beep sound. 1 Access Menu No. 571. 2 Select [Off] or [On]. [Off]: A beep does not sound - Kenwood TH-D74A | User Manual - Page 80
it for special use. Select [Altnet] and press [ENT], then enter your desired character string. When transmitting messages and meteorological data using the TH-D74, the character string you entered is added to the packet, following your station Callsign. 2 Select [Off] or [On]. [Off]: Turn off the - Kenwood TH-D74A | User Manual - Page 81
of the Mobile Station if they have matching tone (CTCSS) frequencies and are within range, thus informing the stations that communications is possible. PROGRAMMING MESSAGE GROUP CODE Use a message group code to exchange messages only among your group members. With one or more message group codes - Kenwood TH-D74A | User Manual - Page 82
TH-D74 to a PC installed with APRS software and operating the IGate and Digipeater stations, set TH-D74 Note: ◆◆ The built-in TNC does not support Command mode or Converse mode. ◆◆ The built-in from the URL listed below. https://www.kenwood.com/i/products/info/amateur/ software_download.html Note: - Kenwood TH-D74A | User Manual - Page 83
transceiver. STEP 2: Register your Callsign to a gateway repeater. Refer to the User Guide in detail. MY CALLSIGN Set your Callsign to the transceiver in DV/DR mode. Gateway call. Note: ◆◆ The basic operations in DR mode are not supported in DV mode. ◆◆ The transceiver has a Time-Out Timer function - Kenwood TH-D74A | User Manual - Page 84
DIGITAL FUNCTION MENU This menu switches the functions to use for operation in digital mode. How to Use the Digital Function Menu 1 Press [MODE] to enter DR mode. 2 Press [F], [MODE]. The Digital Function Menu appears. (DV mode) (DR Mode) 3 Select an item in the Digital Function Menu and press - Kenwood TH-D74A | User Manual - Page 85
[FROM]. Set the repeater frequency (or the duplex setting) correctly. In case that it is out of the repeater area (or the Move to a public.) The destination repeater Callsign and < > appear after transmission. In case that a destination repeater can not be reached or the destination repeater is - Kenwood TH-D74A | User Manual - Page 86
transmission by the other station is finished. ◆◆ In stable communication condition, you can also make a reply by Direct Reply function without manually setting the destination Callsign. 2 Press [A/B]. The Callsign list editing screen appears. 3 Select the item and press [ENT]. The editing screen - Kenwood TH-D74A | User Manual - Page 87
Sorting the Callsign You can sort the Callsign list. 1 Press [MODE] in the Callsign list selection screen. The move position selection screen appears. 2 Select a move position and press [A/B]. When you move an item to the end of the list, select [Move to End] and press [A/B]. AUTO REPLY FUNCTION - Kenwood TH-D74A | User Manual - Page 88
Displaying the RX History 1 Access Menu No. 600. 4 Select a number for registration and press [ENT]. The TX messages is selected Each press of [PTT] transmits the selected message. 2 Select a list and press [A/B]. The RX history details screen appears. 3 Press [A/B]. The RX history GPS screen - Kenwood TH-D74A | User Manual - Page 89
Setting the Destination Repeater (TO) 1 Press [ ] (1s). The destination selection screen appears. This screen also appears when selecting [Destination Select] in the Digital Function Menu. 2 Select [Individual] and press [ENT]. The repeater list appears. 3 Select the Callsign from the Callsign lists - Kenwood TH-D74A | User Manual - Page 90
Setting by Local CQ 1 Press [ ] (1s). The destination selection screen appears. This screen also appears when selecting [Destination Select] in the Digital Function Menu. 2 Select [Local CQ] and press [ENT]. CQCQCQ is set to [TO]. Setting by Gateway CQ 1 Press [ ] (1s). [Reflector Info.]: You can - Kenwood TH-D74A | User Manual - Page 91
case, use a communication software that allows you to set the COM port number to 5 or higher. Data Communication Operation When performing data communication operation, refer to the instruction manual of the communication software that you will cause to give trouble to the other station. ◆◆ Setting - Kenwood TH-D74A | User Manual - Page 92
RX AFC This function is to correct a slight frequency offset of the received signal to achieve frequency stability. 1 Access Menu No. 616. 2 Select [Off] or [On]. [Off]: Turns off the RX AFC. [On]: Turns on the RX AFC. Note: ◆◆ This function does not work with the TX frequency. BK (BREAK) CALL BK ( - Kenwood TH-D74A | User Manual - Page 93
Note: ◆◆ This setting is canceled when the power is switched OFF. CALLSIGN SQUELCH/ CODE SQUELCH This function is useful when communicating with the specific stations. The squelch opens and you can call only when the digital code set by your station or the Callsign of your station is received. GPS - Kenwood TH-D74A | User Manual - Page 94
RX BREAK-IN DISPLAY This function is to display information received from other station in a Break-In screen. Received information is displayed in a Break-In screen in the operation band. RX Break-In Display Method This function is to set the method to display a Break-In screen (display a Break-In - Kenwood TH-D74A | User Manual - Page 95
STANDBY BEEP This function is to notify with a beep sound that transmission has ended when a D-STAR signal is received. 1 Access Menu No. 645. ◆◆ If there is no more than one repeater registered in the repeater list, a repeater scan can not be performed. REPEATER SCAN LOCKOUT This function is to - Kenwood TH-D74A | User Manual - Page 96
REPEATER LIST Up to 1,500 repeaters can be registered in the repeater list. Displaying the Repeater List 1 Access Menu No. 210. World region selection screen appears. 2 Select a World region and press [ENT]. Country region selection screen appears. 3 Select a Country region and press [ENT]. Group - Kenwood TH-D74A | User Manual - Page 97
control program MCP-D74 and virtual COM port driver from the following URL. https://www.kenwood.com/i/ the wrong driver that does not support the transceiver will be installed and communicating USB Connector (USB2.0, Type B) PC USB Cable Note: ◆◆ TH-D74 can not be connected to the COM port of the - Kenwood TH-D74A | User Manual - Page 98
sub device. The transceiver supports the following profiles. HSP distance. In such a case, try stopping the other wireless any nearby equipment. The communication problem may also be resolved by to enable the pairing mode, refer to the instruction manual of the headset (device to be connected). - Kenwood TH-D74A | User Manual - Page 99
PIN code depending on the device to be connected. When Requested to Enter the PIN Code The PIN code input screen appears. Refer to the instruction manual of the device to be connected and enter the PIN code using the number keys and press [A/B]. If you press [ ] when the PIN code input - Kenwood TH-D74A | User Manual - Page 100
compatible adapter and a PC, refer to the instruction manual of the PC and adapter. Pairing between the transceiver program MCP-D74 and use a normal communication port. ◆◆ When using with a PC or USB adapter which supports Bluetooth version 2.0 or earlier, passkey is not displayed. In this case - Kenwood TH-D74A | User Manual - Page 101
No. 936. 2 Select [On] or [Off]. [On]: Turns ON the auto connect function. [Off]: Turns OFF the auto connect function. Note: ◆◆ This function does not support automatic connection with a PC. 18-4 - Kenwood TH-D74A | User Manual - Page 102
Supported battery pack or battery case is removed during operation. • If the battery pack or alkaline batteries battery pack. Note: ◆◆ For precautions regarding the microSD memory card, refer to the instruction manual as shown in the following diagram. KENWOOD TH-D74 CAPTURE: Stores Capture images. - Kenwood TH-D74A | User Manual - Page 103
Removing (Unmounting) a microSD Memory Card When removing a microSD memory card, be sure to perform the operation to safely remove (unmount) it. Note: ◆◆ Removing a microSD memory card without unmounting it correctly may damage it. 1 Access Menu No. 820. The microSD memory card is unmounted. When - Kenwood TH-D74A | User Manual - Page 104
clear confirmation screen appears. 2 Select [Data For TH-D74A], [Data For TH-D74E], or [Data For TH-D74] and press [A/B]. [Data For TH-D74A]: Repeater lists mainly used in North America. [Data For TH-D74E]: Repeater lists mainly used in Europe. [Data For TH-D74]: Repeater lists mainly used in Japan - Kenwood TH-D74A | User Manual - Page 105
2 Select [On]. Recording begins when PTT is pressed. [Off]: Does not record the communication history. [On]: Recording the communication history. Stored files are named as follows. • YYYYMMDD_HHMMSS.csv Example: 20180512_125303.CSV (Communication history from 12:53:03 on May 12, 2018) The - Kenwood TH-D74A | User Manual - Page 106
as follows. Example: 12202018_132051.wav (TH-D74A) 20122018_132051.wav (TH-D74E) (File for which recording OFF. Note: ◆◆ The transceiver only supports recording to a microSD memory card. ◆◆ file list does not appear. ◆◆ If there is a problem with the format of an audio file, the error screen - Kenwood TH-D74A | User Manual - Page 107
Clearing Audio Files 1 Access Menu No. 300. The recording file list appears. 2 Select the file. 3 Press [MENU]. The recording file list menu appears. 4 Select [Clear] and press [A/B]. The recording file clear confirmation screen appears. 5 Press [A/B]. The file is cleared and the recording file list - Kenwood TH-D74A | User Manual - Page 108
21 FM RADIO The transceiver can receive FM radio broadcasts. You can listen to FM radio while simultaneously monitoring two signals as well as while waiting for a CQ or a call from an acquaintance, or waiting for an APRS call. When the band A or B receives a signal (call from another party) and - Kenwood TH-D74A | User Manual - Page 109
3 Select the channel and press [ENT]. The FM radio station is registered and the FM radio memory channel list appears. 4 Select [Clear Memory] and press [A/B]. The FM radio memory clear confirmation screen appears. 4 Press [ ]. The frequency screen reappears. Selecting a FM Radio Station Select a - Kenwood TH-D74A | User Manual - Page 110
Memory Shift Copy the frequency of a broadcast station from the FM radio memory channel list to VF0. 1 Access Menu No. 710. The FM radio memory channel list appears. 5 Enter characters. 6 Press [ENT]. The broadcast station name is registered. 2 Select the Channel. Select from FM0 to FM9. 3 Press - Kenwood TH-D74A | User Manual - Page 111
FM Radio Auto Mute Return Time When a signal is received or transmitted in band A or B while listening to a radio broadcast in FM radio mode, the reception sound of the radio broadcast is muted. When a signal is no longer received in band A or B or after transmission is completed, the transceiver - Kenwood TH-D74A | User Manual - Page 112
microphone and Bluetooth headset in addition to the built-in microphone. ◆◆ The transceiver only supports recording a voice message to the internal memory. Recording to a microSD card is not supported. RECORDING VOICE MESSAGES Record the voice from the microphone to the voice message memory channels - Kenwood TH-D74A | User Manual - Page 113
SENDING VOICE MESSAGES Send the message of a recorded voice message channel. 1 Access Menu No. 310. The voice message list appears. 2 Select the channel to send. 3 Press [A/B]. Playing and sending begins. Pressing [PTT] stops playback and returns to the frequency screen. When playing and sending - Kenwood TH-D74A | User Manual - Page 114
CLEARING VOICE MESSAGES 1 Access Menu No. 310. The voice message list appears. 2 Select the channel to clear. 3 Press [MENU]. The voice message list menu appears. 4 Select [Clear] and press [A/B]. The voice message clear confirmation screen appears. 5 Press [A/B]. The voice message is cleared. The - Kenwood TH-D74A | User Manual - Page 115
Turn off the voice guidance function. [Manual]: Announce the current status when pressing [ ]. [Auto1]: Announce the status or displayed information changed by the operation. [Auto2]: Announce the status or displayed information changed by the operation. In case of announcing a memory channel, the - Kenwood TH-D74A | User Manual - Page 116
Voice Guidance (Auto1/Auto2) Voice guidance in Auto1/ Auto2 is automatically announced based on the following operations or status. Operation or status Guidance Change to VFO mode "VFO" + Frequency Change to Memory Channel mode "Memory" + Channel number Change to Call mode "C" Change of the - Kenwood TH-D74A | User Manual - Page 117
Callsign (APRS) Error screen by no Callsign registration Various Clear confirmation screen Full reset Partial reset VFO reset Reset confirmation screen Battery Level Power ON Guidance Menu mode startup: "Menu" + item number Selecting Menu item: Menu item number Selecting setting value: setting vale - Kenwood TH-D74A | User Manual - Page 118
Voice Guidance (Manual) Voice guidance below is manually announced based on the following status. Frequency Screen Status Character entry screen Menu mode Guidance VFO: Operation band + "VFO" + Mode + Frequency + Transmit output power VFO - Kenwood TH-D74A | User Manual - Page 119
4 Voice guidance for operation band means as follows. Group number A "A" B "B" FM Radio Mode "R" 5 Voice guidance for transmit output power band means as follows. Group number H M L EL None (FM Radio Mode) "High" "Medium" "Low" "EL" None Guidance Guidance 23-5 - Kenwood TH-D74A | User Manual - Page 120
24 WEATHER ALERT (TH-D74A ONLY) The Weather Alert is available only in the USA and Canada. When activated, this function will check for a received NOAA 1050 Hz tone. When - Kenwood TH-D74A | User Manual - Page 121
us assume the VHF band of the mobile transceiver will be controlled. On the TH-D74A: 1 Access Menu No. 946. The current secret access code number appears. instruction manual for the mobile transceiver. If it is not described, consult your authorized KENWOOD dealer, customer service, or service - Kenwood TH-D74A | User Manual - Page 122
Charger Battery Case Speaker Microphone Speaker Microphone Speaker Microphone Clip Microphone with Earphone Clip Microphone with Earphone Clip Microphone with Earphone Headset with VOX Headset Headset DC Cable Cigarette Lighter Cord with Noise Filter DC Power Supply Note: ◆◆ Optional accessories - Kenwood TH-D74A | User Manual - Page 123
and address in case the service technician needs to contact you; if available, also include your fax number and e-mail address. Don't return accessory items unless you feel they are directly related to the service problem. You may return this product for service to the authorized KENWOOD dealer from - Kenwood TH-D74A | User Manual - Page 124
TROUBLESHOOTING The problems described in this table are commonly encountered operational malfunctions and are usually not caused by circuit failure. Problem Probable Cause Corrective Action Power is not turned on when using Li-ion battery pack or AAA alkaline batteries. Battery voltage is low. - Kenwood TH-D74A | User Manual - Page 125
Problem charged at the charging station. The battery icon does not show that it the microSD memory Data format is not supported. card cannot be read. Use a microSD loss with garbled data. In that case, "L" display will light up on selection is incorrect. The manually entered repeater frequency is - Kenwood TH-D74A | User Manual - Page 126
144 - 148 (TH-D74A), 144 - 146 (TH-D74E), 222 - 225 (TH-D74A), 430 - 450 (TH-D74A), 430 - 440 (TH-D74E) MHz RX: 136 - 174, 216 - 260 (TH-D74A only), 410 - mA (SQ Close) 50 mA (Avg. Save on) GPS receiver mode 115 mA Battery Life Approx. Single, Save on, Rate 6:6:48 sec, GPS off H M L EL - Kenwood TH-D74A | User Manual - Page 127
, A3E, A1A Sensitivity (TYP.) Amateur Band FM 12dB SINAD FM/ NFM 144 MHz FM/ NFM 220 MHz (TH-D74A only) FM/ NFM 430 MHz DV PN9/GMSK 4.8kbps, BER 1% 144 MHz (TH-D74A) 144 MHz (TH-D74E) 220 MHz (TH-D74A only) 430 MHz SSB 10 dB S/N AM 10 dB S/N Except above Amateur Band AM 10 dB - Kenwood TH-D74A | User Manual - Page 128
MHz (URX - 57.15 MHz) x 10 - ( URX - 58.05 MHz) x 10 = ±57.15 MHz, ±58.05 MHz Around 11.06 MHz x n (N = mutiple) 19.2 MHz x n (N = mutiple) TH-D74A only Band A Band B> V x 220M reception (VRX + 57.15 MHz) x 8 - (220 MRX + 58.05 MHz ) x 6 = ±57.15 MHz, ±58.05 MHz (VRX + 57.15 MHz) x 10 - Kenwood TH-D74A | User Manual - Page 129
© 2019
-
 1
1 -
 2
2 -
 3
3 -
 4
4 -
 5
5 -
 6
6 -
 7
7 -
8
-
9
-
10
-
11
-
12
-
13
-
14
-
15
-
16
-
17
-
18
-
19
-
20
-
21
-
22
-
23
-
24
-
25
-
26
-
27
-
28
-
29
-
30
-
31
-
32
-
33
-
34
-
35
-
36
-
37
-
38
-
39
-
40
-
41
-
42
-
43
-
44
-
45
-
46
-
47
-
48
-
49
-
50
-
51
-
52
-
53
-
54
-
55
-
56
-
57
-
58
-
59
-
60
-
61
-
62
-
63
-
64
-
65
-
66
-
67
-
68
-
69
-
70
-
71
-
72
-
73
-
74
-
75
-
76
-
77
-
78
-
79
-
80
-
81
-
82
-
83
-
84
-
85
-
86
-
87
-
88
-
89
-
90
-
91
-
92
-
93
-
94
-
95
-
96
-
97
-
98
-
99
-
100
-
101
-
102
-
103
-
104
-
105
-
106
-
107
-
108
-
109
-
110
-
111
-
112
-
113
-
114
-
115
-
116
-
117
-
118
-
119
-
120
-
121
-
122
-
123
-
124
-
125
-
126
-
127
-
128
-
129
 |
 |

B5A-1253-00/04
USER MANUAL
TH-D74A
TH-D74E
This User Manual covers detailed operating instructions of the TH-D74A/E
including basic operating instructions described in the User Guide comes
with the product.