Konica Minolta bizhub 25e bizhub 25e User Guide - Page 23
Scanning color documents, Selecting the file format - default password
 |
View all Konica Minolta bizhub 25e manuals
Add to My Manuals
Save this manual to your list of manuals |
Page 23 highlights
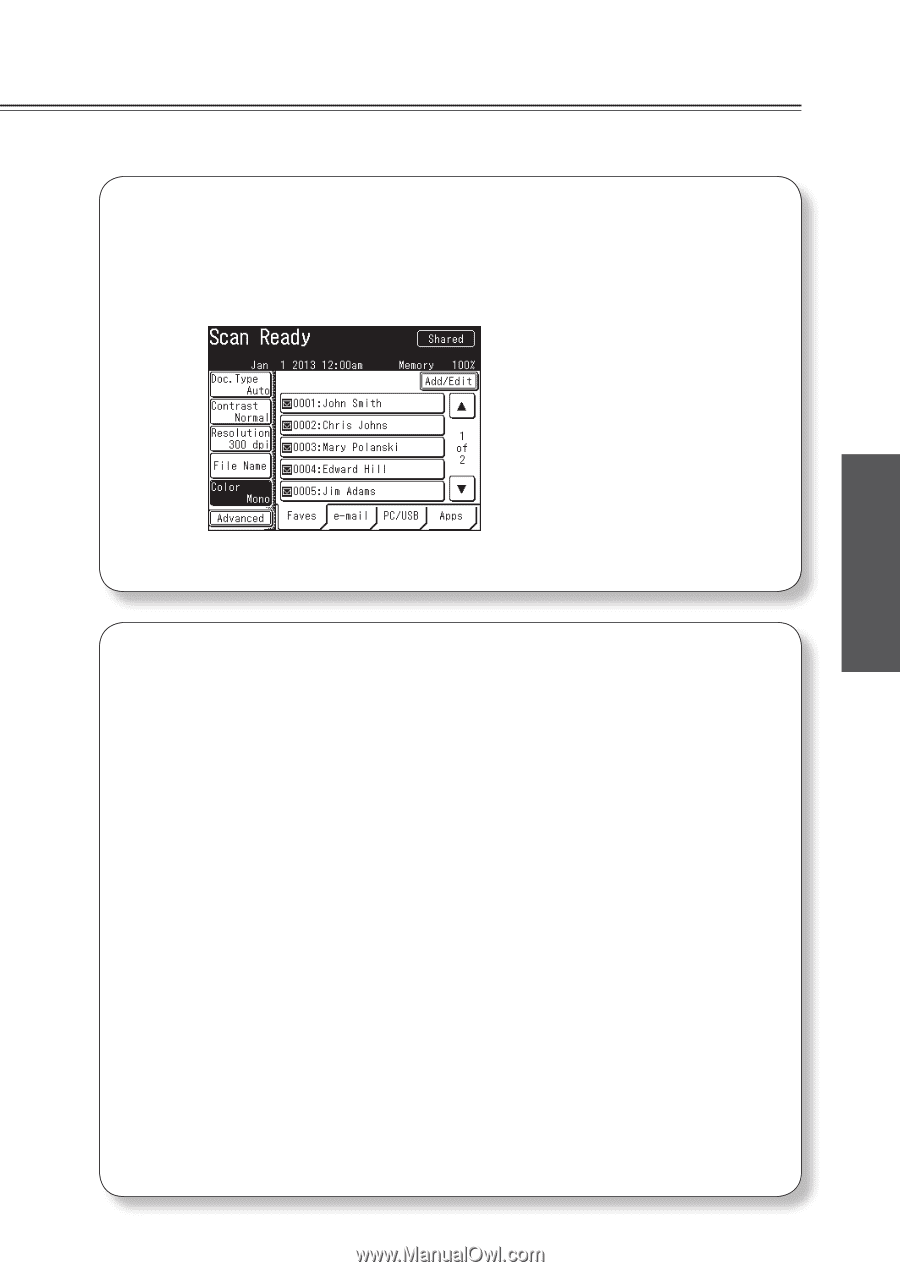
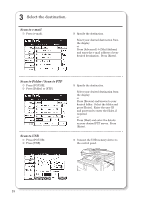
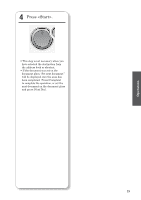
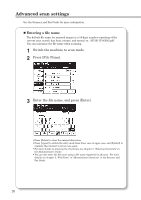
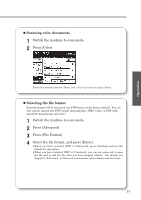
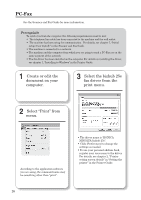
Operation „„Scanning color documents 1 Switch the machine to scan mode. 2 Press [Color]. The button switches between "Mono" and "Color" each time you press [Color]. „„Selecting the file format Scanned images will be converted into PDF format as the factory default. You can also convert images into TIFF format (monochrome), JPEG (color), or PDF with password (monochrome and color). 1 Switch the machine to scan mode. 2 Press [Advanced]. 3 Press [File Format]. 4 Select the file format, and press [Enter]. •When you have selected [PDF w/ Password], press [Setting] and set the details for encryption. •When you have selected [PDF w/ Password], you can set password to open the file and to edit the file after you have pressed . For details, see chapter 2, "File format" in "Advanced scan functions" in the Scanner and Fax Guide 21
-
 1
1 -
2
-
3
-
4
-
5
-
6
-
7
-
8
-
9
-
10
-
11
-
12
-
13
-
14
-
15
-
16
-
17
-
 18
18 -
 19
19 -
 20
20 -
 21
21 -
 22
22 -
 23
23 -
 24
24 -
 25
25 -
 26
26 -
 27
27 -
 28
28 -
29
-
30
-
31
-
32
-
33
-
34
-
35
-
36
-
37
-
38
-
39
-
40
-
41
-
42
-
43
-
44
-
45
-
46
-
47
-
48
-
49
-
50
-
51
-
52
-
53
-
54
-
55
 |
 |