Konica Minolta bizhub PRESS 2250P bizhub PRESS 2250P Security User Guide
Konica Minolta bizhub PRESS 2250P Manual
 |
View all Konica Minolta bizhub PRESS 2250P manuals
Add to My Manuals
Save this manual to your list of manuals |
Konica Minolta bizhub PRESS 2250P manual content summary:
- Konica Minolta bizhub PRESS 2250P | bizhub PRESS 2250P Security User Guide - Page 1
- Konica Minolta bizhub PRESS 2250P | bizhub PRESS 2250P Security User Guide - Page 2
- Konica Minolta bizhub PRESS 2250P | bizhub PRESS 2250P Security User Guide - Page 3
1.2.2 Welcome ...1-2 Composition of User's Guide...1-2 User's Guide ...1-2 Conventions Used in This Manual 1-3 Symbols Used in This Manual ...1-3 Original and Paper Indications...1-4 2 Box ...2-42 3 Index 3.1 Index by item ...3-2 3.2 Index by button...3-3 bizhub PRESS 2250P Contents-1 - Konica Minolta bizhub PRESS 2250P | bizhub PRESS 2250P Security User Guide - Page 4
1 Introduction - Konica Minolta bizhub PRESS 2250P | bizhub PRESS 2250P Security User Guide - Page 5
Troubleshooting Guide This User's Guide is intended for users ranging from those using this machine for the first time to administrators. This guide provides those users to manage security functions. Should you experience any problems, please contact your service representative. bizhub PRESS 2250P - Konica Minolta bizhub PRESS 2250P | bizhub PRESS 2250P Security User Guide - Page 6
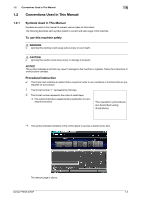
Used in This Manual 1 1.2 Conventions Used in This Manual 1.2.1 Symbols Used in This Manual Symbols are used in this manual to express various instruction. % This symbol indicates transition of the control panel to access a desired menu item. The relevant page is shown. bizhub PRESS 2250P - Konica Minolta bizhub PRESS 2250P | bizhub PRESS 2250P Security User Guide - Page 7
in This Manual 1 d Reference This symbol indicates a reference. View the reference as required. Key symbols [ ] Key names on the touch panel or computer screen, or a name of user's guide are indicated the paper size with the length (X) being shorter than the width (Y). bizhub PRESS 2250P 1-4 - Konica Minolta bizhub PRESS 2250P | bizhub PRESS 2250P Security User Guide - Page 8
2 Security Functions - Konica Minolta bizhub PRESS 2250P | bizhub PRESS 2250P Security User Guide - Page 9
: A64F001-00P1-G00-10 2.1.2 About the ROM Version Display Function The version of bizhub PRESS 2250P control software mentioned above can be checked by the ROM version display function in the customer engineer (CE) service mode. When the ROM version display function is used, the version of control - Konica Minolta bizhub PRESS 2250P | bizhub PRESS 2250P Security User Guide - Page 10
bizhub PRESS 2250P has two security modes. Normal mode Use this mode when the machine is used by a single person and there is low possibility of illicit access or operation. This mode is already set as factory default. To use the machine in normal mode, please refer to the user's guides provided - Konica Minolta bizhub PRESS 2250P | bizhub PRESS 2250P Security User Guide - Page 11
use the Enhanced Security mode after confirming that a service contract has been signed with a customer engineer (CE). Clearly state in the service contract that the customer engineer (CE) will not a wrong password is entered for one of the 5 passwords mentioned above. bizhub PRESS 2250P 2-4 - Konica Minolta bizhub PRESS 2250P | bizhub PRESS 2250P Security User Guide - Page 12
controller and printer driver which support the Enhanced Security mode, contact your service representative. For the operation procedure of the printer controller or printer driver, please refer to the user's guide machine bizhub PRESS 2250P 2-5 - Konica Minolta bizhub PRESS 2250P | bizhub PRESS 2250P Security User Guide - Page 13
with invalid data when the transmission is com- pleted. - If the administrator issues a delete order for each box, it will be overwritten with invalid data. bizhub PRESS 2250P 2-6 - Konica Minolta bizhub PRESS 2250P | bizhub PRESS 2250P Security User Guide - Page 14
the machine. Ask your service representative to set up refer to the User's Guide - Main Body. To protect pressed, the warning message [Incorrect password / Please wait for a while] will appear, and no key will work for five seconds. Enter the correct password after five seconds. bizhub PRESS 2250P - Konica Minolta bizhub PRESS 2250P | bizhub PRESS 2250P Security User Guide - Page 15
2.3 Administrator Security Functions 2 The Administrator Setting Menu Screen will be displayed. 4 Press [07 Security Setting]. 5 Press [03 Enhanced Security Mode]. bizhub PRESS 2250P 2-8 - Konica Minolta bizhub PRESS 2250P | bizhub PRESS 2250P Security User Guide - Page 16
Security Functions 2 6 Turn ON/OFF the Enhanced Security mode. % Select [ON] to activate the Enhanced Security mode, or select [OFF] to deactivate it. 7 Press [OK]. % A dialog to confirm the change to the Enhanced Security mode setting will be displayed. % Press [Yes]. bizhub PRESS 2250P 2-9 - Konica Minolta bizhub PRESS 2250P | bizhub PRESS 2250P Security User Guide - Page 17
in progress / After cooling, power off automatically] is displayed. NOTICE bizhub PRESS 2250P has two main power switches in total; one for each of Main Main Body 2 kept OFF, the machine turns into the Call for Service state. 2.3.2 HDD Lock Password With the Enhanced Security mode activated, you - Konica Minolta bizhub PRESS 2250P | bizhub PRESS 2250P Security User Guide - Page 18
characters/symbols are entered and [OK] is pressed, the warning message [Incorrect password / Please wait for a while] will appear, and no key will work for five seconds. Enter the correct password after five seconds. The Administrator Setting Menu Screen will be displayed. bizhub PRESS 2250P 2-11 - Konica Minolta bizhub PRESS 2250P | bizhub PRESS 2250P Security User Guide - Page 19
2.3 Administrator Security Functions 2 4 Press [07 Security Setting]. 5 Press [02 HDD Management Setting]. The HDD Management Setting Menu Screen will be displayed. 6 Press [03 HDD Lock Password]. The HDD Lock Password Screen will be displayed. bizhub PRESS 2250P 2-12 - Konica Minolta bizhub PRESS 2250P | bizhub PRESS 2250P Security User Guide - Page 20
the upper left corner of the Utility Menu Screen. 8 If the authentication has succeeded, press [New Password] to enter a new password. NOTICE Do not use your name, modes provided on the screen. 1 Press Utility/Counter on the control panel to display the Utility Menu Screen. bizhub PRESS 2250P 2-13 - Konica Minolta bizhub PRESS 2250P | bizhub PRESS 2250P Security User Guide - Page 21
characters and symbols, then press [OK]. % The pressed, the warning message [Incorrect password / Please wait for a while] will appear, and no key will work for five seconds. Enter the correct password after five seconds. The Administrator Setting Menu Screen will be displayed. bizhub PRESS 2250P - Konica Minolta bizhub PRESS 2250P | bizhub PRESS 2250P Security User Guide - Page 22
2.3 Administrator Security Functions 2 4 Press [07 Security Setting]. 5 Press [02 HDD Management Setting]. The HDD Management Setting Menu Screen will be displayed. 6 Press [04 Delete Temp. Data Setting]. The Delete Temporary Data Setting Screen will be displayed. bizhub PRESS 2250P 2-15 - Konica Minolta bizhub PRESS 2250P | bizhub PRESS 2250P Security User Guide - Page 23
stored on HDD. When you choose to delete all the data, select one of the 8 erase modes provided. 1 Press Utility/Counter on the control panel to display the Utility Menu Screen. % To use this function of deleting all the data, please contact your service representative. bizhub PRESS 2250P 2-16 - Konica Minolta bizhub PRESS 2250P | bizhub PRESS 2250P Security User Guide - Page 24
characters and symbols, then press [OK]. % The pressed, the warning message [Incorrect password / Please wait for a while] will appear, and no key will work for five seconds. Enter the correct password after five seconds. The Administrator Setting Menu Screen will be displayed. bizhub PRESS 2250P - Konica Minolta bizhub PRESS 2250P | bizhub PRESS 2250P Security User Guide - Page 25
2.3 Administrator Security Functions 2 4 Press [07 Security Setting]. 5 Press [02 HDD Management Setting]. The HDD Management Setting Menu Screen will be displayed. 6 Press [05 Delete All Data Setting]. The Delete All Data Setting Screen will be displayed. bizhub PRESS 2250P 2-18 - Konica Minolta bizhub PRESS 2250P | bizhub PRESS 2250P Security User Guide - Page 26
's Guide - Main Body for details of the erase mode. NOTICE If you delete data using the [Execute Deletion] key, no data on HDD can be used again. All the necessary data should be moved to another device beforehand. 8 Press [Return] on the Delete All Data Setting Screen. bizhub PRESS 2250P 2-19 - Konica Minolta bizhub PRESS 2250P | bizhub PRESS 2250P Security User Guide - Page 27
the number of accounts to be distributed according to your needs. Please refer to the User's Guide - Main Body for details. 2.4.1 Adding User Registration Follow the procedure below to setup a new entered will appear as the same number of asterisks "*" on the screen. bizhub PRESS 2250P 2-20 - Konica Minolta bizhub PRESS 2250P | bizhub PRESS 2250P Security User Guide - Page 28
Mode 2 The Administrator Setting Menu Screen will be displayed. 4 Press [03 User Auth./Account Track]. The User Auth./Account Track Menu Screen will be displayed. 5 Press [02 User Authentication Setting]. The User Authentication Setting Menu Screen will be displayed. bizhub PRESS 2250P 2-21 - Konica Minolta bizhub PRESS 2250P | bizhub PRESS 2250P Security User Guide - Page 29
Security Mode 2 6 Press [02 User Registration]. The User Registration Screen will be displayed. 7 Press [Add]. The User Registration - Add/Change Screen will be displayed. 8 Press [User No.]. Use the touch panel keypad, [,], or [+] to enter the desired user number. bizhub PRESS 2250P 2-22 - Konica Minolta bizhub PRESS 2250P | bizhub PRESS 2250P Security User Guide - Page 30
for the user name. The user name cannot be duplicated. Press [OK] to return to the User Registration - Add/Change Screen. 10 Press [Password]. The Password Setting Screen will be displayed. Enter than 8 characters cannot be used when the Enhanced Security mode is activated. bizhub PRESS 2250P 2-23 - Konica Minolta bizhub PRESS 2250P | bizhub PRESS 2250P Security User Guide - Page 31
to 320 alphanumeric characters including symbols for the E-mail address. Press [OK] to return to the User Registration - Add/Change Screen. 12 Press [Account Name]. The Account Name Screen will be displayed. . Select one of the registered accounts provided on the screen. bizhub PRESS 2250P 2-24 - Konica Minolta bizhub PRESS 2250P | bizhub PRESS 2250P Security User Guide - Page 32
], press [Enable] on the right, and then press [Maximum]. % Use the touch panel keypad, [,], or [+] to enter the desired number of allowed prints. Available range for the allowance is from 1 to 99,999,999. % Press [OK] twice to return to the User Registration - Add/Change Screen. bizhub PRESS 2250P - Konica Minolta bizhub PRESS 2250P | bizhub PRESS 2250P Security User Guide - Page 33
. % If a wrong password or fewer than 8 alphanumeric characters/symbols are entered and [OK] is pressed, the warning message [Incorrect password / Please wait for a while] will appear, and no key will work for five seconds. Enter the correct password after five seconds. bizhub PRESS 2250P 2-26 - Konica Minolta bizhub PRESS 2250P | bizhub PRESS 2250P Security User Guide - Page 34
Mode 2 The Administrator Setting Menu Screen will be displayed. 4 Press [03 User Auth./Account Track]. The User Auth./Account Track Menu Screen will be displayed. 5 Press [02 User Authentication Setting]. The User Authentication Setting Menu Screen will be displayed. bizhub PRESS 2250P 2-27 - Konica Minolta bizhub PRESS 2250P | bizhub PRESS 2250P Security User Guide - Page 35
]. The User Registration Screen will be displayed. 7 Select the key with the user number and user name to be changed. 8 Press [Change] to display the User Registration - Add/Change Screen. % The user number cannot be changed. 9 To change the user name, press [User Name]. bizhub PRESS 2250P 2-28 - Konica Minolta bizhub PRESS 2250P | bizhub PRESS 2250P Security User Guide - Page 36
step 9. % Enter 8 to 64 alphanumeric characters for the user password (the alphabetic characters are casesensitive). % The current password cannot be used again as a new password. Press [OK] to return to the User Registration - Add/Change Screen. bizhub PRESS 2250P 2-29 - Konica Minolta bizhub PRESS 2250P | bizhub PRESS 2250P Security User Guide - Page 37
User Registration - Add/Change Screen. 14 To change the allowance, press [Max. Allowance Set]. Change the maximum number of prints to be allowed for the user after a successful authentication. % In [Max. Allowance Set], press [Enable] on the right, and then press [Maximum]. bizhub PRESS 2250P 2-30 - Konica Minolta bizhub PRESS 2250P | bizhub PRESS 2250P Security User Guide - Page 38
15 Press [Print] or [Recall] on the right of [Usable Function] to specify which functions the user is allowed to use. 16 Press [OK]. % When settings are completed, press [Return] on the User Registration Screen. The User Authentication Setting Menu Screen will be restored. bizhub PRESS 2250P 2-31 - Konica Minolta bizhub PRESS 2250P | bizhub PRESS 2250P Security User Guide - Page 39
characters/symbols are entered and [OK] is pressed, the warning message [Incorrect password / Please wait for a while] will appear, and no key will work for five seconds. Enter the correct password after five seconds. The Administrator Setting Menu Screen will be displayed. bizhub PRESS 2250P 2-32 - Konica Minolta bizhub PRESS 2250P | bizhub PRESS 2250P Security User Guide - Page 40
User Auth./Account Track]. The User Auth./Account Track Menu Screen will be displayed. 5 Press [02 User Authentication Setting]. The User Authentication Setting Menu Screen will be displayed. 6 Press [02 User Registration]. The User Registration Screen will be displayed. bizhub PRESS 2250P 2-33 - Konica Minolta bizhub PRESS 2250P | bizhub PRESS 2250P Security User Guide - Page 41
assigned by the administrator for security. NOTICE To change a user password without user authentication made, the user name specified with that password should be entered. 1 Press Utility/Counter on the control panel to display the Utility Menu Screen. bizhub PRESS 2250P 2-34 - Konica Minolta bizhub PRESS 2250P | bizhub PRESS 2250P Security User Guide - Page 42
Mode 2 2 Press [01 System Setting]. The System Setting Menu Screen will be displayed. 3 Press [08 Change User Password]. The screen to change the user password will be displayed. 4 Press [User Name], then enter the user name specified with that password. Press [OK]. bizhub PRESS 2250P 2-35 - Konica Minolta bizhub PRESS 2250P | bizhub PRESS 2250P Security User Guide - Page 43
easily figure out. % The current password cannot be used again as a new password. 7 Enter the new password again for confirmation. % Press [Input Confirmation] to enter the same password as above. Press [OK]. 8 Press [OK]. The System Setting Menu Screen will be displayed. bizhub PRESS 2250P 2-36 - Konica Minolta bizhub PRESS 2250P | bizhub PRESS 2250P Security User Guide - Page 44
2.4 User Authentication in Enhanced Security Mode 2 9 Press [Exit]. The screen resumes the one previously displayed before the Utility Menu Screen. bizhub PRESS 2250P 2-37 - Konica Minolta bizhub PRESS 2250P | bizhub PRESS 2250P Security User Guide - Page 45
User Name Setting Screen will be displayed. 2 Enter the specified user name, and press [OK]. % You may enter up to 64 alphanumeric characters including symbols for the user name. The alphabetic characters are case-sensitive. The User Authentication Screen will be restored. bizhub PRESS 2250P 2-38 - Konica Minolta bizhub PRESS 2250P | bizhub PRESS 2250P Security User Guide - Page 46
be displayed. Press [OK] on the dialog, and then enter the correct password. The User Authentication Screen will be restored. 5 Press [OK]. The Recall Screen will be displayed. 6 Select the desired folder and press [To User Box]. The list of user boxes will be displayed. bizhub PRESS 2250P 2-39 - Konica Minolta bizhub PRESS 2250P | bizhub PRESS 2250P Security User Guide - Page 47
(1st Sheet)], or [Wait], and press [Print]. % [Proof (1st Sheet)] can be displayed by using the Utility menu. It does not appear with the initial settings. Please refer to the User's Guide - Main Body for details. 11 Use the control panel keypad to enter the print quantity. bizhub PRESS 2250P 2-40 - Konica Minolta bizhub PRESS 2250P | bizhub PRESS 2250P Security User Guide - Page 48
selected file will be deleted and the file selection screen will be restored. 16 When all operations are completed, press Access on the control panel to release the authentication. The User Authentication Screen will be displayed and it will no longer accept any operation. bizhub PRESS 2250P 2-41 - Konica Minolta bizhub PRESS 2250P | bizhub PRESS 2250P Security User Guide - Page 49
User Name Setting Screen will be displayed. 2 Enter the specified user name, and press [OK]. % You may enter up to 64 alphanumeric characters including symbols for the user name. The alphabetic characters are case-sensitive. The User Authentication Screen will be restored. bizhub PRESS 2250P 2-42 - Konica Minolta bizhub PRESS 2250P | bizhub PRESS 2250P Security User Guide - Page 50
Authentication failure] will be displayed. Press [OK] on the dialog, and then enter the correct password. The User Authentication Screen will be restored. 5 Press [OK]. The Recall Screen will be displayed. 6 Press [Secure Folder]. The list of secure boxes will be displayed. bizhub PRESS 2250P 2-43 - Konica Minolta bizhub PRESS 2250P | bizhub PRESS 2250P Security User Guide - Page 51
the desired secure file. 10 Select [Auto], [Proof], [Proof (1st Sheet)], or [Wait], and press [Print]. % [Proof (1st Sheet)] can be displayed by using the Utility menu. It does not appear with the initial settings. Please refer to the User's Guide - Main Body for details. bizhub PRESS 2250P 2-44 - Konica Minolta bizhub PRESS 2250P | bizhub PRESS 2250P Security User Guide - Page 52
the following keys: % Press [Yes] to continue recalling. % Press [No] to exit. 14 When all operations are completed, press Access on the control panel to release the authentication. The User Authentication Screen will be displayed and it will no longer accept any operation. bizhub PRESS 2250P 2-45 - Konica Minolta bizhub PRESS 2250P | bizhub PRESS 2250P Security User Guide - Page 53
3 Index - Konica Minolta bizhub PRESS 2250P | bizhub PRESS 2250P Security User Guide - Page 54
control software ......2-2 T Turning Enhanced Security mode ON/OFF 2-6 Turning the Enhanced Security mode ON/OFF ..........2-7 U USB port functions 2-5 User authentication in Enhanced Security mode ......2-20 bizhub PRESS 2250P 3-2 - Konica Minolta bizhub PRESS 2250P | bizhub PRESS 2250P Security User Guide - Page 55
, 2-42 User No 2-22 User Registration 2-22, 2-28, 2-33 Utility/Counter ... 2-7, 2-10, 2-13, 2-16, 2-20, 2-26, 2-32, 2-34 W Wait 2-40, 2-44 Y Yes 2-9, 2-34, 2-41, 2-45 bizhub PRESS 2250P 3-3 - Konica Minolta bizhub PRESS 2250P | bizhub PRESS 2250P Security User Guide - Page 56
- Konica Minolta bizhub PRESS 2250P | bizhub PRESS 2250P Security User Guide - Page 57
http://konicaminolta.com
-
 1
1 -
 2
2 -
 3
3 -
 4
4 -
 5
5 -
 6
6 -
 7
7 -
8
-
9
-
10
-
11
-
12
-
13
-
14
-
15
-
16
-
17
-
18
-
19
-
20
-
21
-
22
-
23
-
24
-
25
-
26
-
27
-
28
-
29
-
30
-
31
-
32
-
33
-
34
-
35
-
36
-
37
-
38
-
39
-
40
-
41
-
42
-
43
-
44
-
45
-
46
-
47
-
48
-
49
-
50
-
51
-
52
-
53
-
54
-
55
-
56
-
57
 |
 |