Konica Minolta bizhub PRESS C6000 bizhub PRESS C6000/C7000 IC-601 Network Scan - Page 51
Registering the SMB Server
 |
View all Konica Minolta bizhub PRESS C6000 manuals
Add to My Manuals
Save this manual to your list of manuals |
Page 51 highlights
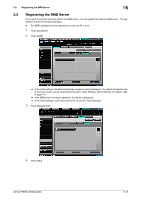
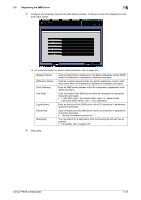
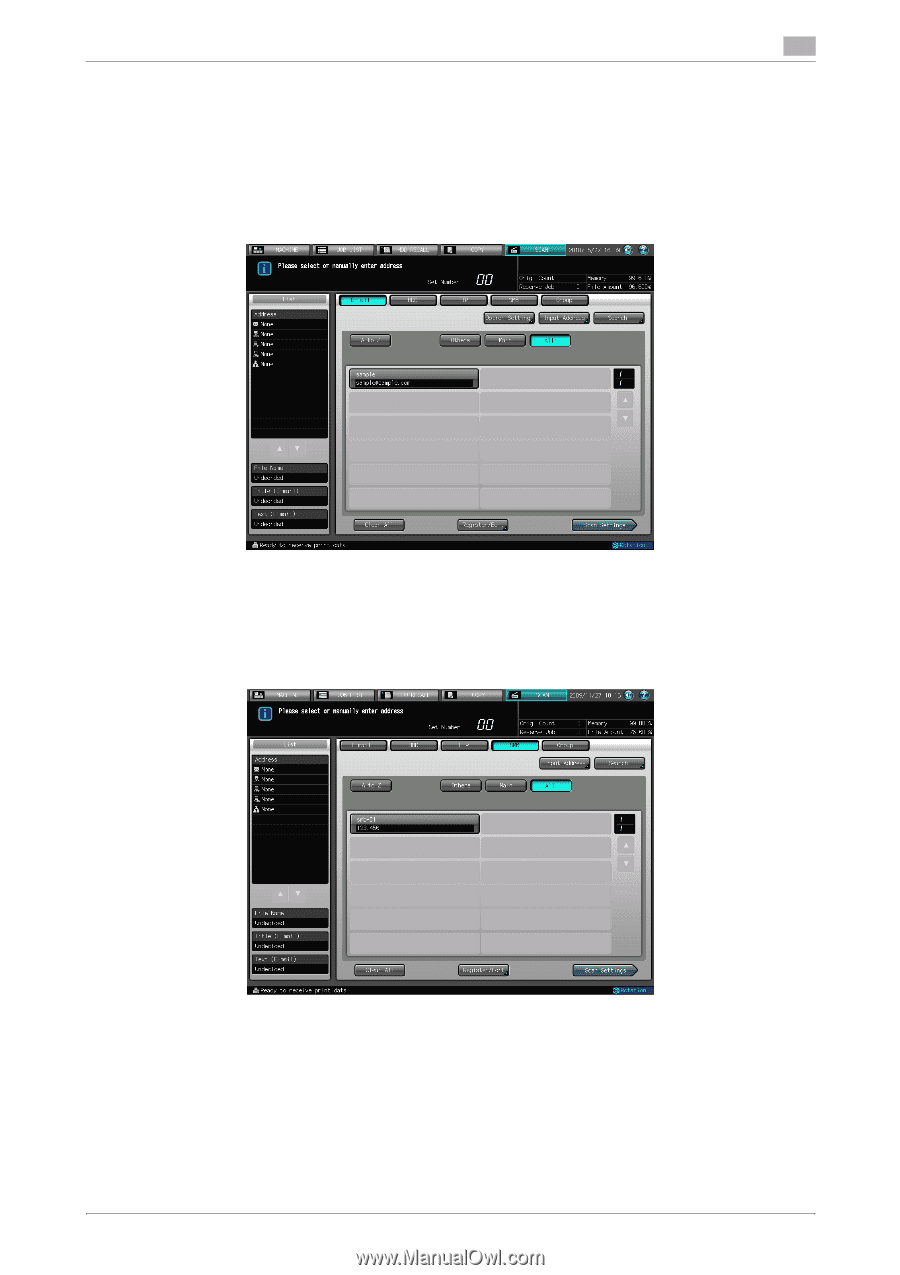
5.5 Registering the SMB Server 5 5.5 Registering the SMB Server If you want to send the scanned data to the SMB server, you can register the address SMB server. The registration is done in the following steps. 0 For SMB, addresses can be registered as many as 30 in sum. 1 Press [SCAN] tab. 2 Press [SMB]. % In the initial settings, the Select Addresses screen (E-mail) is displayed. The default destination tab of the scan screen can be set at [Utility/Counter] - [User Setting] - [Scan Setting]. For details, refer to page 7-6. % If the SMB server is already registered, the Name is displayed. % In the initial settings, such index keys as [A-C] and [D-F] are displayed. 3 Press [Register/Edit]. 4 Press [Add]. bizhub PRESS C7000/C6000 5-15
-
 1
1 -
2
-
3
-
4
-
5
-
6
-
7
-
8
-
9
-
10
-
11
-
12
-
13
-
14
-
15
-
16
-
17
-
18
-
19
-
20
-
21
-
22
-
23
-
24
-
25
-
26
-
27
-
28
-
29
-
30
-
31
-
32
-
33
-
34
-
35
-
36
-
37
-
38
-
39
-
40
-
41
-
42
-
43
-
44
-
45
-
 46
46 -
 47
47 -
 48
48 -
 49
49 -
 50
50 -
 51
51 -
 52
52 -
 53
53 -
 54
54 -
 55
55 -
 56
56 -
57
-
58
-
59
-
60
-
61
-
62
-
63
-
64
-
65
-
66
-
67
-
68
-
69
-
70
-
71
-
72
-
73
-
74
-
75
-
76
-
77
-
78
-
79
-
80
-
81
-
82
-
83
-
84
-
85
-
86
-
87
-
88
-
89
-
90
-
91
-
92
-
93
-
94
-
95
-
96
-
97
-
98
-
99
-
100
-
101
-
102
-
103
-
104
-
105
-
106
-
107
-
108
-
109
-
110
-
111
-
112
-
113
-
114
-
115
-
116
-
117
-
118
-
119
 |
 |
bizhub PRESS C7000/C6000
5-15
5.5
Registering the SMB Server
5
5.5
Registering the SMB Server
If you want to send the scanned data to the SMB server, you can register the address SMB server.
The reg-
istration is done in the following steps.
0
For SMB, addresses can be registered as many as 30 in sum.
1
Press [SCAN] tab.
2
Press [SMB].
%
In the initial settings, the Select Addresses screen (E-mail) is displayed.
The default destination tab
of the scan screen can be set at [Utility/Counter] - [User Setting] - [Scan Setting]. For details, refer
to page 7-6.
%
If the SMB server is already registered, the Name is displayed.
%
In the initial settings, such index keys as [A-C] and [D-F] are displayed.
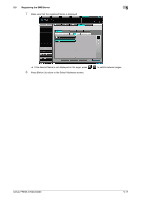
3
Press [Register/Edit].
4
Press [Add].