Kyocera FS-1028MFP FS-1028MFP/1128MFP Setup Guide Rev-1 - Page 24
IMPORTANT, scannerdata Properties, Share this folder, Permissions, Permissions for scannerdata
 |
View all Kyocera FS-1028MFP manuals
Add to My Manuals
Save this manual to your list of manuals |
Page 24 highlights
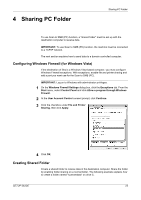
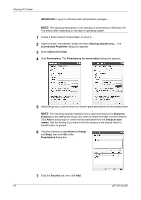
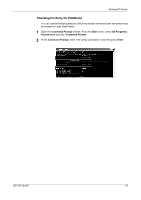
Sharing PC Folder IMPORTANT: Log on to Windows with administrator privileges. NOTE: The following description is one example of screenshots of Windows XP. The details differ depending on the type of operating system. 1 Create a folder named "scannerdata" on drive C. 2 Right-click the "scannerdata" folder and select Sharing and Security.... The scannerdata Properties dialog box appears. 3 Select Share this folder. 4 Click Permissions. The Permissions for scannerdata dialog box appears. 5 Select the group or user to whom you want to grant permissions for the shared folder. NOTE: The following example explains how to grant permissions for Everyone. Everyone is the setting that allows any users to share the folder over the network. Click Add to add groups or users that are selectable from the Group or user names. Use this setting if you want to limit the access to the shared folder to specific users or groups. 6 Click the checkbox under Allow for Change and Read, then click OK of the Permissions dialog box. 7 Click the Security tab, then click Add. 24 SETUP GUIDE
-
 1
1 -
2
-
3
-
4
-
5
-
6
-
7
-
8
-
9
-
10
-
11
-
12
-
13
-
14
-
15
-
16
-
17
-
18
-
 19
19 -
 20
20 -
 21
21 -
 22
22 -
 23
23 -
 24
24 -
 25
25 -
 26
26 -
 27
27 -
 28
28 -
 29
29 -
30
-
31
-
32
-
33
-
34
-
35
-
36
 |
 |
