Lenovo ThinkCentre M51e (English) User guide - Page 34
master/slave
 |
View all Lenovo ThinkCentre M51e manuals
Add to My Manuals
Save this manual to your list of manuals |
Page 34 highlights
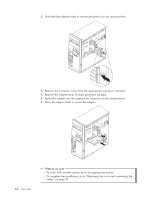
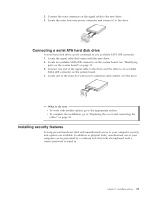
v If you are installing an additional optical drive, set it as a slave device. v If there is a combination of optical and parallel ATA hard disk drives in bays 1 and 2, set the hard disk drive as a master device and the optical drive as a slave device. Refer to the documentation that comes with your drive for master/slave jumper information. 6. For a 5.25-inch drive, install a retainer bracket on the side of the drive. 7. For a 3.5-inch drive, install the drive into the Universal Adapter Bracket, 5.25 to 3.5-inch. 8. Install the drive into the bay until it snaps into position. Note: If you are installing the adapter bracket, install the screws that secure the bracket in the bay. 9. Continue at "Connecting drives" on page 20. Installing a hard disk drive in bay 3 1. Remove the computer cover. See "Removing the cover" on page 10. 18 User Guide
-
 1
1 -
2
-
3
-
4
-
5
-
6
-
7
-
8
-
9
-
10
-
11
-
12
-
13
-
14
-
15
-
16
-
17
-
18
-
19
-
20
-
21
-
22
-
23
-
24
-
25
-
26
-
27
-
28
-
 29
29 -
 30
30 -
 31
31 -
 32
32 -
 33
33 -
 34
34 -
 35
35 -
 36
36 -
 37
37 -
 38
38 -
 39
39 -
40
-
41
-
42
-
43
-
44
-
45
-
46
-
47
-
48
-
49
-
50
-
51
-
52
-
53
-
54
-
55
-
56
-
57
-
58
-
59
-
60
-
61
-
62
 |
 |
