Lenovo ThinkCentre M51e (English) User guide - Page 36
Connecting, drives, first, optical, drive, additional, parallel
 |
View all Lenovo ThinkCentre M51e manuals
Add to My Manuals
Save this manual to your list of manuals |
Page 36 highlights
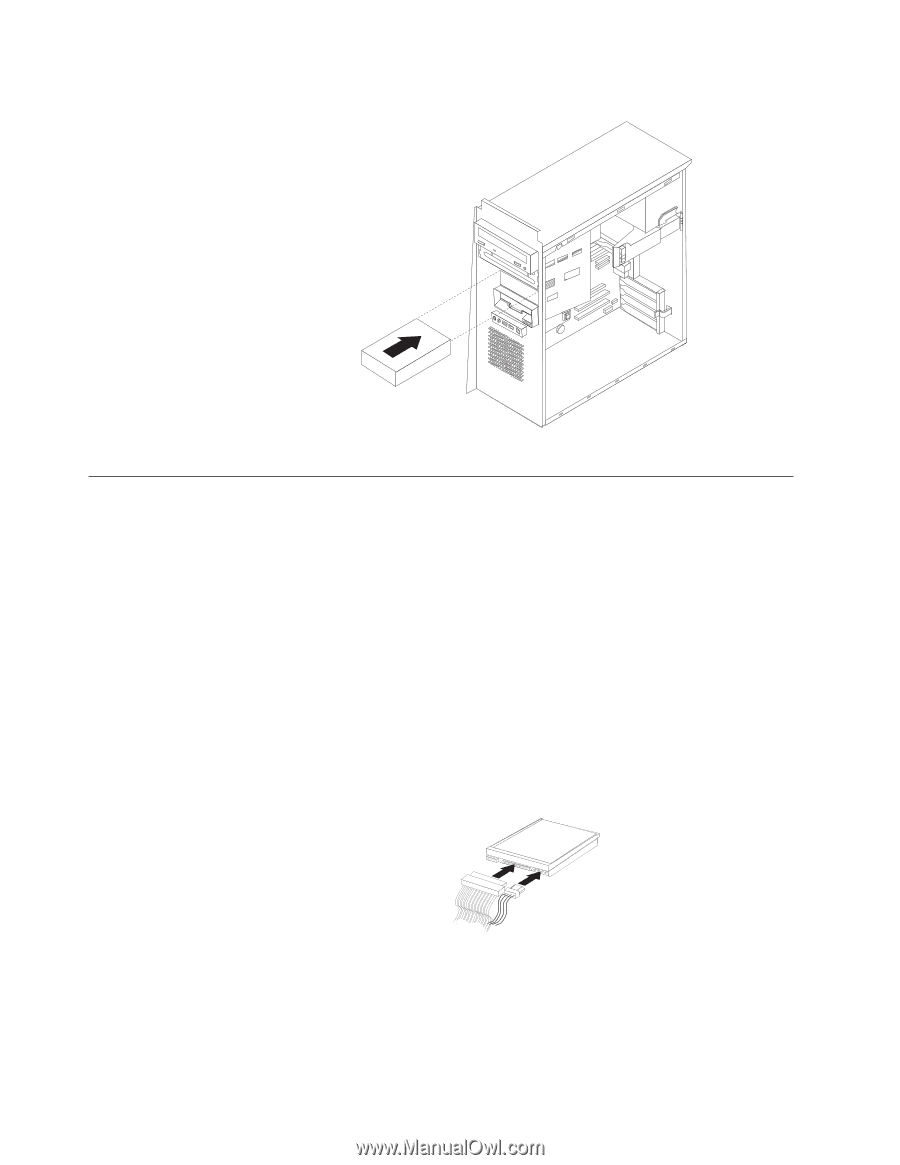
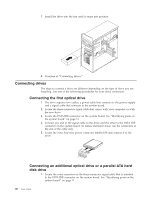
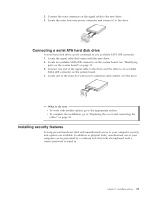
7. Install the drive into the bay until it snaps into position. 8. Continue at "Connecting drives." Connecting drives The steps to connect a drive are different depending on the type of drive you are installing. Use one of the following procedures for your drive connection. Connecting the first optical drive 1. The drive requires two cables; a power cable that connects to the power supply and a signal cable that connects to the system board. 2. Locate the three-connector signal cable that comes with your computer or with the new drive. 3. Locate the PATA IDE connector on the system board. See "Identifying parts on the system board" on page 11. 4. Connect one end of the signal cable to the drive and the other to the PATA IDE connector on the system board. To reduce electronic noise, use the connectors at the end of the cable only. 5. Locate the extra four-wire power connector labelled P4 and connect it to the drive. Connecting an additional optical drive or a parallel ATA hard disk drive 1. Locate the extra connector on the three-connector signal cable that is attached to the PATA IDE connector on the system board. See "Identifying parts on the system board" on page 11. 20 User Guide
-
 1
1 -
2
-
3
-
4
-
5
-
6
-
7
-
8
-
9
-
10
-
11
-
12
-
13
-
14
-
15
-
16
-
17
-
18
-
19
-
20
-
21
-
22
-
23
-
24
-
25
-
26
-
27
-
28
-
29
-
30
-
 31
31 -
 32
32 -
 33
33 -
 34
34 -
 35
35 -
 36
36 -
 37
37 -
 38
38 -
 39
39 -
 40
40 -
 41
41 -
42
-
43
-
44
-
45
-
46
-
47
-
48
-
49
-
50
-
51
-
52
-
53
-
54
-
55
-
56
-
57
-
58
-
59
-
60
-
61
-
62
 |
 |