Lenovo ThinkCentre M55 User Manual - Page 54
Erasing, forgotten, password, clearing
 |
View all Lenovo ThinkCentre M55 manuals
Add to My Manuals
Save this manual to your list of manuals |
Page 54 highlights
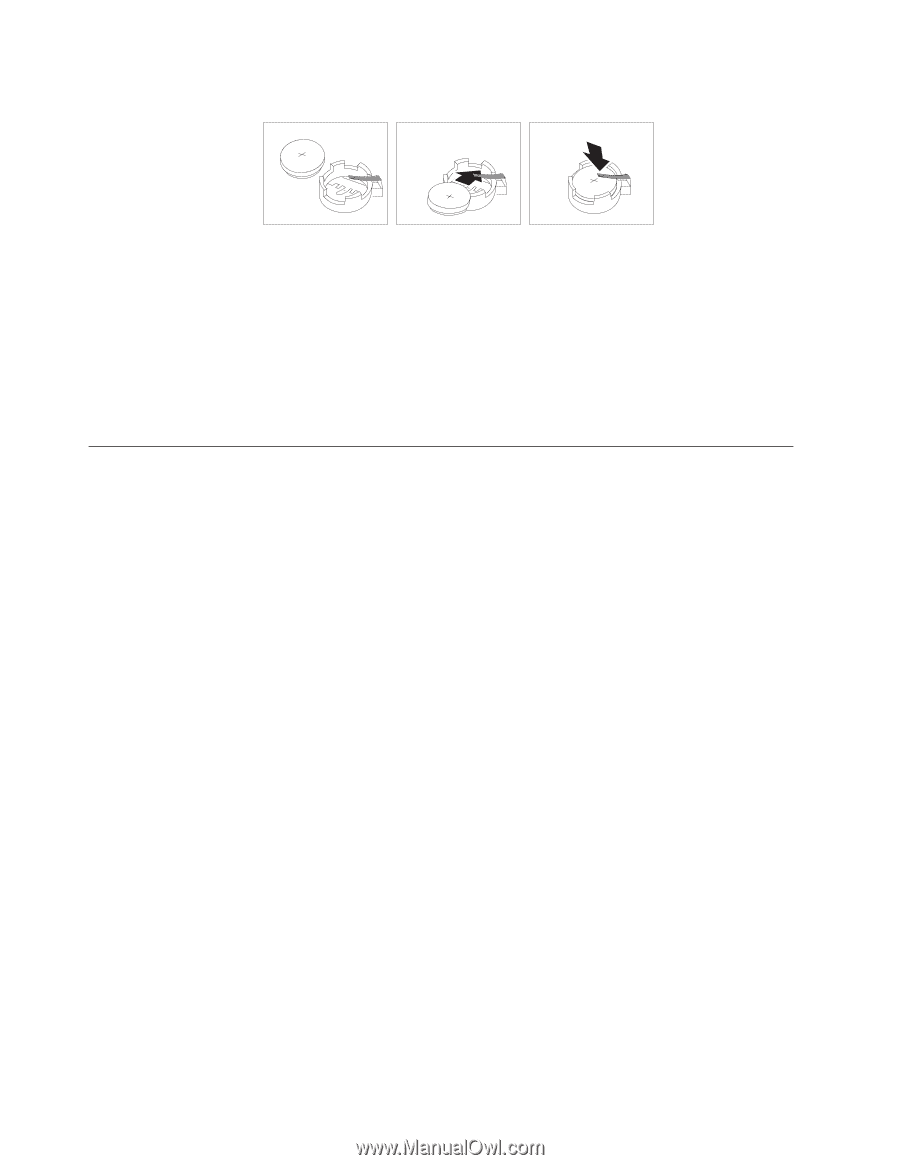
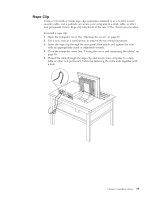
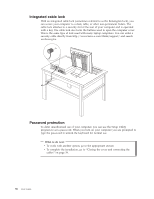
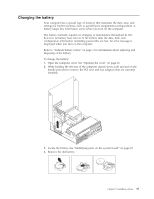
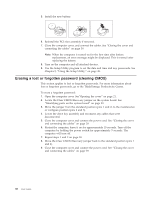
5. Install the new battery. 6. Reinstall the PCI riser assembly if removed. 7. Close the computer cover, and connect the cables. See "Closing the cover and connecting the cables" on page 39. Note: When the computer is turned on for the first time after battery replacement, an error message might be displayed. This is normal after replacing the battery. 8. Turn on the computer and all attached devices. 9. Use the Setup Utility program to set the date and time and any passwords. See Chapter 5, "Using the Setup Utility," on page 49. Erasing a lost or forgotten password (clearing CMOS) This section applies to lost or forgotten passwords. For more information about lost or forgotten passwords, go to the ThinkVantage Productivity Center. To erase a forgotten password: 1. Open the computer cover. See"Opening the cover" on page 21. 2. Locate the Clear CMOS/Recovery jumper on the system board. See "Identifying parts on the system board" on page 23. 3. Move the jumper from the standard position (pins 1 and 2) to the maintenance or configure position (pins 2 and 3). 4. Lower the drive bay assembly and reconnect any cables that were disconnected. 5. Close the computer cover and connect the power cord. See "Closing the cover and connecting the cables" on page 39. 6. Restart the computer, leave it on for approximately 10 seconds. Turn off the computer by holding the power switch for approximately 5 seconds. The computer will turn off. 7. Repeat steps 1 and 2 on page 38. 8. Move the Clear CMOS/Recovery jumper back to the standard position (pins 1 and 2). 9. Close the computer cover and connect the power cord. See "Closing the cover and connecting the cables" on page 39. 38 User Guide
-
 1
1 -
2
-
3
-
4
-
5
-
6
-
7
-
8
-
9
-
10
-
11
-
12
-
13
-
14
-
15
-
16
-
17
-
18
-
19
-
20
-
21
-
22
-
23
-
24
-
25
-
26
-
27
-
28
-
29
-
30
-
31
-
32
-
33
-
34
-
35
-
36
-
37
-
38
-
39
-
40
-
41
-
42
-
43
-
44
-
45
-
46
-
47
-
48
-
 49
49 -
 50
50 -
 51
51 -
 52
52 -
 53
53 -
 54
54 -
 55
55 -
 56
56 -
 57
57 -
 58
58 -
 59
59 -
60
-
61
-
62
-
63
-
64
-
65
-
66
-
67
-
68
-
69
-
70
-
71
-
72
-
73
-
74
-
75
-
76
-
77
-
78
-
79
-
80
-
81
-
82
-
83
-
84
-
85
-
86
-
87
-
88
-
89
-
90
-
91
-
92
-
93
-
94
 |
 |