Lexmark E312L User's Guide
Lexmark E312L - Optra B/W Laser Printer Manual
 |
View all Lexmark E312L manuals
Add to My Manuals
Save this manual to your list of manuals |
Lexmark E312L manual content summary:
- Lexmark E312L | User's Guide - Page 1
Optra E312 User's Guide June 2000 www.lexmark.com - Lexmark E312L | User's Guide - Page 2
or typographical errors. Changes are services, except those expressly designated by the manufacturer, are the user's responsibility. Lexmark, MarkVision and Optra are trademarks of Lexmark printer commands (language) and functions included in its printer products. This printer is intended by Lexmark - Lexmark E312L | User's Guide - Page 3
- Lexmark E312L | User's Guide - Page 4
the box 1 Installing the print cartridge 2 Connecting the printer to your computer 4 Loading paper 10 Printing a test page 12 Attaching a new operator panel overlay 13 Installing memory 14 2 Printer drivers 21 Printer drivers 21 MarkVision 23 3 Paper handling 25 Paper types and sizes 26 - Lexmark E312L | User's Guide - Page 5
other media in the manual sheet feeder 33 Clearing paper jams 34 4 Troubleshooting 37 Indicator lights 39 5 Supplies 63 Print cartridge maintenance 63 Appendix A: Printer specifications 65 Printer features 65 Printer dimensions 66 Appendix B: Advanced troubleshooting 67 Appendix C: Safety - Lexmark E312L | User's Guide - Page 6
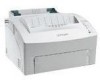
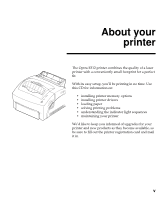
E312 printer combines the quality of a laser printer with a conveniently small footprint for a perfect fit. With its easy setup, you'll be printing in no time. Use this CD for information on: • installing printer memory options • installing printer drivers • loading paper • solving printing problems - Lexmark E312L | User's Guide - Page 7
the Lexmark™ Optra™ E312 and E312L printers. The differences between these two models are outlined in the following table. Note:Some sections in this printer manual may not apply to the E312L model. Item Base memory Maximum memory Emulations Machine type and model Ship with print cartridge yield - Lexmark E312L | User's Guide - Page 8
Performance The Optra E312 printer prints up to 10 pages per minute for quick job turnaround. It comes with 4MB of memory, expandable to 68MB to print complex jobs quickly. You can also install an optional flash memory card to store forms, macros and downloaded fonts. PostScript Level 2 and PCL 6 - Lexmark E312L | User's Guide - Page 9
and card stock. 5 Paper support Stack media in the paper output bin. 6 Paper guides Adjust the width of the paper in the manual sheet feeder. 7 Indicator lights Check the status of your printer. For information, see Printer status information. 8 Paper output bin Stack printed documents, face - Lexmark E312L | User's Guide - Page 10
view 10 Printer cable connector 13 Power switch 11 USB connector 12 Power cord connector Use the: When you want to: 10 Printer cable connector Connect your computer to the printer's parallel port with a parallel interface cable. 11 USB connector Connect your computer to the printer's USB port - Lexmark E312L | User's Guide - Page 11
to the user defaults, all print job data is lost. The different light sequences are explained in the Troubleshooting chapter. Use MarkVision or your software application driver to change printer settings such as paper source, paper size and orientation. To set up your printer, go to the next chapter - Lexmark E312L | User's Guide - Page 12
of information about your printer or about Lexmark products and services. Online documents The Drivers, MarkVision and Utilities CD that was shipped with your printer contains several online documents. Refer to the booklet that came with the CD for launching instructions. Once you have launched - Lexmark E312L | User's Guide - Page 13
xii - Lexmark E312L | User's Guide - Page 14
and packing materials in case you need to repack the printer for service or storage. 2 Make sure you have the items listed below: - Setup Guide and printer registration card - printer - print cartridge - power cord - User's Guide CD - Drivers, MarkVision and Utilities CD If you need help during - Lexmark E312L | User's Guide - Page 15
Installing the print cartridge 1 Use the finger tab to pull down the printer cover. 2 Unpack the print cartridge. 3 Holding the cartridge level, pull out the sealing tape. 2 Chapter 1: The basics - Lexmark E312L | User's Guide - Page 16
4 Gently shake the cartridge to distribute the toner evenly. 5 Insert the print cartridge: a Slide the print cartridge down between the print cartridge slots. b Gently push down on the cartridge until it drops into place. 6 Close the printer cover. Installing the print cartridge 3 - Lexmark E312L | User's Guide - Page 17
To print from software loaded on your computer, your printer needs to be connected to your computer with either a parallel interface cable or a USB cable. Using a parallel interface cable Your printer requires an IEEE-1284 compliant parallel cable. We recommend Lexmark part number 1329605 (10 ft - Lexmark E312L | User's Guide - Page 18
shortcut in the Browse window, double-click on the CD icon, and double-click on the setup application (setup.exe). 9 Click OK to start the printer driver installation program. 10 Follow the installation instructions in the printer drivers dialog box. 11 In the Print to the following port check - Lexmark E312L | User's Guide - Page 19
on your computer and your printer. 5 When the Add New Hardware Wizard screen appears: a Select Next to begin searching for the new drivers. b Select Next to use search for the correct driver. c Make sure the Floppy disk drives, CD-ROM drive and Microsoft Windows Update check boxes are cleared, and - Lexmark E312L | User's Guide - Page 20
. Troubleshooting Tips Problem: Unexpected characters print or characters are missing. You are connected to the USB port, but the printer will not print. What to do: • Make sure the parallel cable or USB cable is firmly plugged in at the back of the printer. • Make sure you are using Windows 98 - Lexmark E312L | User's Guide - Page 21
Apple LaserWriter Software folder. 10 Open the Desktop Printer Utility application. 11 The New Desktop Printer screen displays. 12 Select Printer (USB) from the list and click OK. 13 In the USB Printer Selection box, click Change. The USB printer dialog box displays. 14 Select Optra E312 and click - Lexmark E312L | User's Guide - Page 22
Note: Both areas of the printer dialog box show the Optra E312 printer icon. 15 In the PostScript Printer Description (PPD) File box, click Auto Setup. Wait for the information to process. The previous screen displays. Notice the new printer icon. 16 Click Create. A window appears for you to name - Lexmark E312L | User's Guide - Page 23
Loading paper Automatic paper feeder Manual paper feeder You can load paper in the automatic paper feeder, which holds up to 150 sheets, or the manual feeder, which holds 1 sheet at a time. 1 To print from the automatic paper feeder, extend the paper support. 2 Before loading paper, flex the sheets - Lexmark E312L | User's Guide - Page 24
4 Slide the paper guides against the edges of the paper. 5 Extend the paper support on the paper output bin. 6 Select the paper size from your software application. 7 Start your print job. Loading paper 11 - Lexmark E312L | User's Guide - Page 25
Troubleshooting Tips Problem: What to do: Toner smudges appear on the front or • Make sure the paper is straight and unwrinkled. back of the page. Paper sticks together/printer feeds multiple sheets of paper. • Remove the paper from the paper feeder and fan the paper. • Make sure there isn't - Lexmark E312L | User's Guide - Page 26
panel button. A test page listing your printer model and default settings should print out. If it doesn't, check Printing problems. Troubleshooting Tips Problem: The operator panel lights do not come on when the printer is turned on. What to do: • Make sure the power cord is firmly plugged in at - Lexmark E312L | User's Guide - Page 27
set up your application software and install the appropriate printer driver. Refer to the booklet that came with the Drivers, MarkVision and Utilities CD for installation instructions. Go to Printer drivers for more information about the printer utilities and drivers. Your printer comes with 4MB of - Lexmark E312L | User's Guide - Page 28
photoconductor to light may damage the print cartridge. After you remove the cartridge from the printer, cover it or store it in a clean, dark place. 4 With the printer facing you, place it on its left side. 5 Turn the printer around so the bottom of the printer is facing you. 6 Locate and remove - Lexmark E312L | User's Guide - Page 29
7 Grasp the corner of the shield and gently pull it out, then down. 8 Pull the shield away from the printer. 16 Chapter 1: The basics - Lexmark E312L | User's Guide - Page 30
memory card, follow the memory card instructions below. Notch Connection points 1 Remove the printer memory card from its packaging. Avoid touching the connection points along the edge of the card. 2 Locate the printer memory connector. Printer memory connector 3 Hold the option card with - Lexmark E312L | User's Guide - Page 31
card back with your thumbs until it snaps into place. Installing a flash memory card To install an optional flash memory card: 1 Remove the printer memory card from its packaging. Avoid touching the connection points along the edge of the card. Notch Connection points 2 Locate the option card - Lexmark E312L | User's Guide - Page 32
3 Hold the option card with the connection points facing toward the system board and the notch pointing down and to the left. 4 Insert the card into the option card connector at a 45 degree angle. 5 Gently push the card all the way in. 6 Push the card back with your thumbs until it snaps into place. - Lexmark E312L | User's Guide - Page 33
position. 3 Re-install the print cartridge. 4 Reconnect the computer cable and latch the metal clips. 5 Plug the power cord into the printer. 6 Turn the printer on. As the printer powers up and the operator panel lights begin cycling on and off, there is a pause while the new memory is tested, then - Lexmark E312L | User's Guide - Page 34
at http://www.lexmark.com to download a printer driver to your computer. Printer drivers Printer drivers for the following operating systems and applications are included on the CD: • Windows 95 • Windows 98 • Windows 2000 • Windows NT 4.0 • Windows for Workgroups 3.11 • Windows 3.1x • Macintosh - Lexmark E312L | User's Guide - Page 35
a modem attached to your computer, you can download printer drivers from the Lexmark web site (www.lexmark.com). Printer utilities The CD also includes printer utilities. If you're using Windows 95, Windows 98, Windows 2000, Windows NT 4.0, Macintosh or OS/2 Warp, you can install the MarkVision - Lexmark E312L | User's Guide - Page 36
online documentation on the Drivers, MarkVision and Utilities CD that came with your printer. Online help Online Help is available from all MarkVision screens. MarkVision for Windows 95, Windows 98, Windows 2000 and Windows NT 4.0 includes step-by-step instructions for using many MarkVision - Lexmark E312L | User's Guide - Page 37
24 Chapter 2: Printer drivers - Lexmark E312L | User's Guide - Page 38
feeder, which holds up to 150 sheets of plain paper and a single sheet manual feeder. Use the automatic paper feeder for the print jobs you do most often. Use the manual sheet feeder to feed a single page, transparency, envelope, label or index card. Your printer also has an output bin on top of the - Lexmark E312L | User's Guide - Page 39
problems. For best print quality, use 20 lb (75 g/m2) xerographic paper. If the paper has a preferred print side, load it with the print side facing you. Media Paper Size A4, A5, B5, letter, legal, executive Weight 16 - 24 lb (60-90 g/m2) Capacity Automatic Paper Feeder: 150 sheets Manual - Lexmark E312L | User's Guide - Page 40
you. Transparencies If you occasionally print transparencies: • Use transparencies designed for laser printers. We recommend Lexmark Laser Printer Transparencies: for letter size transparencies, part number 70X7240; for A4 size transparencies, part number 12A5010. Transparencies must be able - Lexmark E312L | User's Guide - Page 41
Load envelopes in the center of the manual feeder or automatic paper feeder and slide the paper guides snugly against the sides of the envelopes. When printing on envelopes: • Try a sample of any envelopes you are considering using with the printer before buying large quantities. • Use envelopes - Lexmark E312L | User's Guide - Page 42
paper guides to fit the width of the envelopes. Labels For occasional label printing, use paper labels designed for laser printers. You can feed labels one at a time from the manual feeder, or you can load up to 10 labels in the automatic paper feeder. When printing on labels: • Test the print - Lexmark E312L | User's Guide - Page 43
the manual feeder, to feed paper and special media such as transparencies, envelopes, labels and card stock. To avoid curling and potential jams when printing on special media, open the front output door to feed the media straight out the front of the printer. 1 Extend the paper support on the - Lexmark E312L | User's Guide - Page 44
• A4, A5, B5, legal or executive-size paper, insert the paper with the print side facing you • letterhead paper, insert letterhead with the top of the page pointing top left corner 4 Slide the paper guides flush against the edges of the media. Loading paper, other media in the automatic feeder 31 - Lexmark E312L | User's Guide - Page 45
5 Extend the paper support on the paper output bin or open the front output door if you're printing on special media. 6 Select the automatic paper feeder from your software application. 7 Start your print job. 32 Chapter 3: Paper handling - Lexmark E312L | User's Guide - Page 46
special media, one sheet at a time, into your printer. If you experience problems feeding envelopes or index cards in the automatic paper feeder, try printing them one at a time from the manual feeder. To avoid curling or potential jams when printing on special media, open the front output door to - Lexmark E312L | User's Guide - Page 47
get a paper jam, the Paper Jam indicator light prompts you to clear the paper path. If the paper has just started to feed from the paper feeder when the jam occurs: 1 Pull the paper straight up out of the paper feeder. 2 Open and close the printer cover to resume printing. If the paper jam occurs - Lexmark E312L | User's Guide - Page 48
labels: 1 Be sure the labels remain attached to the backing sheet after clearing the paper jam. 2 Feed 10 or more sheets of plain paper through the printer before resuming label printing. The plain paper will remove any remaining adhesive in or on the fusing unit. Note: Serious damage to your - Lexmark E312L | User's Guide - Page 49
Troubleshooting Tips Problem: Paper sticks together/printer feeds multiple sheets of paper. Paper skews or buckles. Envelopes fail to feed correctly. What to do: • Make sure you are using recommended paper/other media (see Paper types and sizes). • Make sure the envelopes are loaded in the center - Lexmark E312L | User's Guide - Page 50
a printer part that requires cleaning or replacement by a service technician. Print quality problems Problem: What to do: Light or blurred characters. • Make sure you removed the sealing tape from the print cartridge. • Hot/humid or cold/dry weather conditions may affect how well toner adheres - Lexmark E312L | User's Guide - Page 51
Type setting from your Lexmark printer driver. • Try a different kind of xerographic bond paper. • Replace the print cartridge. Printing problems Problem: What to do: Printer has missing or damaged parts. • Inside the U.S., call the number listed on your printer registration card. • Outside the - Lexmark E312L | User's Guide - Page 52
different things, depending on their sequence. They indicate that the printer is Ready to print (printer status information); the printer needs attention (printer attendance information); or the printer needs servicing (printer service information). Operator panel terms Light is on Light is off - Lexmark E312L | User's Guide - Page 53
receive and process data. • Print a test page by pushing the operator panel button with a brief button press, or • reset the printer by pushing the operator panel button with a long button press. Each time the printer is reset, the print job in process is terminated. 40 Chapter 4: Troubleshooting - Lexmark E312L | User's Guide - Page 54
If your printer lights look like this: Then your printer: is Busy receiving data, processing data, the print engine is running, or processing/printing a test page. • If you want to reset the printer, push the operator panel button with a long button press. Indicator lights 41 - Lexmark E312L | User's Guide - Page 55
is Waiting until a Print Timeout occurs or until additional data is received. • Print data stored in the printer buffer by pushing the operator panel button with a brief button press or • reset the printer by pushing the operator panel button with a long button press. 42 Chapter 4: Troubleshooting - Lexmark E312L | User's Guide - Page 56
If your printer lights look like this: Then your printer: is Resetting settings to their power-on default settings or saving settings changed in configuration mode. Indicator lights 43 - Lexmark E312L | User's Guide - Page 57
If your printer lights look like this: Then your printer: is Flushing corrupted print data. 44 Chapter 4: Troubleshooting - Lexmark E312L | User's Guide - Page 58
Printer attendance information If your printer lights look like this: Then your printer: detects a Paper Jam. • Open the printer cover, clear all paper from the paper path and close the cover to resume printing. Indicator lights 45 - Lexmark E312L | User's Guide - Page 59
/envelopes or that the paper did not feed properly from the automatic paper feeder. • Load media into the automatic paper feeder and push the operator panel button to resume printing or • reset the printer by pushing the operator panel button with a long button press. 46 Chapter 4: Troubleshooting - Lexmark E312L | User's Guide - Page 60
to display the light sequence that appeared before the cover was opened. • Install the print cartridge. If your printer lights look like this: Then your printer: flash memory is full (Memory Full) • Print data without saving it in flash memory by pushing the operator panel button with a brief - Lexmark E312L | User's Guide - Page 61
lights look like this: Then your printer: • memory is full, or • received a page that is too complex to print, or • reduces the resolution of a formatted page to 300 dpi before printing, or • has a PPDS font error, or • doesn't have enough memory to save what is in the buffer (resource save off - Lexmark E312L | User's Guide - Page 62
Secondary error codes If your printer lights look like this when you double-click the operator panel button: Then your printer: memory is full (Memory Full). • Reduce the complexity of the job and/or the resolution, or • press the operator panel button with a brief button press to resume printing - Lexmark E312L | User's Guide - Page 63
Page). • Switch the printing mode to a different printing mode via the Lexmark driver for Windows, or • press the operator panel button with a brief button press to resume printing, or • reset the printer by pushing the operator panel button with a long button press. 50 Chapter 4: Troubleshooting - Lexmark E312L | User's Guide - Page 64
out of memory while formatting a page and is forced to reduce the resolution to 300 dpi before printing it (Resolution Reduction Warning). • Push the operator panel button to resume printing, or • reset the printer by pushing the operator panel button with a long button press. Indicator lights 51 - Lexmark E312L | User's Guide - Page 65
your printer lights look like this when you double-click the operator panel button: Then your printer: has received a request for a PPDS font which is not installed (Font Error). • Reset the front panel by pushing the operator panel button with a long button press. 52 Chapter 4: Troubleshooting - Lexmark E312L | User's Guide - Page 66
this when you double-click the operator panel button: Then your printer: doesn't have enough memory to save what is in the buffer (Resource Save Off). • Install additional memory or • push the operator panel button to resume printing, or • reset the front panel by pushing the operator panel button - Lexmark E312L | User's Guide - Page 67
your printer: has insufficient memory to free up unused space in flash memory (Insufficient Defrag Memory). • Delete fonts, macros and other data in RAM, or install additional printer memory, then issue a PJL command to begin freeing up unused space in flash memory. 54 Chapter 4: Troubleshooting - Lexmark E312L | User's Guide - Page 68
to communicate with the printer through the USB port, but the port has been disabled in configuration mode. • If this error occurs when you turn on the printer, double check that the ENA is still plugged in to the printer. • If you want to print through the parallel port, print a menu settings page - Lexmark E312L | User's Guide - Page 69
your printer: has a service error and printing stops immediately. • Turn the printer off and back on. If the lights are still blinking, contact your point of purchase, or call the Lexmark service number listed on your printer registration card. Reset user defaults When formatting problems occur - Lexmark E312L | User's Guide - Page 70
For print quality problems, such as stray toner marks appearing on the paper, select the Engine Clean Cycle setting to remove any toner that may have accumulated. 1 Turn off the printer. 2 Open the top cover. 3 Turn the printer back on. 4 Load paper into the paper feeder. 5 When the Error light - Lexmark E312L | User's Guide - Page 71
marks, the second page is gray and the third page is black. b Once the paper exits into the output bin, the printer returns to the Ready state. When you've isolated the problem, i.e., print is too light, toner streaks, and so on, refer to the troubleshooting tables beginning on page 37. 58 Chapter - Lexmark E312L | User's Guide - Page 72
is selected, the Paper Jam light is on solid, the Error light is blinking and the Press Button light is blinking. 7 Do a long button press to start Hex Trace. Data sent to the printer is printed out in hexadecimal and character representation to help isolate the source of the problem. 8 To exit Hex - Lexmark E312L | User's Guide - Page 73
user default settings does not solve formatting problems, reset the printer to the original factory default settings. 1 Turn off the printer. 2 Open the top cover. 3 Turn the printer back on. 4 Load paper into the paper feeder. 5 When the Error light comes on, indicating the top cover is open - Lexmark E312L | User's Guide - Page 74
Has a power outage occurred in your area? • Is a print cartridge installed in your printer? • Is the printer cover closed completely? Once you've checked these things, turn your printer off and back on again. If your printer is still not operating properly, call the Lexmark service number listed on - Lexmark E312L | User's Guide - Page 75
62 Chapter 4: Troubleshooting - Lexmark E312L | User's Guide - Page 76
refill print cartridges. The printer warranty does not cover damage caused by using refilled cartridges. • Store print cartridges in the same environment as the printer. • Do not remove a print cartridge from the printer except to replace it or to clear a paper jam. Print cartridge maintenance 63 - Lexmark E312L | User's Guide - Page 77
Troubleshooting Tips Problem Characters appear light or blurred. Printer seems to be printing, but pages are blank. Printer is on, but nothing prints. Jobs are not printing and the Error light is on solid. Action • Make sure you removed the sealing tape from the print cartridge. • Replace the print - Lexmark E312L | User's Guide - Page 78
single-sheet manual input tray • 100-sheet paper output tray and a single-sheet output door • 4MB printer memory • 4MB, 8MB, 16MB, 32MB and 64MB memory options for 68MB maximum memory expansion • 1MB, 2MB and 4MB flash memory options • USB capability • Single element print cartridge for easy, clean - Lexmark E312L | User's Guide - Page 79
Printer dimensions Height: Width: Depth: Weight: 8.8 in. (224 mm) 13.6 in. (345 mm) 14.4 in. (365 mm) 16.5 lb (7.5 kg) with print cartridge 66 Appendix A: Printer specifications - Lexmark E312L | User's Guide - Page 80
Advanced B troubleshooting If you contact the Lexmark Customer Support Center to help you resolve a printing problem, they may guide you through configuration mode to change a default setting (i.e., turning on the PPDS Activated setting if your job application uses the PPDS datastream). Use the - Lexmark E312L | User's Guide - Page 81
Enter Configuration Mode setting is selected, the operator panel Load Paper light is on solid, the Error light is blinking and the Press Button light is blinking. light is on solid. When the printer is in configuration mode, the indicator lights take on new meanings based on their function. The - Lexmark E312L | User's Guide - Page 82
default. If your printer encounters a memory shortage when trying to print a job and you are not using the parallel port, turn off Parallel Port Enabled to free up a little more for approximately 2 seconds. Turn off the printer to exit configuration mode. Appendix B: Advanced troubleshooting 69 - Lexmark E312L | User's Guide - Page 83
the printer receives information at a much faster transmission rate, provided the host computer supports Fastbytes. When the protocol is set to Standard, the printer receives on for approximately 2 seconds. Turn off the printer to exit configuration mode. 70 Appendix B: Advanced troubleshooting - Lexmark E312L | User's Guide - Page 84
lights look like this in configuration mode: Then your printer: Factory Default PPDS Activated setting is off, the factory default. operator panel indicator lights remain on for approximately 2 seconds. Turn off the printer to exit configuration mode. Appendix B: Advanced troubleshooting 71 - Lexmark E312L | User's Guide - Page 85
used. Use this setting to select whether or not the printer automatically performs a carriage return (CR) after a line feed (LF) or a line feed after a carriage return. • If the Press Button light 2 seconds. Turn off the printer to exit configuration mode. 72 Appendix B: Advanced troubleshooting - Lexmark E312L | User's Guide - Page 86
select and save a setting for this menu. As the setting is saved, all operator panel indicator lights remain on for approximately 2 seconds. Turn off the printer to exit configuration mode. Appendix B: Advanced troubleshooting 73 - Lexmark E312L | User's Guide - Page 87
lights look like this in configuration mode: Then your printer: Factory Default Parallel Mode 2 setting is on, the factory default. On is saved, all indicator lights remain on for approximately 2 seconds. Turn off the printer to exit configuration mode. 74 Appendix B: Advanced troubleshooting - Lexmark E312L | User's Guide - Page 88
to the next menu item, USB Port Enabled. • Do a long button press to select and save a setting for this menu. As the setting is saved, all operator panel indicator lights remain on for approximately 2 seconds. Turn off the printer to exit configuration mode. Appendix B: Advanced troubleshooting 75 - Lexmark E312L | User's Guide - Page 89
to the next menu item, USB NPA Mode. • Do a long button press to select and save a setting for this menu. As the setting is saved, all operator panel indicator lights remain on for approximately 2 seconds. Turn off the printer to exit configuration mode. 76 Appendix B: Advanced troubleshooting - Lexmark E312L | User's Guide - Page 90
printer: Factory Default USB NPA Mode setting is set to Auto, the factory default. When USB NPA Mode is enabled, your computer can send print jobs to the printer and query printer 2 seconds. Turn off the printer to exit configuration mode. Auto Appendix B: Advanced troubleshooting 77 - Lexmark E312L | User's Guide - Page 91
78 Appendix B: Advanced troubleshooting - Lexmark E312L | User's Guide - Page 92
described in the operating instructions, to a professional service person. • This product is designed, tested and approved to meet strict global safety standards with the use of specific Lexmark components. The safety features of some parts may not always be obvious. Lexmark is not responsible for - Lexmark E312L | User's Guide - Page 93
Lexmark sind, wird von Lexmark keinerlei Verantwortung oder Haftung für dieses Produkt übernommen. • Dieses Produkt verwendet einen Laser servicio o reparación deberá realizarse por parte del personal cualificado, a menos que se som er let tilgængelig. • Service og reparationer, som ikke er beskrevet - Lexmark E312L | User's Guide - Page 94
lett tilgjengelig. • La bare kvalifisert personale ta seg av service og reparasjon som ikke er direkte beskrevet i bruksanvisningen. os de assistência. • Este produto foi concebido, testado e aprovado para satisfazer os padrões globais de segurança na utilização de componentes específicos da Lexmark - Lexmark E312L | User's Guide - Page 95
de segurança para uso de componentes específicos da Lexmark. Os recursos de segurança de alguns componentes podem não ser sempre óbvios. A Lexmark não é responsável pelo uso de outros componentes de substituição. • O produto usa raios laser, tome CUIDADO: O uso de controles, ajustes ou a execução de - Lexmark E312L | User's Guide - Page 96
Appendix C: Safety information 83 - Lexmark E312L | User's Guide - Page 97
84 Appendix C: Safety information - Lexmark E312L | User's Guide - Page 98
Appendix C: Safety information 85 - Lexmark E312L | User's Guide - Page 99
86 Appendix C: Safety information - Lexmark E312L | User's Guide - Page 100
Electronic emissions notices Federal Communications Commission (FCC) compliance information statement The Optra E laser printer, type 312, has been tested and found to comply with the limits for a Class B digital device, pursuant to Part 15 of the FCC Rules. Operation is subject to the following two - Lexmark E312L | User's Guide - Page 101
in the wavelength region of 700-810 nanometers. The laser system and printer are designed so there is never any human access to laser radiation above a Class I level during normal operation, user maintenance, or prescribed service condition. The EPA ENERGY STAR Computers program is a partnership - Lexmark E312L | User's Guide - Page 102
assistenza tecnica, non ricevano radiazioni laser superiori al livello della classe 1. Laserinformatie De printer voldoet aan de eisen die produtos laser. Em outros locais, está certificada como um produto laser da Classe I, em conformidade com os requisitos da norma IEC 825. Os produtos laser da - Lexmark E312L | User's Guide - Page 103
åll som utförs av användaren eller annan föreskriven serviceåtgärd. Chinese laser notice Laser-melding Skriveren er godkjent i USA etter kravene i DHHS 21 betrakte som farlige. Skriveren inneholder internt en klasse IIIb (3b)-laser, som består av en gallium-arsenlaserenhet som avgir stråling - Lexmark E312L | User's Guide - Page 104
printer. Optra E312 This Statement of Limited Warranty applies to this product if it was originally purchased for your use, and not for resale, from Lexmark or a Lexmark remarketer, referred to in this statement as "Remarketer." Warranty Lexmark warrants that this product: • Is manufactured from new - Lexmark E312L | User's Guide - Page 105
damage to, a product in transit to the designated location. When warranty service involves the exchange of a product or part, the item replaced becomes the property of the Remarketer or Lexmark. The replacement may be a new or repaired item. The replacement item assumes the remaining warranty period - Lexmark E312L | User's Guide - Page 106
Lexmark or a Lexmark authorized servicer • operation of a product beyond the limit of its duty cycle • failure to have installed a maintenance kit as specified (if applicable) • use of printing media outside of Lexmark specifications • use of other than Lexmark supplies (such as toner cartridges - Lexmark E312L | User's Guide - Page 107
Additional Rights Some states do not allow limitations on how long an implied warranty lasts, or do not allow the exclusion or limitation of incidental or consequential damages. If such laws apply, the limitations or exclusions contained in this statement may not apply to you. This warranty gives - Lexmark E312L | User's Guide - Page 108
setting improves the print quality of graphic fills, images and halftones. A A4. Paper measuring 210 x 297 mm. A5. Paper measuring 148 x 210 mm. application. See software application. attendance message. A message that indicates a printer problem. The printer requires operator intervention before - Lexmark E312L | User's Guide - Page 109
as size, weight and style. fuser. The part of the printer that uses heat and pressure to make toner adhere to the paper. G g/m². Grams per square meter. Metric measurement for paper weight. H hex trace. A way to isolate printing problems by showing you, in a hexadecimal and character representation - Lexmark E312L | User's Guide - Page 110
orientation in which the print runs across the short edge of the paper. print cartridge. The replaceable unit inside the printer that contains the toner supply. printer driver. A program that translates the language of a software application to the language of the printer so the two can communicate - Lexmark E312L | User's Guide - Page 111
that indicates the printer needs service. setting. Values you choose from printer menus or software applications that control printer operation and the appearance of the printed page. setup utility. A program shipped with your printer to install printer drivers, test printer setup, and complete - Lexmark E312L | User's Guide - Page 112
4 USB ix, 5 cartridge. See print cartridge clearing paper jams 34 USB NPA Mode 77 USB Port Enabled 76 selecting 67 Index connecting the printer using a parallel interface cable 4 using a USB cable 5 CRLF/LFCR 72 E energy conservation 88 Energy Star 88 engine clean cycle 57 envelopes feeding problems - Lexmark E312L | User's Guide - Page 113
46 Paper Jam 45 Ready 40 Resetting 43 Service Error 56 Top Cover Open 47 Waiting 42 installing 18 flash memory card option 18 print cartridge 2 printer drivers 21 printer memory card option 17 Insufficient Defrag Memory 54 J jams 34 L label types 29 language, changing operator panel display 13 laser - Lexmark E312L | User's Guide - Page 114
power cord, connecting 13 PPDS Activated 71 PPDS font error 52 print cartridge installing 2 maintaining 63 problems 4, 64 print quality 1200 Image Quality vii toner saver vii printer attendance information 45 features viii, 65 service information 56 status information 40 unpacking 1 printer drivers, - Lexmark E312L | User's Guide - Page 115
types envelopes 27 labels 29 paper 26, 27 transparency 27 U unpacking the printer 1 USB ix, 5-9, 75, 76, 77 W Waiting light 42 X-8 Index - Lexmark E312L | User's Guide - Page 116
Lexmark and Lexmark with diamond design are trademarks of Lexmark International, Inc., registered in the United States and/or other countries. © 2000 Lexmark International, Inc. 740 West New Circle Road Lexington, Kentucky 40550 www.lexmark.com
-
 1
1 -
 2
2 -
 3
3 -
 4
4 -
 5
5 -
 6
6 -
 7
7 -
8
-
9
-
10
-
11
-
12
-
13
-
14
-
15
-
16
-
17
-
18
-
19
-
20
-
21
-
22
-
23
-
24
-
25
-
26
-
27
-
28
-
29
-
30
-
31
-
32
-
33
-
34
-
35
-
36
-
37
-
38
-
39
-
40
-
41
-
42
-
43
-
44
-
45
-
46
-
47
-
48
-
49
-
50
-
51
-
52
-
53
-
54
-
55
-
56
-
57
-
58
-
59
-
60
-
61
-
62
-
63
-
64
-
65
-
66
-
67
-
68
-
69
-
70
-
71
-
72
-
73
-
74
-
75
-
76
-
77
-
78
-
79
-
80
-
81
-
82
-
83
-
84
-
85
-
86
-
87
-
88
-
89
-
90
-
91
-
92
-
93
-
94
-
95
-
96
-
97
-
98
-
99
-
100
-
101
-
102
-
103
-
104
-
105
-
106
-
107
-
108
-
109
-
110
-
111
-
112
-
113
-
114
-
115
-
116
 |
 |

www.lexmark.com
User’s Guide
June 2000
Optra E312