Lexmark E312L User's Guide - Page 19
Add New Hardware Wizard, Floppy disk drives, CD-ROM, drive, Microsoft Windows Update, Specify a, - driver windows 7
 |
View all Lexmark E312L manuals
Add to My Manuals
Save this manual to your list of manuals |
Page 19 highlights
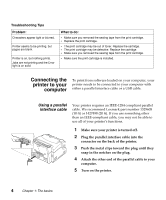
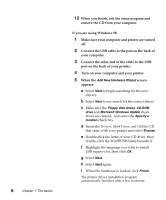
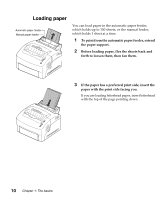
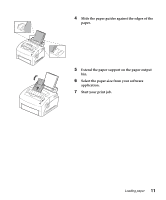
6 Chapter 1: The basics 12 When you finish, exit the setup program and remove the CD from your computer. If you are using Windows 98: 1 Make sure your computer and printer are turned off. 2 Connect the USB cable to the port on the back of your computer. 3 Connect the other end of the cable to the USB port on the back of your printer. 4 Turn on your computer and your printer. 5 When the Add New Hardware Wizard screen appears: a Select Next to begin searching for the new drivers. b Select Next to use search for the correct driver. c Make sure the Floppy disk drives, CD-ROM drive and Microsoft Windows Update check boxes are cleared, and select the Specify a location check box. d Insert the Drivers, MarkVision, and Utilities CD that came with your printer and select Browse. e Double-click the letter of your CD drive, then double-click the Win98USB folder beneath it. f Highlight the language you wish to install USB support for, then click OK. g Select Next. h Select Next again. i When the hardware is loaded, click Finish. The printer driver installation program automatically launches after a few moments.
-
 1
1 -
2
-
3
-
4
-
5
-
6
-
7
-
8
-
9
-
10
-
11
-
12
-
13
-
 14
14 -
 15
15 -
 16
16 -
 17
17 -
 18
18 -
 19
19 -
 20
20 -
 21
21 -
 22
22 -
 23
23 -
 24
24 -
25
-
26
-
27
-
28
-
29
-
30
-
31
-
32
-
33
-
34
-
35
-
36
-
37
-
38
-
39
-
40
-
41
-
42
-
43
-
44
-
45
-
46
-
47
-
48
-
49
-
50
-
51
-
52
-
53
-
54
-
55
-
56
-
57
-
58
-
59
-
60
-
61
-
62
-
63
-
64
-
65
-
66
-
67
-
68
-
69
-
70
-
71
-
72
-
73
-
74
-
75
-
76
-
77
-
78
-
79
-
80
-
81
-
82
-
83
-
84
-
85
-
86
-
87
-
88
-
89
-
90
-
91
-
92
-
93
-
94
-
95
-
96
-
97
-
98
-
99
-
100
-
101
-
102
-
103
-
104
-
105
-
106
-
107
-
108
-
109
-
110
-
111
-
112
-
113
-
114
-
115
-
116
 |
 |