Lexmark E312L User's Guide - Page 18
Using a USB cable, Drivers, MarkVision, and Utilities - windows 7 driver
 |
View all Lexmark E312L manuals
Add to My Manuals
Save this manual to your list of manuals |
Page 18 highlights
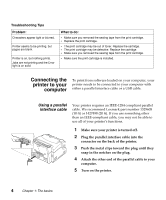
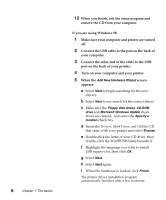
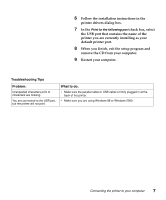
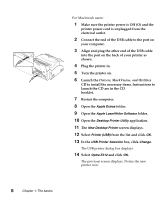
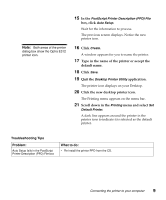
Using a USB cable If you are connecting your printer to a PC with a USB (Universal Serial Bus) cable, we recommend Lexmark part number 12A2405 (2 m). If you use something other than this cable, you may not be able to use all of your printer's functions. If you are using Windows 2000: 1 Make sure your computer and printer are turned off. 2 Connect the USB cable to the port on the back of your computer. 3 Connect the other end of the cable to the USB port on the back of your printer. 4 Turn on your computer and your printer. 5 When the Found New Hardware Wizard screen appears, select Cancel to close the wizard. 6 Insert the Drivers, MarkVision, and Utilities CD that came with your printer and select Start. 7 From the Start menu, select Run, then click Browse. 8 Click on the My Computer shortcut in the Browse window, double-click on the CD icon, and double-click on the setup application (setup.exe). 9 Click OK to start the printer driver installation program. 10 Follow the installation instructions in the printer drivers dialog box. 11 In the Print to the following port check box, select the USB port that best describes the order you've connected USB printers to your computer (i.e., the first USB printer is USB001, the second USB002, and so on). Connecting the printer to your computer 5
-
 1
1 -
2
-
3
-
4
-
5
-
6
-
7
-
8
-
9
-
10
-
11
-
12
-
 13
13 -
 14
14 -
 15
15 -
 16
16 -
 17
17 -
 18
18 -
 19
19 -
 20
20 -
 21
21 -
 22
22 -
 23
23 -
24
-
25
-
26
-
27
-
28
-
29
-
30
-
31
-
32
-
33
-
34
-
35
-
36
-
37
-
38
-
39
-
40
-
41
-
42
-
43
-
44
-
45
-
46
-
47
-
48
-
49
-
50
-
51
-
52
-
53
-
54
-
55
-
56
-
57
-
58
-
59
-
60
-
61
-
62
-
63
-
64
-
65
-
66
-
67
-
68
-
69
-
70
-
71
-
72
-
73
-
74
-
75
-
76
-
77
-
78
-
79
-
80
-
81
-
82
-
83
-
84
-
85
-
86
-
87
-
88
-
89
-
90
-
91
-
92
-
93
-
94
-
95
-
96
-
97
-
98
-
99
-
100
-
101
-
102
-
103
-
104
-
105
-
106
-
107
-
108
-
109
-
110
-
111
-
112
-
113
-
114
-
115
-
116
 |
 |
