Lexmark T652DTN Help Menu Pages - Page 6
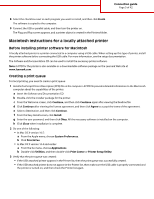
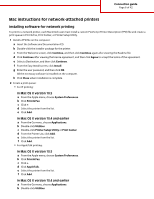
Mac instructions for network-attached printers
 |
UPC - 734646317368
View all Lexmark T652DTN manuals
Add to My Manuals
Save this manual to your list of manuals |
Page 6 highlights
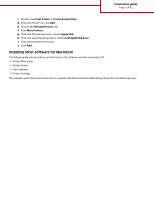
Connection guide Page 6 of 42 Mac instructions for network-attached printers Installing software for network printing To print to a network printer, each Macintosh user must install a custom PostScript Printer Description (PPD) file and create a print queue in Print & Fax, Print Center, or Printer Setup Utility. 1 Install a PPD file on the computer: a Insert the Software and Documentation CD. b Double-click the installer package for the printer. c From the Welcome screen, click Continue, and then click Continue again after viewing the Readme file. d Click Continue after viewing the license agreement, and then click Agree to accept the terms of the agreement. e Select a Destination, and then click Continue. f From the Easy Install screen, click Install. g Enter the user password, and then click OK. All the necessary software is installed on the computer. h Click Close when installation is complete. 2 Create a print queue: • For IP printing: In Mac OS X version 10.5 a From the Apple menu, choose System Preferences. b Click Print & Fax. c Click +. d Select the printer from the list. e Click Add. In Mac OS X version 10.4 and earlier a From the Go menu, choose Applications. b Double-click Utilities. c Double-click Printer Setup Utility or Print Center. d From the Printer List, click Add. e Select the printer from the list. f Click Add. • For AppleTalk printing: In Mac OS X version 10.5 a From the Apple menu, choose System Preferences. b Click Print & Fax. c Click +. d Click AppleTalk. e Select the printer from the list. f Click Add. In Mac OS X version 10.4 and earlier a From the Go menu, choose Applications. b Double-click Utilities.
-
 1
1 -
 2
2 -
 3
3 -
 4
4 -
 5
5 -
 6
6 -
 7
7 -
 8
8 -
 9
9 -
 10
10 -
 11
11 -
 12
12 -
13
-
14
-
15
-
16
-
17
-
18
-
19
-
20
-
21
-
22
-
23
-
24
-
25
-
26
-
27
-
28
-
29
-
30
-
31
-
32
-
33
-
34
-
35
-
36
-
37
-
38
-
39
-
40
-
41
-
42
 |
 |