Lexmark X5650 Fax Guide - Page 30
Can send but not receive faxes, Can receive but not send faxes, Fax Setup, Ringing and Answering - ink cartridges
 |
UPC - 734646078566
View all Lexmark X5650 manuals
Add to My Manuals
Save this manual to your list of manuals |
Page 30 highlights
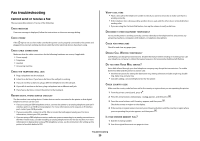
Can send but not receive faxes These are possible causes and solutions. Try one or more of the following: LOAD PAPER Load paper to print any faxes that have been stored in the printer. MAKE SURE THAT AUTO ANSWER IS ON If the Auto Answer light is on: • The printer will answer after the preset number of telephone rings. • If you are using a distinctive ring, see the instructions for setting a distinctive ring for the printer. 1 From the printer control panel, press . 2 Press the arrow buttons until Fax Setup appears, and then press . 3 Press the arrow buttons until Ringing and Answering appears, and then press . 4 Press again. Check to see if Auto Answer is set to On. 5 If Auto Answer is not selected, press the arrow buttons until On appears, and then press to save the setting. CHECK INK Check the ink levels, and install a new cartridge if necessary. CHECK WHETHER FAX FORWARDING IS SELECTED 1 From the printer control panel, press . 2 Press the arrow buttons until Fax Setup appears, and then press . 3 Press the arrow buttons until Ringing and Answering appears, and then press . 4 Press the arrow buttons until Fax Forward appears, and then press . Check to see if Fax Forward is set to Forward or Print & Forward. 5 If fax forward is set to on, press the arrow buttons until Off appears, and then press . Can receive but not send faxes These are possible solutions. Try one or more of the following: CHECK MODE SELECTION To make sure that the printer is set for faxing, check to see if the If the light is not on, press on the printer control panel. light is on. CHECK DOCUMENT PLACEMENT Load the original document faceup into the Automatic Document Feeder (ADF) or facedown on the scanner glass. CHECK THE DIAL PREFIX SETTING 1 From the printer control panel, press . 2 Press the arrow buttons until Fax Setup appears, and then press . 3 Press the arrow buttons until Dialing and Sending appears, and then press . 4 Press the arrow buttons until Dial Prefix appears, and then press . 5 To change the setting, press the arrow buttons until the prefix that you want appears, and then press . 6 If you have not yet created a setting for the dialing prefix: a Press the arrow buttons until Create appears, and then press . b Using the keypad, enter the prefix to be dialed before each telephone number, and then press to save the setting. CHECK SPEED DIAL NUMBER • Check to make sure Speed Dial has been programmed for the number that you want to dial. For more information, see the instructions for setting up Speed Dial. • As an alternative, dial the telephone number manually. MAKE SURE THE PRINTER DETECTS DIAL TONE • See the instructions for sending a fax while listening to a call (on hook dial). • Check the Dial Method setting: 1 Listen for a dial tone. If you hear a dial tone but the printer hangs up without dialing, this means it did not recognize the dial tone. 2 From the printer control panel, press . 3 Press the arrow buttons until Fax Setup appears, and then press . Troubleshooting 30
-
 1
1 -
2
-
3
-
4
-
5
-
6
-
7
-
8
-
9
-
10
-
11
-
12
-
13
-
14
-
15
-
16
-
17
-
18
-
19
-
20
-
21
-
22
-
23
-
24
-
 25
25 -
 26
26 -
 27
27 -
 28
28 -
 29
29 -
 30
30 -
 31
31 -
 32
32 -
 33
33 -
 34
34
 |
 |