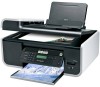
Lexmark X5650 Fax Guide - Page 32
Remote Fax Error, Phone Line Busy, Phone Line Error, Quality, Fax Setup, Dialing and Sending - review
 |
UPC - 734646078566
View all Lexmark X5650 manuals
Add to My Manuals
Save this manual to your list of manuals |
Page 32 highlights
LOWER THE SCAN RESOLUTION 1 From the printer control panel, press . 2 Press until Quality appears. 3 Press the arrow buttons until a lower quality appears, and then press . ENABLE AUTO FAX CONVERSION 1 From the printer control panel, press . 2 Press the arrow buttons until Fax Setup appears, and then press . 3 Press the arrow buttons until Dialing and Sending appears, and then press . 4 Press the arrow buttons until Auto Fax Convert appears, and then press . 5 If auto fax conversion is not set to on, press the arrow buttons until On appears, and then press . Remote Fax Error These are possible solutions. Try one or more of the following: CHECK THE PHONE LINE Resend the fax. There may have been a problem with the quality of the telephone line connection. DECREASE THE TRANSMISSION SPEED 1 From the printer control panel, press . 2 Press the arrow buttons until Fax Setup appears, and then press . 3 Press the arrow buttons until Dialing and Sending appears, and then press . 4 Press the arrow buttons until Max Send Speed appears, and then press . 5 Press the arrow buttons to select a lower transmission speed, and then press . 6 Resend the fax. 7 If the problem persists, repeat step 1 through step 5 to resend the fax at successively lower transmission speeds. Note: 2400 bps is the lowest transmission speed. Notes: • The lower the transmission speed, the longer it will take your fax to print. • This solution will reduce the speed for future faxes until you reset the transmission speed. Phone Line Busy These are possible causes and solutions. Try one or more of the following: CHANGE REDIAL SETTINGS The printer automatically redials three times at two-minute intervals. You can change the default settings to redial up to five times at intervals up to eight minutes. To change the redial settings: 1 From the printer control panel, press . 2 Press the arrow buttons until Dialing and Sending appears, and then press . 3 To change the number of times the printer will redial: a Press the arrow buttons until Redial Attempts appears, and then press . b Press the arrow buttons until the setting that you want appears, and then press . 4 To change the length of time between redials: a Press the arrow buttons until Redial Time appears, and then press . b Press the arrow buttons until the setting that you want appears, and then press . SCHEDULE TO RESEND FAX AT A LATER TIME See the instructions for sending a broadcast fax at a scheduled time. Phone Line Error These are possible causes and solutions. Try one or more of the following: REVIEW DIGITAL PHONE SERVICE CHECKLIST The fax modem is an analog device. Certain devices can be connected to the printer so that digital telephone services can be used. • If you are using an ISDN telephone service, connect the printer to an analog telephone port (an Rinterface port) on an ISDN terminal adapter. For more information and to request an R-interface port, contact your ISDN provider. • If you are using DSL, connect to a DSL filter or router that will support analog use. For more information, contact your DSL provider. • If you are using a PBX telephone service, make sure you are connecting to an analog connection on the PBX. If none exists, consider installing an analog telephone line for the fax machine. For more information on faxing when using a PBX telephone service, see the instructions for setting up to fax while behind a PBX. Troubleshooting 32
-
 1
1 -
2
-
3
-
4
-
5
-
6
-
7
-
8
-
9
-
10
-
11
-
12
-
13
-
14
-
15
-
16
-
17
-
18
-
19
-
20
-
21
-
22
-
23
-
24
-
25
-
26
-
 27
27 -
 28
28 -
 29
29 -
 30
30 -
 31
31 -
 32
32 -
 33
33 -
 34
34
 |
 |