LiftMaster SW470 SW490 S3 BOARD Manual - Page 14
Control Arm Assembly, Sw490, Do - gate opener
 |
View all LiftMaster SW470 manuals
Add to My Manuals
Save this manual to your list of manuals |
Page 14 highlights
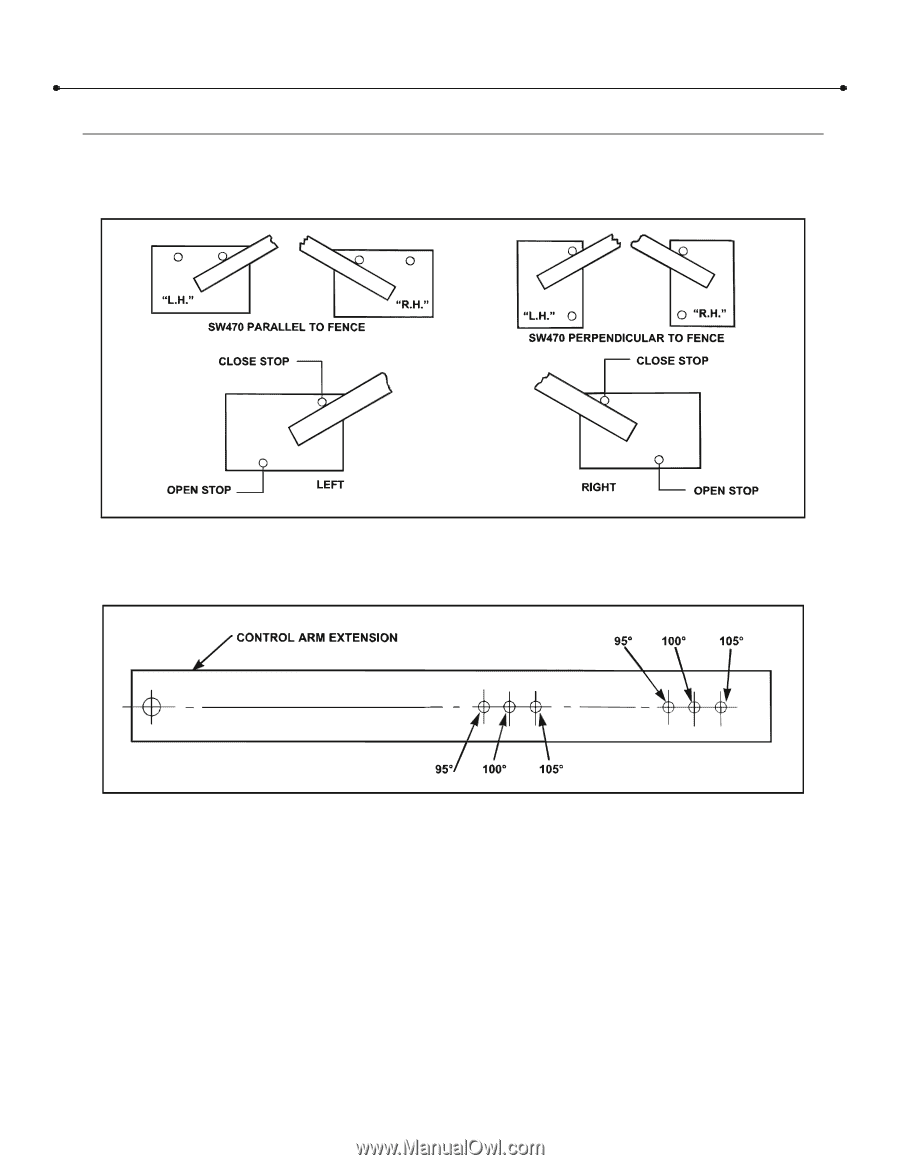
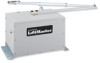
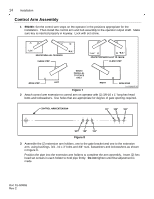
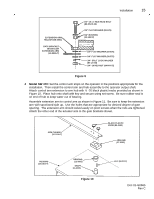
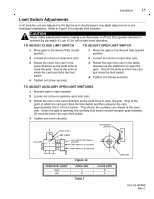
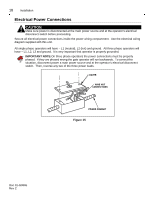
14 Installation Control Arm Assembly 1 SW490: Set the control arm stops on the operator in the positions appropriate for the installation. Then install the control arm and hub assembly to the operator output shaft. Make sure key is inserted properly in keyway. Lock with set screw. SW490 PARALLEL TO FENCE ONLY Figure 7 01-G0665F20 2 Attach control arm extension to control arm on operator with (2) 3/8-16 x 1" long hex head bolts and lockwashers. Use holes that are appropriate for degree of gate opening required. Figure 8 0 1 -G 0 6 6 5 F3 3 Assemble the (2) extension arm holders, one to the gate bracket and one to the extension arm, using bushings, 3/4 -10 x 3" bolts and 3/4" nuts, flatwashers and lockwashers as shown in Figure 9. Position the pipe into the extension arm holders to complete the arm assembly. Insert (2) hex head set screws in each holder to hold pipe firmly. Do not tighten until final adjustment is made. Doc 01-G0665 Rev C
-
 1
1 -
2
-
3
-
4
-
5
-
6
-
7
-
8
-
 9
9 -
 10
10 -
 11
11 -
 12
12 -
 13
13 -
 14
14 -
 15
15 -
 16
16 -
 17
17 -
 18
18 -
 19
19 -
20
-
21
-
22
-
23
-
24
-
25
-
26
-
27
-
28
-
29
-
30
-
31
 |
 |