Linksys WRT120N User Guide - Page 8
Advanced Configuration, Setup > Basic Setup, Access the Browser-Based Utility - cannot admin password
 |
UPC - 745883587858
View all Linksys WRT120N manuals
Add to My Manuals
Save this manual to your list of manuals |
Page 8 highlights
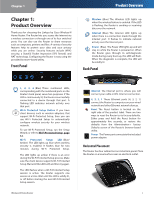
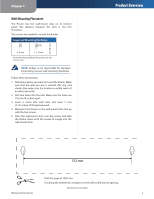
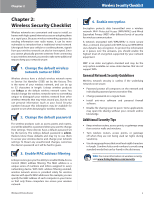
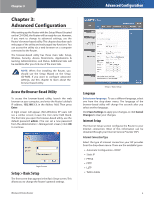
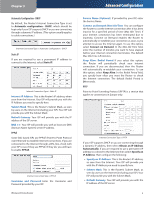
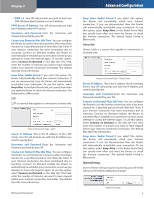
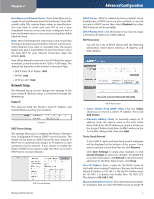
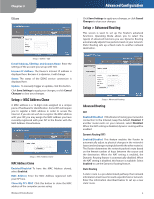
Chapter 3 Chapter 3: Advanced Configuration After setting up the Router with the Setup Wizard (located on the CD-ROM), the Router will be ready for use. However, if you want to change its advanced settings, use the Router's browser-based utility. This chapter describes each web page of the utility and each page's key functions. You can access the utility via a web browser on a computer connected to the Router. The browser-based utility has these main tabs: Setup, Wireless, Security, Access Restrictions, Applications & Gaming, Administration, and Status. Additional tabs will be available after you click one of the main tabs. NOTE: When first installing the Router, you should use the Setup Wizard on the Setup CD-ROM. If you want to configure advanced settings, use this chapter to learn about the browser-based utility. Access the Browser-Based Utility To access the browser-based utility, launch the web browser on your computer, and enter the Router's default IP address, 192.168.1.1, in the Address field. Then press Enter. A login screen will appear. (Non-Windows XP users will see a similar screen.) Leave the User name field blank. The first time you open the browser-based utility, use the default password admin. (You can set a new password from the Administration > Management screen.) Click OK to continue. Login Screen Setup > Basic Setup The first screen that appears is the Basic Setup screen. This allows you to change the Router's general settings. Wireless-N Home Router Advanced Configuration Setup > Basic Setup Language Select your language To use a different language, select one from the drop-down menu. The language of the browser‑based utility will change five seconds after you select another language. Click Save Settings to apply your changes, or click Cancel Changes to clear your changes. Internet Setup The Internet Setup section configures the Router to your Internet connection. Most of this information can be obtained through your Internet Service Provider (ISP). Internet Connection Type Select the type of Internet connection your ISP provides from the drop-down menu. These are the available types: •• Automatic Configuration - DHCP •• Static IP •• PPPoE •• PPTP •• L2TP •• Telstra Cable 4
-
 1
1 -
2
-
 3
3 -
 4
4 -
 5
5 -
 6
6 -
 7
7 -
 8
8 -
 9
9 -
 10
10 -
 11
11 -
 12
12 -
 13
13 -
14
-
15
-
16
-
17
-
18
-
19
-
20
-
21
-
22
-
23
-
24
-
25
-
26
-
27
-
28
-
29
-
30
-
31
-
32
-
33
-
34
-
35
-
36
-
37
-
38
-
39
-
40
-
41
-
42
-
43
-
44
-
45
-
46
-
47
-
48
-
49
-
50
-
51
-
52
-
53
-
54
-
55
 |
 |