Linksys WRT160NL User Guide - Page 22
Format Disk, Create or Edit a Shared Folder, Shared Folders Summary, Claim Disk, Display Name - cannot access
 |
UPC - 745883587650
View all Linksys WRT160NL manuals
Add to My Manuals
Save this manual to your list of manuals |
Page 22 highlights
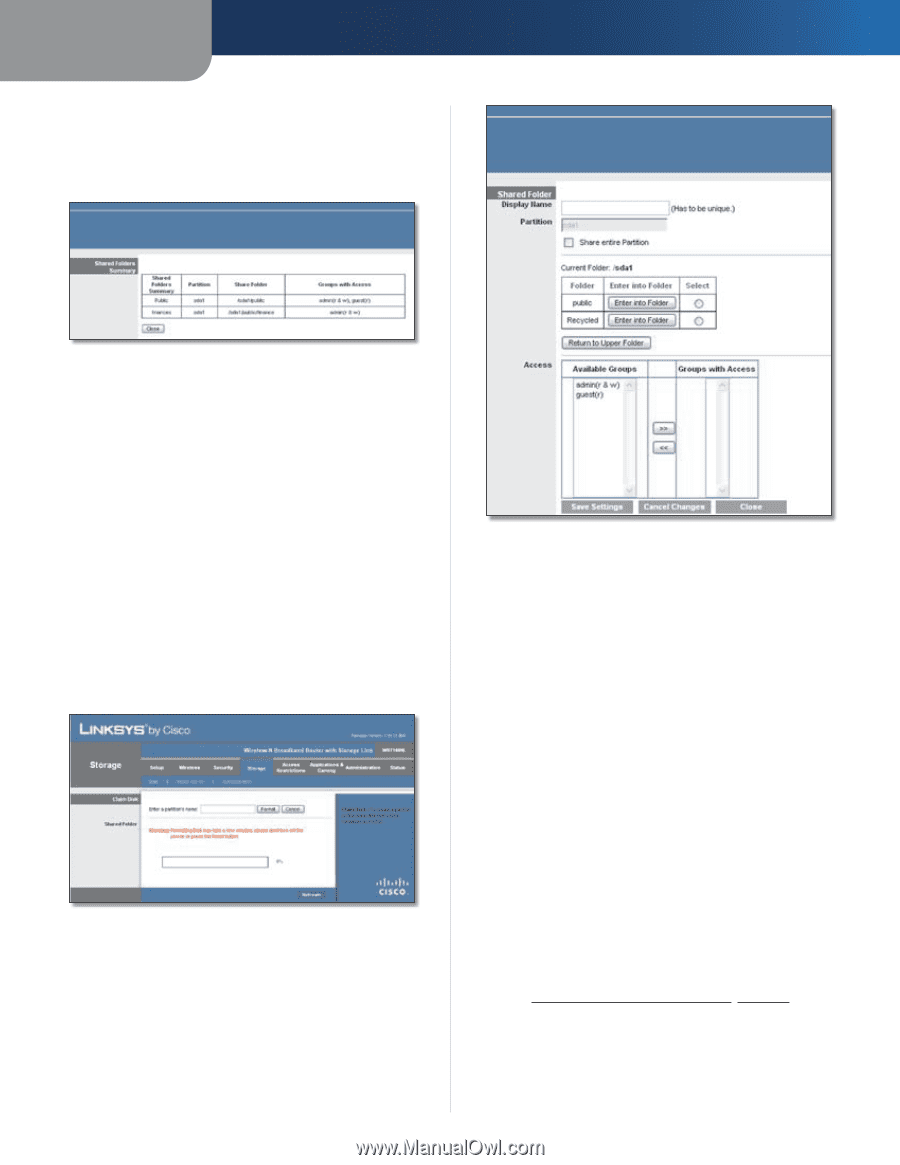
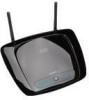
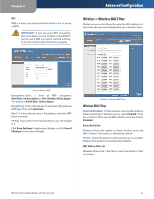
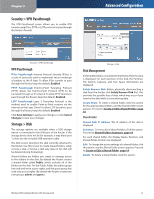
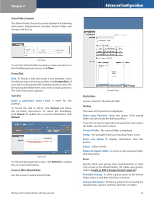
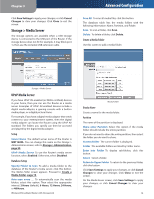
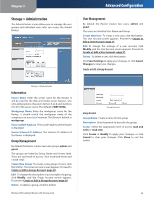
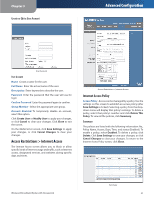
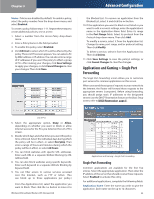
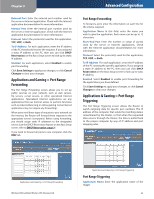
Chapter 3 Shared Folders Summary The Shared Folders Summary screen displays the following information: Display Name, Partition, Shared Folder, and Groups with Access. Advanced Configuration Summary To exit the Shared Folders Summary screen and return to the Disk Management screen, click Close. Format Disk Disk To format a disk and create a new partition, select the disk you want to format, and then click Format Disk. (If your disk was formatted with multiple partitions, then the formatting will delete them and create a single partition.) The Claim Disk screen appears. Claim Disk Enter a partition's name Create a name for the partition. To format the disk as FAT32, click Format and follow the on‑screen instructions. To cancel the formatting, click Cancel. To update the on-screen information, click Refresh. Claim Disk On the Disk Management screen, click Refresh to update the on-screen information. Create or Edit a Shared Folder Use this screen to add a shared folder. Wireless-N Broadband Router with Storage Link Shared Folder Display Name Create a name for the shared folder. Partition The name of the partition is displayed. Share enter Partition Select this option if the shared folder should include the entire partition. If you do not want to share the entire partition, then select the folder you do want to share. Current Folder The current folder is displayed. Folder The available folders are listed by Folder name. Enter into Folder To display sub-folders, click this button. Select Select a folder. Return to Upper Folder To return to the previous folder, click this button. Access Specify which user groups have read-and-write or readonly access to the shared folders. (To create user groups, refer to Create or Edit a Group Account, page 20.) Available Groups To allow a group access to the shared folder, select it, and then click the >> button. Groups with Access To block a group from accessing the shared folder, select it, and then click the
-
 1
1 -
2
-
3
-
4
-
5
-
6
-
7
-
8
-
9
-
10
-
11
-
12
-
13
-
14
-
15
-
16
-
 17
17 -
 18
18 -
 19
19 -
 20
20 -
 21
21 -
 22
22 -
 23
23 -
 24
24 -
 25
25 -
 26
26 -
 27
27 -
28
-
29
-
30
-
31
-
32
-
33
-
34
-
35
-
36
-
37
-
38
-
39
-
40
-
41
-
42
-
43
-
44
-
45
-
46
-
47
-
48
-
49
-
50
-
51
-
52
-
53
-
54
-
55
-
56
-
57
-
58
-
59
-
60
-
61
-
62
-
63
-
64
-
65
 |
 |