Linksys WRT160NL User Guide - Page 35
Appendix A: Troubleshooting, Troubleshooting - usb
 |
UPC - 745883587650
View all Linksys WRT160NL manuals
Add to My Manuals
Save this manual to your list of manuals |
Page 35 highlights
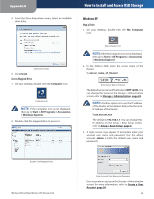
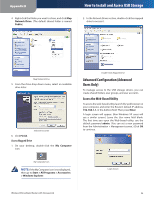
Appendix A Appendix A: Troubleshooting Your computer cannot connect to the Internet. Follow these instructions until your computer can connect to the Internet: •• Make sure that the Router is powered on. The Power LED should be green and not flashing. •• If the Power LED is flashing, then power off all of your network devices, including the modem, Router, and computers. Then power on each device in the following order: 1. Cable or DSL modem 2. Router 3. Computer •• Check the cable connections. The computer should be connected to one of the ports numbered 1-4 on the Router, and the modem must be connected to the Internet port on the Router. The modem does not have an Ethernet port. The modem is a dial-up modem for traditional dial-up service. To use the Router, you need a cable/DSL modem and high-speed Internet connection. You cannot use the DSL service to connect manually to the Internet. After you have installed the Router, it will automatically connect to your Internet Service Provider (ISP), so you no longer need to connect manually. The DSL telephone line does not fit into the Router's Internet port. The Router does not replace your modem. You still need your DSL modem in order to use the Router. Connect the telephone line to the DSL modem, and then insert the setup CD into your computer. Click Setup and follow the on‑screen instructions. When you double-click the web browser, you are prompted for a username and password. If you want to get rid of the prompt, follow these instructions. Launch the web browser and perform the following steps (these steps are specific to Internet Explorer but are similar for other browsers): 1. Select Tools > Internet Options. 2. Click the Connections tab. 3. Select Never dial a connection. Wireless-N Broadband Router with Storage Link Troubleshooting 4. Click OK. The Router does not have a coaxial port for the cable connection. The Router does not replace your modem. You still need your cable modem in order to use the Router. Connect your cable connection to the cable modem, and then insert the setup CD into your computer. Click Setup and follow the on‑screen instructions. The computer cannot connect wirelessly to the network. Make sure the wireless network name or SSID is the same on both the computer and the Router. If you have enabled wireless security, then make sure the same security method and key are used by both the computer and the Router. You need to modify the settings on the Router. Open the web browser (for example, Internet Explorer or Firefox), and enter the Router's IP address in the address field (the default IP address is 192.168.1.1). When prompted, enter the password to the Router (the default is admin). Click the appropriate tab to change the settings. The Router does not recognize your USB storage device. Make sure the USB storage device uses the NTFS or FAT format. To check its format, follow these instructions: 1. Connect the USB storage device directly to your computer. 2. On your desktop, double-click Computer or My Computer icon. 3. Right-click the USB storage device, and click Properties. 4. The format is listed in the File system description. If the format is not NTFS or FAT, then back up the data on the USB storage device. After you have backed up the data on the USB storage drive, you can format it. Right-click the USB storage device, and click Format. Follow the on-screen instructions. For more information, refer to Windows Help. If the Router still does not recognize the USB storage device, then remove the power adapter from the Router's Power port. Wait five seconds, and then re-connect the power adapter to the Router's Power port. In Windows Vista, you do not see the USB storage device in the Network screen. Make sure the Router and your computer use the same workgroup name. (The default workgroup name of the Router is workgroup. In Windows Vista, right-click the Computer icon and select Properties. Click Advanced 31
-
 1
1 -
2
-
3
-
4
-
5
-
6
-
7
-
8
-
9
-
10
-
11
-
12
-
13
-
14
-
15
-
16
-
17
-
18
-
19
-
20
-
21
-
22
-
23
-
24
-
25
-
26
-
27
-
28
-
29
-
 30
30 -
 31
31 -
 32
32 -
 33
33 -
 34
34 -
 35
35 -
 36
36 -
 37
37 -
 38
38 -
 39
39 -
 40
40 -
41
-
42
-
43
-
44
-
45
-
46
-
47
-
48
-
49
-
50
-
51
-
52
-
53
-
54
-
55
-
56
-
57
-
58
-
59
-
60
-
61
-
62
-
63
-
64
-
65
 |
 |