Maytag MCB2256HEB Use and Care Manual - Page 6
Handle Installation
 |
View all Maytag MCB2256HEB manuals
Add to My Manuals
Save this manual to your list of manuals |
Page 6 highlights
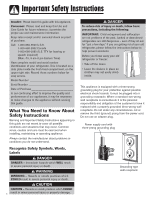
Installation Materials Needed • 1⁄4" outer diameter flexible copper tubing • Shut-off valve (requires a 1⁄4" hole to be drilled into water supply line before valve attachment) • Adjustable wrench • 1⁄4" hex nut driver Note • Add 8' to tubing length needed to reach water supply for creation of service loop. 1. Create service loop with copper tubing (minimum 2' diameter). Avoid kinks in the copper tubing when bending the service loop. 2' diameter minimum 2. Remove plastic cap from water valve inlet port. 3. Place brass nut (A) and sleeve (B) on copper tube end as illustrated. (Do not use old sleeve.) A B 4. Place end of copper tubing into water valve inlet port. Shape tubing slightly. Do not kink - so that tubing feeds straight into inlet port. 5. Slide brass nut over sleeve and screw nut into inlet port. Tighten nut with wrench. IMPORTANT: Do not overtighten. Cross threading may occur. 6. Pull on tubing to confirm connection is secure. Connect tubing to frame with water tubing clamp (C) and turn on water supply. Check for leaks and C correct if necessary. Continue to observe the water supply connection for two to three hours prior to moving the refrigerator to its permanent location. 7. Monitor water connection for 24 hours. Correct leaks, if necessary. 5 Handle Installation If not installed, the handle is located in the interior of the fresh food section or attached to the back of your refrigerator. Remove and discard handle packaging and tape. Front Mount Handle Materials Needed • Gloves to protect hands • Phillips screwdriver • Plastic door handle removal card (or 1⁄32" thick plastic card), retain the card To Install: 1. The handles are to be oriented as shown. 2. Align front mount door handle clip with the door tabs. 3. Ensure the handle clips are positioned slightly above the door tabs. Handle Clip Door Tab 4. Rotate the handle so that the handle is flat against the door. 5. Push the handle down against the upper door tab just enough to allow it to hang unsupported. 6. Align bottom of handle with lower door tab. Press upper handle end to door surface and firmly grasp lower end of handle. Gently slide handle upward until bottom of handle settles on door surface, then reverse direction, sliding downward to almost engaging tab with clip. 7. Grasp the handle firmly and slide down until it clicks. The audible click indicates fastening clips are securely interlocked. To Remove: 1. Flex the handle away from the door panel. Simultaneously place door handle removal card
-
 1
1 -
 2
2 -
 3
3 -
 4
4 -
 5
5 -
 6
6 -
 7
7 -
 8
8 -
 9
9 -
 10
10 -
 11
11 -
 12
12 -
13
-
14
-
15
-
16
-
17
-
18
-
19
-
20
-
21
-
22
-
23
-
24
-
25
-
26
-
27
-
28
-
29
-
30
-
31
-
32
-
33
-
34
-
35
-
36
-
37
-
38
-
39
-
40
-
41
-
42
-
43
-
44
-
45
-
46
-
47
-
48
-
49
-
50
-
51
-
52
-
53
-
54
-
55
-
56
-
57
-
58
-
59
-
60
-
61
-
62
-
63
-
64
-
65
-
66
-
67
-
68
-
69
-
70
-
71
-
72
-
73
-
74
-
75
-
76
-
77
-
78
-
79
-
80
-
81
-
82
-
83
-
84
-
85
-
86
-
87
-
88
-
89
-
90
-
91
-
92
-
93
-
94
-
95
-
96
 |
 |
