Motorola MPx200 User Manual
Motorola MPx200 Manual
 |
View all Motorola MPx200 manuals
Add to My Manuals
Save this manual to your list of manuals |
Motorola MPx200 manual content summary:
- Motorola MPx200 | User Manual - Page 1
START HERE > - Motorola MPx200 | User Manual - Page 2
- Motorola MPx200 | User Manual - Page 3
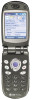
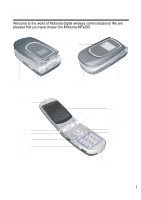
digital wireless communications! We are pleased that you have chosen the Motorola MPx200. External display Speaker SD/MMC slot Handstrap hole Earpiece Left soft key Send key Jog dial Home key Power button Infrared port Sync/charger port - Motorola MPx200 | User Manual - Page 4
, any license under the copyrights, patents, or patent applications of Motorola or any third-party software provider, except for the normal, non-exclusive, royalty-free license to use that arises by operation of law in the sale of a product. Manual number: 6809469A51-O Cover number: 8988485L61-O 2 - Motorola MPx200 | User Manual - Page 5
home screen of your phone. • Inbox • SIM Manager • Contacts • Speed Dial • Calendar • Tasks • mMode • Voice Recorder • Pocket Internet Explorer • ActiveSync • OfficeOnline • Call History • Caller ID • Favorites Manager • File Manager • Windows Media • Accessories • Calculator • Infrared - Motorola MPx200 | User Manual - Page 6
About This Guide 14 Installing the SIM Card 15 Installing the Battery 17 Charging the Battery 19 Getting to Know Your Phone 21 Synchronizing on Your Phone 34 Securing Your Phone 37 Sending and Receiving Calls 41 Making a Call 41 Receiving a Call 45 In-call Options 46 Reviewing Your Calls - Motorola MPx200 | User Manual - Page 7
Inbox 85 Message Notifications 88 Sending SMS to Email Addresses 89 Communicating with MSN Messenger 89 Office Online 92 Personal Organizer 93 Contacts 93 Calendar 98 Tasks 103 Calculator 106 News and Entertainment 107 mMODE 107 Pocket Internet Explorer 107 Media Player 111 Playing - Motorola MPx200 | User Manual - Page 8
SIM Manager 122 File Manager 125 Caller ID 127 Favorites Manager 131 Task Manager 132 Troubleshooting 134 Specific Absorption Rate Data 136 Microsoft End User License Agreement 138 Index 143 CTIA Safety Tips 145 6 - Motorola MPx200 | User Manual - Page 9
general safety information in user guides published prior to December 1, 2002. Exposure to Radio Frequency (RF) Energy Your phone contains a transmitter with your phone, the system handling your call controls the power level at which your phone transmits. Your Motorola phone is designed to - Motorola MPx200 | User Manual - Page 10
your body. Approved Accessories Use of accessories not approved by Motorola, including but not limited to batteries and antenna, may cause your phone to exceed RF energy exposure guidelines. For a list of approved Motorola accessories, visit our website at www.Motorola.com. RF Energy Interference - Motorola MPx200 | User Manual - Page 11
call. In order to receive and make a call, you must turn off the Airplane Mode feature and re-engage your phone's RF capability. Always obey the instructions of your airline crew. Medical Devices Pacemakers Pacemaker manufacturers recommend that a minimum separation of 6 inches (15 centimeters) be - Motorola MPx200 | User Manual - Page 12
be found in the "Wireless Phone Safety Tips" at the end of this manual and at the following websites: www.Motorola.com/callsmart or www.attws.com it is a phone type especially qualified for use in such areas and certified as "Intrinsically Safe." Do not remove, install, or charge batteries in such - Motorola MPx200 | User Manual - Page 13
To avoid possible interference with blasting operations, turn OFF your phone when you are near electrical blasting caps, in a blasting area, or in areas posted "Turn off electronic devices." Obey all signs and instructions. Batteries Batteries can cause property damage and/or bodily injury such as - Motorola MPx200 | User Manual - Page 14
from the screen. Repetitive Motion Injuries When you play games on your phone, you may experience occasional discomfort in your hands, arms, shoulders, neck, or other parts of your body. Follow these instructions to avoid problems such as tendonitis, carpal tunnel syndrome, or other musculoskeletal - Motorola MPx200 | User Manual - Page 15
product is set to its default settings and all data files, user settings, and preinstalled applications will be deleted. A master reset should only be carried out by Motorola, or an authorized service center. Data in the handset must be backed up prior to the reset in order for it to be reinstalled - Motorola MPx200 | User Manual - Page 16
, mono headset, companion CD, AT&T Wireless SIM card, user manual, and product and service user data. You can purchase other accessories to customize your phone for maximum performance and portability. To purchase Motorola Original™ accessories, contact the Motorola Customer Call Center at 1-800-331 - Motorola MPx200 | User Manual - Page 17
Started Installing the SIM Card Your SIM (Subscriber Identity Module) card contains your phone number, service details, and phonebook/message memory. It is stored in a recess in the battery compartment. Caution: Do not bend or scratch your SIM card. Do not touch the gold colored areas of your SIM - Motorola MPx200 | User Manual - Page 18
Getting Started Action 3 Hold the SIM card with the gold contact side facing down and the cut corner on the left. Cut corner 4 With the SIM card seated in the holder, slide the retainer on top of the SIM card to secure it. SIM card holder SIM card retainer 16 - Motorola MPx200 | User Manual - Page 19
must install and charge the battery to use your phone. Your phone is designed for use only with Motorola Original batteries and accessories. We recommend that you store batteries in their protective cases when not in use. Action 1 Insert the battery into the back of the phone, with the contacts on - Motorola MPx200 | User Manual - Page 20
Getting Started Action 3 Place the battery cover back on the phone, aligning the tabs on the cover with the groove on the phone. 4 Slide the battery cover in the direction shown until it locks into place. 18 - Motorola MPx200 | User Manual - Page 21
Getting Started Charging the Battery New batteries are shipped partially charged. Before you can use your phone, you need to install and charge the battery for 24 hours as described in the following steps. Some batteries perform best after several full charge/discharge cycles. Action 1 Remove the - Motorola MPx200 | User Manual - Page 22
stop scrolling. You can use the phone during the charging process. However, the battery will take longer to fully charge. • When battery power is low, a low battery message displays. Charge the battery immediately. • If battery power is completely drained, the phone turns off automatically. • If the - Motorola MPx200 | User Manual - Page 23
incoming is connected: • Turn the volume up/down. Perform the command shown on the screen immediately above the key. • Dial a phone number you entered using the keypad. • Dial a phone number you selected from the Call History list. • Answer an incoming call. • Place a call on hold to answer a second - Motorola MPx200 | User Manual - Page 24
Getting Started e End • End active data calls at any time. • End a call when one party is on the line, and end the active call when multiple parties are connected. h Home Display the Home screen and Quick List (see "Quick List" on page 33). Press and hold Home h to view the Quick List. B Back - Motorola MPx200 | User Manual - Page 25
jack for hands-free operation and to listen to MP3 files. Memory Card Slot Insert a SD or MMC memory card into this slot to expand your phone's data storage capability. SD/MMC card slot Headset jack Notes: • Up to 10 MB of additional available memory exists on your MPx200 for user content. This - Motorola MPx200 | User Manual - Page 26
ME), NT Workstation 4.0 with SP 6 or later, or Windows 98 • Microsoft Outlook 98 (2000 recommended) or later for synchronization to the desktop or portable computer for e-mail, calendar, contacts, tasks, and notes. • Microsoft Internet Explorer 4.01 SP1 or later • Hard disk drive with 12 to 65 MB of - Motorola MPx200 | User Manual - Page 27
is already installed on your phone. Make sure to install ActiveSync 3.6 or later on your desktop computer before connecting your phone to the desktop computer. ActiveSync is available on the MPx200 Companion CD included in the box, or download to your desktop computer for free from Microsoft - Motorola MPx200 | User Manual - Page 28
on the Microsoft Smartphone operating system MPx200 User's Guide or MPx200 Getting Started guide Readme files, located in the Microsoft ActiveSync folder on the desktop computer http://www.microsoft.com/mobile More information on the device http://www.hellomoto.com Service-related information - Motorola MPx200 | User Manual - Page 29
• The top of the display shows status indicators about your phone's current mode, or the name of the current activity or active program. • The center of the display shows the Home screen, as well as email messages, contacts, appointments, favorites, and other types of information. • The bottom of - Motorola MPx200 | User Manual - Page 30
Indicators Status indicators display at the top of your phone's screen. The following table lists common status call Speaker CallerID is ready CallerID is not yet ready Battery level Low battery Battery charging No battery Multipress text input mode, lowercase Multipress text input mode, - Motorola MPx200 | User Manual - Page 31
Display Learning to Use Your Phone Battery level Current date Signal strength Current time The following table lists the icons and their meanings that appear on the external display. Icon Meaning Icon Meaning Signal strength Battery level Call in progress Battery low Data call active No - Motorola MPx200 | User Manual - Page 32
or setting on the phone from this screen. The top of the Home screen displays the 5 icons that are fixed by default. The first icon is press Action (A). To view Contacts, press Contacts (b). • The Home screen automatically displays when you turn on the phone or leave the phone idle, but you can - Motorola MPx200 | User Manual - Page 33
the item selected. • Press Programs (a) to display the list of programs available on your phone, select a program, and then press Action (A). • Press Contacts (b) to display the Contacts list, next select a contact, and then press Action (A). Back Button Press Back to navigate to the previous screen - Motorola MPx200 | User Manual - Page 34
Phone function changes according to the phone's status, for example, when in a particular application or making a phone call. Left Soft Key-Offers a quick way to access programs. Right Soft Key-During normal use, displays the following: • Contacts to another part of the user interface where you can - Motorola MPx200 | User Manual - Page 35
, Call History, Favorites Manager, File Manager, MSN Messenger, SIM Manager, Speed Dial, Tasks, Voice Recorder, and Windows Media. In addition, the Programs List offers three additional folders in the menu list: Settings, Accessories, and Games. To navigate to a program 1 On the Home screen - Motorola MPx200 | User Manual - Page 36
off the Airplane Mode feature and re-engage your phone's RF capability. Always obey the instructions of your airline crew. Entering Text and Numbers on Your Phone You can enter text and numbers on the phone using the keypad. The phone supports 3 input modes for entering text and numbers: Multipress - Motorola MPx200 | User Manual - Page 37
44, 2, 8. When you enter letters that are on the same number key, wait until the underline disappears before entering the next letter so that your phone can process the first letter. This pause is called the Multipress time out, and you can adjust the length of the pause between keypresses. For - Motorola MPx200 | User Manual - Page 38
press and hold Asterisk * to change to Multipress mode, and manually enter the word. Having Trouble Entering a Word in T9 Mode? If you cannot find the only, such as the Work phone field in Contacts, the input mode will automatically default to Numeric mode. Inserting Symbol The following is a list - Motorola MPx200 | User Manual - Page 39
Learning to Use Your Phone To start a new line • Press Action (A). To change between uppercase and the plus (+) sign for international calls • Press and hold 0. Securing Your Phone You can customize the level of your phone's security by locking the keypad, the entire phone, or the SIM card. 37 - Motorola MPx200 | User Manual - Page 40
when the keypad is locked. Locking and Unlocking Your Phone Locking the phone prevents access to personal data. When you turn on this feature, the phone automatically locks after a specified time of inactivity. A screen displays requiring your phone lock password before access is granted. Note: You - Motorola MPx200 | User Manual - Page 41
Unlock, enter your password, and then press Unlock again. To turn off phone lock • On the Home screen, press Programs (a), select More, select Settings, select More, select Security, select Disable Phone Lock, and then press Done (a). Locking the Subscriber Identity Module (SIM) Card Locking the SIM - Motorola MPx200 | User Manual - Page 42
Learning to Use Your Phone To lock the SIM card 1 On the Home screen, press Programs (a), select More, select Settings, select More, select Security, select Enable SIM Lock, and then press Done (a). 2 Enter your PIN1 password (see page 38), and press Done (a). To unlock the SIM card 1 On the Home - Motorola MPx200 | User Manual - Page 43
it, and press Talk s. If you do not find the contact , press and hold B to clear the display. Note: As you enter a phone number or contact name, the phone searches Contacts, Call History, Speed Dial lists, and the Subscriber Identity Module (SIM) card to find a matching name and/or number. When you - Motorola MPx200 | User Manual - Page 44
number, such as Work, Home, and Fax, the Work phone number is set as the default. Press Talk s to dial the default number, but you can change the default number at any time. You can select or toggle to a contact person's alternative numbers by pressing up or down on the directional keypad. To make - Motorola MPx200 | User Manual - Page 45
, and press Left (a) or Right (b) to change the default number. 3 For example: If you change "w" to "m," the default number changes from Work phone (w) to Mobile phone (m). Note: For more information about contact list abbreviations, see "Contacts, Calendar and Tasks" on page 58. To make a call - Motorola MPx200 | User Manual - Page 46
the instructions of your airline crew. To make an emergency call • On the Home screen, enter 112 (the international emergency number) and press Talk s. Having Problems Making a Call? Check to make sure that your phone contains a valid SIM card, that it is turned on, unlocked, and in the service area - Motorola MPx200 | User Manual - Page 47
silence the ring of an incoming call, press the jog dial, and answer the call. Caller ID information is matched to a contact Phone number is identified as Work number in Contacts Sending and Receiving Calls To answer an incoming call • When the flip is closed, open the cover to answer the call - Motorola MPx200 | User Manual - Page 48
service. Check with your service provider. To reject a Call Waiting call • If you are talking on the phone Save Contact Activates the call on hold. Changes between two calls. Creates a contact for the caller. Conference Joins together all existing calls, if you have subscribed to this service - Motorola MPx200 | User Manual - Page 49
Private Mute Unmute Breaks one call out of a conference and makes this call active while the rest of the conference is on hold. Mutes the microphone for the active call. The other party will not hear anything you say, but you can still hear the other party. Turns the microphone back on for the - Motorola MPx200 | User Manual - Page 50
Action (A). To send an email message from Call History • Select the contact, press Menu (b), select E-mail, and then press Action (A). To create a new contact from a number in Call History • Select the entry, press Menu (b), select Save, and then press Action (A). Make sure is highlighted - Motorola MPx200 | User Manual - Page 51
To view Call Timers • On the Home screen, press Programs (a), select Call History, press Menu (b), select View Timers, and then press Action (A). To reset Call Timers • On the Home screen, press Programs (a), select Call History, press Menu (b), select View Timers, and then press Action (A). • Press - Motorola MPx200 | User Manual - Page 52
dial shortcut can be created only for a phone number stored in Contacts. To create a speed dial shortcut for a phone number 1 On the Home screen, press Programs (a), select Contacts (b), and then press Action (A). 2 Open the contact and select the phone number to set up as a speed dial. 3 Press - Motorola MPx200 | User Manual - Page 53
prompted, repeat the voice tag to confirm. 6 If the voice tags match, the phone displays a confirmation and replays the voice tag. Note: You also can create voice tags for Web addresses and email addresses that are stored in Contacts. To make a call using a voice tag 1 On the Home screen, press and - Motorola MPx200 | User Manual - Page 54
a plus (+) sign. Enter the recipient's country code, area code and phone number, then press Talk s to complete the call. To insert an international country code • Press and hold 0 until a plus sign (+) appears. Note: You can insert a plus sign (+) into a contact's number or dial it directly from the - Motorola MPx200 | User Manual - Page 55
Settings Settings Viewing and Changing Settings You can view and change settings to personalize your phone for the way you work. For example, you can change the sounds or use your own sounds for ring tones, notifications, and reminders, use your - Motorola MPx200 | User Manual - Page 56
be known to all callers, only your contacts, or no callers. Configure cell broadcast. Limit your calling area to one or more specific phone numbers and/or area codes. Identify your current network and change your network selection from Automatic to Manual. Sounds Sounds settings are used to - Motorola MPx200 | User Manual - Page 57
on your desktop computer, click Explore, double- click my Smartphone, double-click IPSM, double-click Application Data, double-click phone to ring louder if a client is calling, or you may not want the phone to ring at all, but want to hear calendar reminders. The default profile used with your phone - Motorola MPx200 | User Manual - Page 58
Indicates your current profile Settings Preset Profiles The following table shows the list of your phone's default profiles and their attributes. Profile name Normal Ring type Ring Ring volume 3 Silent Vibrate Off Meeting Vibrate 1 Loud Ring Loud Notification Notification System sound - Motorola MPx200 | User Manual - Page 59
the Quick List. Press Power (or press and hold Home), select the profile, and then press Action (A). • When a headset is plugged into the phone, the Headset profile is used automatically. To modify a profile on the Settings menu 1 On the Home screen, press Programs (a), select More, select Settings - Motorola MPx200 | User Manual - Page 60
computer, click Explore, double- click My Smartphone, double-click IPSM, double-click Application Data, phone's operating system, including version numbers, copyright information and available storage. Note: Your phone handles up to 10 MB of user content, including 3rd party applications, contacts - Motorola MPx200 | User Manual - Page 61
you to browse and chat. Contact your IT Manager or go to www.attwireless.com/smartphone for information on mMode, Mobile Internet plans, configuring email, or wireless syncronizing with the server. Changing your settings without AT&T Wireless consultation may disrupt your data service. To view Data - Motorola MPx200 | User Manual - Page 62
Settings To create a dial-up connection to the Internet 1 On the Home screen, press Programs (a), select More, select Settings, select Data Connections, and then press Action (A). 2 Press Menu (b), select Edit Connections, and then press Action (A). 3 Select Dial-up Connections, and press Action - Motorola MPx200 | User Manual - Page 63
Settings 4 Select Next to move forward with setting up your POP3/IMAP4 email account. 5 Fill in the fields for your account: • Your name: [your Name] • E-mail Address: [your email address] • Server Type: [POP3 or IMAP4] 6 Select Next. 7 Fill in the fields for your account: • Incoming mail server: [ - Motorola MPx200 | User Manual - Page 64
your domain] • Check save password. 10 Select Next. 11 To complete setup select Finish. 12 Press Done (a). 13 To download your email, select Menu > Send/Receive E-mail. Note: Visit www.attwireless/smartphone for a free Email Wizard and information on supported email service providers. VPN Connection - Motorola MPx200 | User Manual - Page 65
from: • Connects to: • Username: [your username] • Password: [your password] • Domain: [your domain] 6 Press Done (a) twice. Proxy Connection A proxy connection accesses the Internet using an existing connection to your corporate network. To configure the MPx200 for a proxy server 1 Go to Programs - Motorola MPx200 | User Manual - Page 66
Settings 6 Press Done (a). 7 Open the menu and select Add. 8 Fill in the fields for SOCKS4, for use with MSN Messenger: • Description: IM • Connects from: My Corporate Network • Connects to: The Internet • Proxy: • Type: SOCKS4 9 Press Done (a) three times to close the Data Connections control - Motorola MPx200 | User Manual - Page 67
phone and it is found, you can be contacted. To view Owner Information settings • On the Home screen, press Programs (a), select More, select Settings, select More, select Owner Information, and then press Action (A). Power Management Use Power Management settings to display power-saving settings - Motorola MPx200 | User Manual - Page 68
you remove programs installed on your phone, with the exception of core programs that came with the phone, such as Contacts, Calendar, phone lock or SIM lock and to set the phone lock password. See the Learning to Use your Phone section of the user guide for more information on securing your phone - Motorola MPx200 | User Manual - Page 69
Keep your Outlook information up-to-date by synchronizing your phone with your desktop computer. • Synchronize Inbox, Calendar, and Contacts with a server so that you have the latest information Exchange Server if your computer is running Microsoft Mobile Information Server 2002 or later. 67 - Motorola MPx200 | User Manual - Page 70
your desktop computer (Your companion CD contains ActiveSync 3.6, or you can download ActiveSync for free from the Microsoft website). ActiveSync is already installed on your phone. Creating a Partnership After the installation is complete, the New Partnership Wizard helps you set up a partnership - Motorola MPx200 | User Manual - Page 71
To start and stop synchronization Connect your phone and desktop computer using infrared port on your phone or cable before you begin to synchronize , such as your user name, password, and the name of the Microsoft Mobile Information Server, either from your service provider or network administrator - Motorola MPx200 | User Manual - Page 72
of the domain for your Microsoft Exchange Server (if required). 7 Select Save password if you want your phone to save your password so that you need not enter it repeatedly. 8 In Server name, enter the name of the Microsoft Mobile Information Server to which you want to connect. 9 Press Done. 10 - Motorola MPx200 | User Manual - Page 73
that you no longer want to synchronize with a server, such as Calendar, Contacts, or Inbox. 3 Clear the check box next to the information type that Please consult your local Information Technology (IT) manager and/or support personnel to administer the appropriate setup and to assure that you have - Motorola MPx200 | User Manual - Page 74
4 Press Done. To create a schedule to synchronize with a server when your phone is not connected to a desktop computer (synchronize wirelessly) 1 On the Home screen, the types of Outlook information you can synchronize. By default, ActiveSync does not automatically synchronize all types of Outlook - Motorola MPx200 | User Manual - Page 75
also choose to download file only attachments. • By default, when synchronizing Inbox phone by way of your service provider. Synchronizing Calendar Calendar items stored on your phone can be synchronized with calendar items stored on your desktop computer or on a Microsoft Exchange Server. By default - Motorola MPx200 | User Manual - Page 76
phone contacts to the SIM card using SIM Manager. Please refer to "SIM Manager" on page 122 for more information. Synchronizing Tasks Tasks stored on your phone can be synchronized with tasks stored on your desktop computer. Task synchronization is automatically selected in ActiveSync. By default - Motorola MPx200 | User Manual - Page 77
you can exchange files between your phone and desktop PC. To exchange files between desktop PC and your phone 1 Connect your phone to your desktop computer. 2 In ActiveSync, click Explore. Windows Explorer opens the Mobile Device window for your phone. 3 In Windows Explorer, browse to the file that - Motorola MPx200 | User Manual - Page 78
's infrared port to send and receive (beam) calendar appointments and contact cards between your phone and Synchronize Information with another mobile device or desktop computer that has an infrared port and supports VCards and VCal. To beam a contact 1 On the Home screen, press Programs (a), select - Motorola MPx200 | User Manual - Page 79
Status information displays the name of the device your phone is beaming to, and whether the beaming process is pending, done, or failed. To receive beamed information 1 On the Home screen, press Programs (a), select More, select Accessories, and then press Action (A). 2 Select Infrared Receive, and - Motorola MPx200 | User Manual - Page 80
your phone. The most common way to send messages is from the Inbox or from the Contacts. For information about text input, see "Entering Text and Numbers on Your Phone" more information visit www.attwireless/smartphone for a free Email Wizard and information on supported email service providers. 78 - Motorola MPx200 | User Manual - Page 81
(a), select Inbox, and then press Action (A). 2 Press New, enter an email address or SMS number (phone number) in the To field, or select a name from Contacts by pressing Menu (b) and select Insert Contact, and then press Action (A). 3 Press Down twice and enter a subject. 4 Press Down, enter your - Motorola MPx200 | User Manual - Page 82
, and then press Action (A). 2 Select the contact and press Action (A). 3 Select the email address or SMS number (phone number), and press Action (A). 4 Enter a subject. 5 Press Down, enter your message, and then press Send s. Inserting Predefined Text into Messages Save time when composing mail by - Motorola MPx200 | User Manual - Page 83
want to verbally explain information that is contained in the email message. To insert a voice recording into an email message 1 On the Home screen, press can be read by most recipients, because most mobile phones support SMS. Note: SMS messages are not synchronized, and you cannot use them - Motorola MPx200 | User Manual - Page 84
from SIM, and then press Action (A). Notes: • You cannot export messages from your phone to a SIM card. • SMS messages are not removed from the SIM card , only the first 5 KB of each new message are downloaded by default to your phone's Inbox. If you are using an IMAP4 or POP3 server, only the - Motorola MPx200 | User Manual - Page 85
phone alerts during boot up. • If you want to create a Contacts for the sender, press Menu (b), select Add Sender to Contacts receiving only the first 0.5 KB set by default. To receive a complete message 1 On the full, press Menu (b), select Mark for Download, and then press Action (A). The complete - Motorola MPx200 | User Manual - Page 86
and press Action (A). Note: You can view attachments only for file types that are supported by your phone (.txt, .JPEG, .asf, .asx, .wax, .wm, wma, wmv, wmx, wvx, .mp3). A third party application must be downloaded to your phone to view attachment in other formats. Viewing Your Message Folders Your - Motorola MPx200 | User Manual - Page 87
structure you have created on your email server. Messages you download from the server will automatically be placed in the appropriate folders on your phone. Managing Inbox All email and SMS messages are stored in the Inbox. By default, the most recently received messages display at the top of - Motorola MPx200 | User Manual - Page 88
Creates a new message. Reply Reply to an open or selected message. Forward Forward the selected message. Delete Delete the selected message. Mark for Download Retrieve the entire email message from the email server the next time you connect. Mark as Read Display the header text of a Inbox - Motorola MPx200 | User Manual - Page 89
Features Customizing Inbox Options You can optimize your phone's Inbox you can change the way your the size of messages you want to automatically download, change your synchronization schedule, and more. To original copy of the message in your reply, save a copy of your sent messages, or use - Motorola MPx200 | User Manual - Page 90
SIM card to Inbox. from SIM The messages are not removed from the SIM card after they are imported. Message Notifications Your phone listen to your new Voicemail messages, press Voice Mail, or dial your Voicemail service number. To modify a sound alert for notifications 1 On the Home screen, - Motorola MPx200 | User Manual - Page 91
SMS to Email Addresses In order to send an SMS to an email address from a MPx200 phone, you must enter information in the following way: To: 0000000000 (you need to enter 10 and then press Sign In. 2 Enter your sign-in name (Example: [email protected]) and password, and then press Sign In. 89 - Motorola MPx200 | User Manual - Page 92
remain on a data connection, which may result in additional charges from your service provider. To send an instant message 1 Sign in to MSN Messenger. 2 Numbers on Your Phone" on page 34. To invite a contact to an ongoing chat • Press Menu (b), select Invite, and then select a contact. To see who - Motorola MPx200 | User Manual - Page 93
select Chats, and then select the contact to begin chatting. To add a contact • In the Messenger contacts list, press Menu (b), select Add Contact, and then follow the directions on the screen. To delete a contact • In the Messenger contacts list, select the contact's name, press Menu (b), and then - Motorola MPx200 | User Manual - Page 94
Features To change your displayed name 1 In the Messenger contacts list, press Menu (b), select Options, and then select office email, calendar, and your company's Global Address List in real-time from your phone. You can access one corporate account (Microsoft Outlook or Lotus Notes) and up to 9 - Motorola MPx200 | User Manual - Page 95
number (w) or home phone number (h). Notes: • If the contact card includes a work phone number, your phone will automatically set it as the default number. • The contacts along with the icon are the entries stored on the SIM card. To edit the SIM contacts, refer to "SIM Manager" on page 122 for - Motorola MPx200 | User Manual - Page 96
w w2 h h2 m pgr car sms e e2 e3 web Meaning Work phone Second work phone Home phone Second home phone Mobile phone Pager Car phone SMS address Email address Second email address Third email address Web page To call a contact using the default number 1 On the Home screen, press Programs (a), select - Motorola MPx200 | User Manual - Page 97
. Note: If you have a long list of contacts, enter the first few letters of the contact's name that you want to call. The phone will search the entire Contacts list and display the name. To call a contact using a number other than the default number 1 On the Home screen, press Programs (a), select - Motorola MPx200 | User Manual - Page 98
(A) to compose a message to the contact. To view a contact card 1 On the Home screen, press Programs (a), select Contacts, and then press Action (A). 2 Select the contact to view, and press Action (A). Number in bold denotes default number Work number Mobile number Email address SMS message number - Motorola MPx200 | User Manual - Page 99
dial number or voice tag to the contact, change the default method for communicating with the contact, beam the contact card to another mobile device or desktop computer using infrared, delete the entire contact card, or edit the card information. To view contact card menu options 1 On the Home - Motorola MPx200 | User Manual - Page 100
recording. Set the selected phone number or email address as the default communication method for the contact. Send the contact card to another mobile device or desktop computer using infrared. Remove the contact card from the Contacts list. Modify information on the contact card. *For information - Motorola MPx200 | User Manual - Page 101
amount of time that you want the reminder to appear before the appointment. 4 Press Done (a). Note: When you create a new appointment on your phone, you can synchronize Calendar with your desktop computer or a server to keep your schedule information current in all locations. To view an appointment - Motorola MPx200 | User Manual - Page 102
Schedule You can view your schedule in calendar using three different views: Agenda, Week, and Month. Agenda View Agenda is the default view for calendar information. This view displays meetings and appointments scheduled for the current day. The appointments appear in chronological order according - Motorola MPx200 | User Manual - Page 103
week. This view allows you to get a quick indication of your free and busy time, and allows you to create an appointment at a selected time easily. The Week view displays the hours from 9:00 A.M. to 5:00 P.M. in onehour increments by default on the left side of the screen. You can press Up - Motorola MPx200 | User Manual - Page 104
Personal Organizer Note: To change settings for Week View, press Menu (b), select Options, and then press Action (a). Month View The Month view provides an overview of your monthly schedule arrow indicators pointing up represent morning appointments, and the arrows pointing down represent afternoon - Motorola MPx200 | User Manual - Page 105
Personal Organizer To view your schedule for the month 1 Press Menu (b), select Month View, and then press Action (A). Importing Calendar Information You can import calendar information from another calendar program if it uses the iCal or vCal format. The calendar information can be imported from - Motorola MPx200 | User Manual - Page 106
press Action (A). 2 Select the Enter new task here field, enter the task, and then press Action (A). Notes: • When you create a new task on your phone, you can synchronize tasks with your desktop computer to keep your Tasks list current in both locations. • If you create a new task with a reminder - Motorola MPx200 | User Manual - Page 107
Recordings are included in the All Notes list and are named consecutively (Recording 1, Recording 2, and so on). To create a Voice Record 1 Hold your phone's microphone near your mouth. 2 Press jog dial, and press Record (b) to begin recording your voice note. 3 Press Stop (a) to stop recording your - Motorola MPx200 | User Manual - Page 108
arithmetic, such as addition, subtraction, multiplication, and division. To open Calculator • On the Home screen, press Programs (a), select More, select Accessories, select Calculator, and then press Action (A). To enter numbers and perform calculations • Use the keypad to enter numbers and perform - Motorola MPx200 | User Manual - Page 109
Pocket Internet Explorer, play audio and video files using Microsoft® Windows MediaTM Player, and play Games. mMODE mMode from AT&T Wireless is an entirely new world on your wireless phone. mMode lets you email, download ring tones, and games. Try the Web "mMode style" - get news, sports, music, and - Motorola MPx200 | User Manual - Page 110
Navigating in Pocket Internet Explorer With Pocket Internet Explorer, the Favorites list is displayed as the main screen instead of a home page. You can add your own favorites to this list for quick access to Web sites you frequently visit. Press Favorites to access your Favorites list from any Web - Motorola MPx200 | User Manual - Page 111
for a Web page, and press Go (b). Note: While you are connected to the Internet, to change between Pocket Internet Explorer and other programs on your phone, press h. This will not close your Internet connection. To return to the page you were viewing, press B. Favorites List If you see a Web page - Motorola MPx200 | User Manual - Page 112
then press Action (a). 2 Select the favorite to delete, press Menu (b), select Delete, and then press Action (a). Cached Web Pages The phone caches Web pages as they are downloaded to your phone and stores them on your phone until the cache is full. If you go to a page that is already stored on your - Motorola MPx200 | User Manual - Page 113
, and free space on your phone. To Windows MediaTM Player 7.0 or later, you can play Windows Media audio and video files and MP3 audio files on your phone phone, see the Media Player Help on your desktop computer. Options General Connections Memory Function Change the way Web pages are downloaded - Motorola MPx200 | User Manual - Page 114
Media Player is easy to use; the controls are similar to the buttons on a compact disc player.You can play audio or video files, skip to another song or video, and increase or decrease the volume. To access the Media Player 1 On the Home screen, press Programs (a), select More, and then press Action - Motorola MPx200 | User Manual - Page 115
To play a streaming media file on a network 1 On the Local Content screen, press Menu (b), select Open URL, and then press Action (a). 2 Enter the Web URL, and press Play (b). To play files randomly 1 On the Local Content screen, press Menu (b), select Settings, and then press Action (a). 2 Select - Motorola MPx200 | User Manual - Page 116
To access menu options when playing a file • Press Menu (b). News and Entertainment The following table lists the menu options and their functions that are available when you play a file. Option Function Play/Stop Plays or stops playback of the current file. Next Skips to the next file on - Motorola MPx200 | User Manual - Page 117
file. Displays the Settings screen, which lets you to adjust the volume and specify various playback options. Permanently deletes the selected file from the phone. Media Player Favorites You can connect to your favorite streaming media file and add it to Favorites. The next time you want to listen - Motorola MPx200 | User Manual - Page 118
on your desktop computer to copy content to your phone. For more information about copying content to your phone and other portable devices, see the Windows MediaTM Player Help on your desktop computer. Supported File Formats Media Player supports the following types of file formats. 116 News and - Motorola MPx200 | User Manual - Page 119
Supported Audio and Video Codecs Media Player can play files that have been compressed by using any of the following audio and video codecs. Audio Codecs • Microsoft® Windows screen or while playing video games, including games played on a Smartphone, may induce previously undetected epileptic - Motorola MPx200 | User Manual - Page 120
follow the onscreen instructions to proceed with the installation. Should you need instructions on how to synchronize your device with a PC, please refer to "Synchronizing Information" on page 67. Software Requirements Operating System: Microsoft Smartphone 2002 Storage: 720 KB Game Description So - Motorola MPx200 | User Manual - Page 121
how many potential customers you should meet and decide on an appropriate recipe and price. Keep in mind that what you see every morning is a forecast, and of everything either. Selecting a Location You'll start in the suburbs, a free location. Learn the ins and outs of the business, then switch to a - Motorola MPx200 | User Manual - Page 122
start making some good money, check out the various upgrades you can buy for your stand. They will help the aces. You win the game when all cards are on the suit stacks. To start a game of Solitaire • On the Home screen, press Programs (b), select More, select Games, select Solitaire, and then press - Motorola MPx200 | User Manual - Page 123
To move cards in Solitaire • Press the number or character above the card stack displaying the card you want to move, and then press the number or character above the card stack to which you want to move the card. Note: Press Up to move a card to one of the four card stacks on the upper right corner - Motorola MPx200 | User Manual - Page 124
entry to SIM card • Press New, enter the name and phone number, press Done when finished. • When entering, press Menu (b), select Cancel and then press Action (a) to discard and exit this function. • When entering the phone number, press Menu (b), select Insert Pause or Insert Wait and then - Motorola MPx200 | User Manual - Page 125
memory • Press Menu (b), select Import/Export and press Action, select Contacts->SIM and press Action to copy the phone entries to the SIM memory. Select SIM->Contacts and press Action to copy the SIM entries to the phone memory. • When the above function is selected, press Menu (b), select Select - Motorola MPx200 | User Manual - Page 126
function. To use the SMS Manager • Press Menu (b), select SMS Manager, and press Action (a). To add a SMS on SIM card • Press New, enter the phone number of recipient and the content. Press Save to store the SMS and press Cancel to discard and exit this function. To edit a SMS • Select a desired SMS - Motorola MPx200 | User Manual - Page 127
on your computer screen and your phone screen. If you are installing from a Storage Card, follow the instructions on your Smartphone screen. We strongly recommend that you install File Manager to the main unit (Smartphone's local "Phone" storage). After installing, select File Manager from your - Motorola MPx200 | User Manual - Page 128
Getting More Out of Your Phone Key Features: • Send the selected files via email or Infrared beaming • View file or folder properties. • View information about memory utilization, device, storage card, and battery power. • Sort listed files in a variety of ways (by name, size, date, type; ascending - Motorola MPx200 | User Manual - Page 129
will first display temporarily: ) Template storage Several animated Caller ID templates are included with your phone's software. You can download additional animated Caller ID templates free from www.iastyle.com. Or, download the PIT Tool, make your own templates, and use the tool to convert the GIF - Motorola MPx200 | User Manual - Page 130
Contacts. Use the Filter submenu to display only entries in your Contacts, only entries on your SIM card default photos to Groups • Delete all manual filtering, and return to the original list view in one easy step (Press U or select the "Reset Filter" command) • Filter the list so that only contact - Motorola MPx200 | User Manual - Page 131
Default Photo". • Assigning an individual Photo ID using the Assign Photo command in Detailed View. Steps: 1. In the main Caller ID screen, select the desired contact Folder command to access the image files in any folder of the phone's local storage, or on the Storage Card. 3. Choose the photo - Motorola MPx200 | User Manual - Page 132
Getting More Out of Your Phone Or, to access various setup options, press Menu. Step 1 Step 2 Step 3 (photo only) Step 3 ( In the General screen, uncheck the Display photo during incoming or waiting call checkbox. The phone will then recover its original background image for incoming calls. 130 - Motorola MPx200 | User Manual - Page 133
Photo ID has been individually assigned, and that Contact is assigned to a group with a generic group Photo ID, that group Photo ID displays. If neither an individual Photo ID nor a group Photo ID has been assigned, then the general default Photo ID displays during incoming calls. Favorites Manager - Motorola MPx200 | User Manual - Page 134
and applications currently running on your phone. You can easily activate any currently running task, terminate the tasks, and refresh the list and amount of Free Memory. To open Task Manager On the Home screen, press Programs (a), select More, select Accessories, select Task Manager, press Action - Motorola MPx200 | User Manual - Page 135
Your Phone To refresh the list of running tasks and the Free Memory amount To update the list of running tasks, and the amount of Free Memory, press asterisk ("*") (or select Refresh from the menu). To view System Info Select System Info from the menu to view details of your power/battery, memory - Motorola MPx200 | User Manual - Page 136
seek your original dealer for help. Troubleshooting Problems Possible Solutions Cannot turn on the phone • Is the battery empty? • Is the battery properly installed? • Are the contacts on battery and phone clean? If the contacts appear to be soiled, contact your dealer to clean them. Unable - Motorola MPx200 | User Manual - Page 137
you subscribed the Internet (WAP) service to your operator? • Did you enter correct setting parameters (such as APN and IP addresses) in WAP profile setup? The screen shows "Insert SIM" • Is your SIM card correctly inserted into the phone? • Are the metal contacts on SIM card clean? If they appear - Motorola MPx200 | User Manual - Page 138
mobile phones employs a unit of measurement known as the Specific Absorption Rate, or SAR. Under the guidelines for your phone model, the SAR limit is 1.6 W/kg.1 Tests for SAR , the lower the power output of the phone. Before a phone model is available for sale to the public, it is tested to confirm - Motorola MPx200 | User Manual - Page 139
cases, products are designed to be within the guidelines. • The SAR limit for mobile phones used by the public is 1.6 watts/ kilogram (W/kg) averaged over in measurements. • Additional related information includes the Motorola testing protocol, assessment procedure, and measurement uncertainty range - Motorola MPx200 | User Manual - Page 140
on any CD-ROM disk accompanying the DEVICE ("Desktop Software"). • The SOFTWARE is licensed, not sold. All rights reserved. • IF YOU DO NOT AGREE TO THIS END USER LICENSE AGREEMENT ("EULA"), DO NOT USE THE DEVICE OR COPY THE SOFTWARE. INSTEAD, PROMPTLY CONTACT MOTOROLA FOR INSTRUCTIONS ON RETURN OF - Motorola MPx200 | User Manual - Page 141
the Mobile Operator permits such transfer, you may permanently transfer all of your rights under this EULA only as part of a sale or transfer of the DEVICE, provided you retain no copies, you transfer all of the SOFTWARE (including all component parts, the media and printed materials, any upgrades - Motorola MPx200 | User Manual - Page 142
provide upgrades or supplements to the SOFTWARE that may be automatically downloaded to your Device. 13. Links to Third Party Sites. The SOFTWARE may provide you with the ability to link to third party sites through the use of the SOFTWARE. The third party sites are NOT under the control of Motorola - Motorola MPx200 | User Manual - Page 143
RECOVERY MEDIA. 15.1.DEVICE Software. If the DEVICE Software is provided by Motorola separate from the DEVICE on media such as a ROM chip, CD ROM disk(s) or via web download or other means, and is labeled "For Upgrade Purposes Only" or "For Recovery Purposes Only", you may install one copy of such - Motorola MPx200 | User Manual - Page 144
20. FOR APPLICABLE LIMITED WARRANTIES AND SPECIAL PROVISIONS PERTAINING TO YOUR PARTICULAR JURISDICTION, PLEASE REFER TO YOUR WARRANTY BOOKLET INCLUDED WITH THIS PACKAGE OR PROVIDED WITH THE SOFTWARE PRINTED MATERIALS. 142 - Motorola MPx200 | User Manual - Page 145
59 Accessories 14 Accessories list...........15 ActiveSync Installing 68 Audio codecs............117 B Battery 17 Charging 19 Installing 17 Buttons 21 Back button 31 Function Buttons ..........21 C Calendar Schedule 100 Call History 48 Call Timers 49 Contact cards 96 Contacts list - Motorola MPx200 | User Manual - Page 146
O optional accessory, defined 14 optional feature, defined 14 P Phone Calls Making a call 41 Receiving a call 45 Profiles 55 Presetting 56 Viewing 55 Q Quick List 33 S Security 66 Shortcuts 50 Deleting 51 Viewing 51 SIM card 15 Installing 15 Locking 39 Unlocking 39 SMS messages .... - Motorola MPx200 | User Manual - Page 147
!" Your Motorola wireless telephone gives you the powerful ability to communicate by voice- almost anywhere, anytime, wherever wireless phone service is available and safe conditions allow. But an important responsibility accompanies the benefits of wireless phones, one that every user must uphold - Motorola MPx200 | User Manual - Page 148
available, use a hands-free device. If possible, add an additional layer of convenience to your wireless phone with one of the many Motorola Original™ handsfree accessories available today. 3 Position your wireless phone within easy reach. Be able to access your wireless phone without removing your - Motorola MPx200 | User Manual - Page 149
local emergency number in the case of fire, traffic accident or medical emergencies.* 9 Use your wireless phone to help others in emergencies. If you see an auto accident, crime in progress or other or other special non-emergency wireless number.* * Wherever wireless phone service is available. 147 - Motorola MPx200 | User Manual - Page 150
✂ Check the laws and regulations on the use of wireless telephones and their accessories in the areas where you drive. Always obey them. The use of these devices may be prohibited or restricted in certain areas. For more information, - Motorola MPx200 | User Manual - Page 151
- Motorola MPx200 | User Manual - Page 152
motorola.com 8988485L61-0
-
 1
1 -
 2
2 -
 3
3 -
 4
4 -
 5
5 -
 6
6 -
 7
7 -
8
-
9
-
10
-
11
-
12
-
13
-
14
-
15
-
16
-
17
-
18
-
19
-
20
-
21
-
22
-
23
-
24
-
25
-
26
-
27
-
28
-
29
-
30
-
31
-
32
-
33
-
34
-
35
-
36
-
37
-
38
-
39
-
40
-
41
-
42
-
43
-
44
-
45
-
46
-
47
-
48
-
49
-
50
-
51
-
52
-
53
-
54
-
55
-
56
-
57
-
58
-
59
-
60
-
61
-
62
-
63
-
64
-
65
-
66
-
67
-
68
-
69
-
70
-
71
-
72
-
73
-
74
-
75
-
76
-
77
-
78
-
79
-
80
-
81
-
82
-
83
-
84
-
85
-
86
-
87
-
88
-
89
-
90
-
91
-
92
-
93
-
94
-
95
-
96
-
97
-
98
-
99
-
100
-
101
-
102
-
103
-
104
-
105
-
106
-
107
-
108
-
109
-
110
-
111
-
112
-
113
-
114
-
115
-
116
-
117
-
118
-
119
-
120
-
121
-
122
-
123
-
124
-
125
-
126
-
127
-
128
-
129
-
130
-
131
-
132
-
133
-
134
-
135
-
136
-
137
-
138
-
139
-
140
-
141
-
142
-
143
-
144
-
145
-
146
-
147
-
148
-
149
-
150
-
151
-
152
 |
 |

START HERE >