Nikon D2HS D2Hs User's Manual - Page 236
Television Playback
 |
UPC - 018208252190
View all Nikon D2HS manuals
Add to My Manuals
Save this manual to your list of manuals |
Page 236 highlights
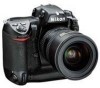
Connections-Television Playback Television Playback Connecting the Camera to a Video Device The supplied EG-D2 audio / video (A / V) cable can be used to connect the D2Hs to a television or VCR for playback or recording. 1 Turn the camera off. The EG-D2 Turn the camera off before connecting or disconnecting the EG-D2. 2 Open the cover protecting the A/V-out and DC-in connectors. A/V out DC in 3 Connect the EG-D2. Insert the black plug to the camera A / V-out connector. Connect the yellow plug to the video-in jack on the television or VCR and the white plug to the audio-in jack. CLC S Connect to video device 4 Tune the television to the video channel. Connect to camera 5 Turn the camera on. During playback, images will be displayed on the television screen or recorded to video tape; the camera monitor will remain off. Note that the television may not be able to display the entire image when pictures are played back. Use an AC Adapter Use of an EH-6 AC adapter (available separately) is recommended for extended playback. When the EH-6 is connected, the camera monitor-off delay will be fixed at ten minutes and the exposure meters will no longer turn off automatically. Video Mode ( 204) Be sure that the video standard matches the standard used in the video device. Note that resolution will drop when images are output on a PAL device. Audio Output ( 143) Set Via VIDEO OUT to play back or record voice memos on the video device. 222
-
 1
1 -
2
-
3
-
4
-
5
-
6
-
7
-
8
-
9
-
10
-
11
-
12
-
13
-
14
-
15
-
16
-
17
-
18
-
19
-
20
-
21
-
22
-
23
-
24
-
25
-
26
-
27
-
28
-
29
-
30
-
31
-
32
-
33
-
34
-
35
-
36
-
37
-
38
-
39
-
40
-
41
-
42
-
43
-
44
-
45
-
46
-
47
-
48
-
49
-
50
-
51
-
52
-
53
-
54
-
55
-
56
-
57
-
58
-
59
-
60
-
61
-
62
-
63
-
64
-
65
-
66
-
67
-
68
-
69
-
70
-
71
-
72
-
73
-
74
-
75
-
76
-
77
-
78
-
79
-
80
-
81
-
82
-
83
-
84
-
85
-
86
-
87
-
88
-
89
-
90
-
91
-
92
-
93
-
94
-
95
-
96
-
97
-
98
-
99
-
100
-
101
-
102
-
103
-
104
-
105
-
106
-
107
-
108
-
109
-
110
-
111
-
112
-
113
-
114
-
115
-
116
-
117
-
118
-
119
-
120
-
121
-
122
-
123
-
124
-
125
-
126
-
127
-
128
-
129
-
130
-
131
-
132
-
133
-
134
-
135
-
136
-
137
-
138
-
139
-
140
-
141
-
142
-
143
-
144
-
145
-
146
-
147
-
148
-
149
-
150
-
151
-
152
-
153
-
154
-
155
-
156
-
157
-
158
-
159
-
160
-
161
-
162
-
163
-
164
-
165
-
166
-
167
-
168
-
169
-
170
-
171
-
172
-
173
-
174
-
175
-
176
-
177
-
178
-
179
-
180
-
181
-
182
-
183
-
184
-
185
-
186
-
187
-
188
-
189
-
190
-
191
-
192
-
193
-
194
-
195
-
196
-
197
-
198
-
199
-
200
-
201
-
202
-
203
-
204
-
205
-
206
-
207
-
208
-
209
-
210
-
211
-
212
-
213
-
214
-
215
-
216
-
217
-
218
-
219
-
220
-
221
-
222
-
223
-
224
-
225
-
226
-
227
-
228
-
229
-
230
-
 231
231 -
 232
232 -
 233
233 -
 234
234 -
 235
235 -
 236
236 -
 237
237 -
 238
238 -
 239
239 -
 240
240 -
 241
241 -
242
-
243
-
244
-
245
-
246
-
247
-
248
-
249
-
250
-
251
-
252
-
253
-
254
-
255
-
256
-
257
-
258
-
259
-
260
-
261
-
262
-
263
-
264
-
265
-
266
-
267
-
268
-
269
-
270
-
271
 |
 |
