Nikon D2HS D2Hs User's Manual - Page 42
The Monitor Cover, Camera Off Display, Tutorial-Basic Photography
 |
UPC - 018208252190
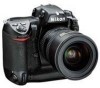
View all Nikon D2HS manuals
Add to My Manuals
Save this manual to your list of manuals |
Page 42 highlights
Tutorial-Basic Photography 1 1.3 Check the number of exposures remaining The exposure-count display in the top control panel shows the number of photographs that can be taken at current settings. When this number reaches zero, the icon will flash in the top control panel and a flashing icon will appear in the viewfinder. No further pictures can be taken until you delete pictures or insert a new memory card. You may be able to take additional pictures at lower image quality or size settings. The Monitor Cover A clear plastic cover (the BM-3 LCD monitor cover) is provided with the camera to keep the monitor clean, and to protect the monitor when the camera is not in use or when you are transporting the camera. To remove the monitor cover, hold the camera firmly, take the cover by its edges, and pull the bottom of the cover gently outwards as shown at right (ቢ). Once the cover is unlatched, you can move it slightly away from the monitor and then remove it as shown (ባ). To replace the cover for shooting or storage, insert the two projections on the top of the cover into the matching indentations above the camera monitor (ቢ), then press the bottom of the cover until you hear it click into place (ባ). Camera Off Display If the camera is turned off with a battery and memory card inserted, the frame count and number of exposures remaining will be displayed (some memory cards may only display this information when the camera is on). 28 CLC S OAU/VT DC IN S OAU/VT DC IN OAU/VT DC IN
-
 1
1 -
2
-
3
-
4
-
5
-
6
-
7
-
8
-
9
-
10
-
11
-
12
-
13
-
14
-
15
-
16
-
17
-
18
-
19
-
20
-
21
-
22
-
23
-
24
-
25
-
26
-
27
-
28
-
29
-
30
-
31
-
32
-
33
-
34
-
35
-
36
-
 37
37 -
 38
38 -
 39
39 -
 40
40 -
 41
41 -
 42
42 -
 43
43 -
 44
44 -
 45
45 -
 46
46 -
 47
47 -
48
-
49
-
50
-
51
-
52
-
53
-
54
-
55
-
56
-
57
-
58
-
59
-
60
-
61
-
62
-
63
-
64
-
65
-
66
-
67
-
68
-
69
-
70
-
71
-
72
-
73
-
74
-
75
-
76
-
77
-
78
-
79
-
80
-
81
-
82
-
83
-
84
-
85
-
86
-
87
-
88
-
89
-
90
-
91
-
92
-
93
-
94
-
95
-
96
-
97
-
98
-
99
-
100
-
101
-
102
-
103
-
104
-
105
-
106
-
107
-
108
-
109
-
110
-
111
-
112
-
113
-
114
-
115
-
116
-
117
-
118
-
119
-
120
-
121
-
122
-
123
-
124
-
125
-
126
-
127
-
128
-
129
-
130
-
131
-
132
-
133
-
134
-
135
-
136
-
137
-
138
-
139
-
140
-
141
-
142
-
143
-
144
-
145
-
146
-
147
-
148
-
149
-
150
-
151
-
152
-
153
-
154
-
155
-
156
-
157
-
158
-
159
-
160
-
161
-
162
-
163
-
164
-
165
-
166
-
167
-
168
-
169
-
170
-
171
-
172
-
173
-
174
-
175
-
176
-
177
-
178
-
179
-
180
-
181
-
182
-
183
-
184
-
185
-
186
-
187
-
188
-
189
-
190
-
191
-
192
-
193
-
194
-
195
-
196
-
197
-
198
-
199
-
200
-
201
-
202
-
203
-
204
-
205
-
206
-
207
-
208
-
209
-
210
-
211
-
212
-
213
-
214
-
215
-
216
-
217
-
218
-
219
-
220
-
221
-
222
-
223
-
224
-
225
-
226
-
227
-
228
-
229
-
230
-
231
-
232
-
233
-
234
-
235
-
236
-
237
-
238
-
239
-
240
-
241
-
242
-
243
-
244
-
245
-
246
-
247
-
248
-
249
-
250
-
251
-
252
-
253
-
254
-
255
-
256
-
257
-
258
-
259
-
260
-
261
-
262
-
263
-
264
-
265
-
266
-
267
-
268
-
269
-
270
-
271
 |
 |
