NordicTrack Powertread 6.0 English Manual - Page 8
POLAR®, Heart, Monitor
 |
View all NordicTrack Powertread 6.0 manuals
Add to My Manuals
Save this manual to your list of manuals |
Page 8 highlights
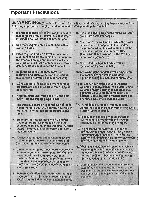
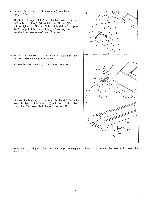
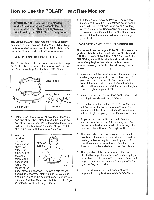
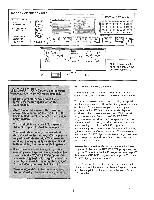
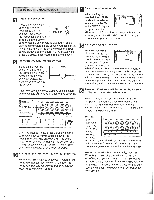
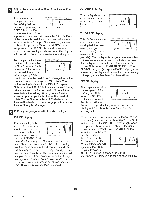
How to Use the POLAR® Heart Rate Monitor IMPORTANT: If a user has an loll:dented, medical device such as a pacemaker, the user must Check with his or her, physician prior to using the POLAR heart rate monitor. The unique POLAR" heart rate monitor is specially designed for accuracy, comfort, and durability. To get the best performance from the POLAR heart rate monitor, please read the instructions below. HOW TO PUT ON THE HEART RATE MONITOR The POLAR heart rate monitor consists of two components: the chest strap and the sensor unit. Follow the steps below to put on the heart rate monitor. Tabs Chest Strap Tab 3. Pull the sensor unit away from your body a few inches and locate the two electrode areas on the inner side. The electrode areas are the two long, grooved rectangles. Using saline solution such as saliva or contact lens solution, wet both electrode areas. Return the sensor unit to a position against your chest. HEART RATE MONITOR TROUBLE-SHOOTING The instructions on pages 11 to 21 of this owner's guide explain how the heart rate monitor is used with-the console, if the letters "PLS" appear In the PULSE display, or if the displayed heart rate is excessively high or low when the heart rate monitor Is used, try the trouble-shooting steps below. 1. Make sure that the heart rate monitor Is under your clothing, against your skin, and as high under the pectoral muscles or breasts as is comfortable. Note: If the heart rate monitor does not function when positioned as described, try moving it slightly lower or higher on your chest. 2. Make sure that the POLAR logo on the sensor unit is facing forwards and is right-side-up. Sensor Unit Buckle 1. Refer to the inset drawing above. Insert the tab on one end of the chest strap through the hole in one end of the sensor unit. Press the end of the sensor unit under the buckle on the chest strap. The tab should be flush with the front of the sensor unit. 2. Wrap the heart rate monitor around your chest and attach the "POLAR" Logo 1 / other end of the chest strap to the sensor unit. Adjust the length of the chest strap, if necessary. The heart rate monitor should be under your clothing, against your skin, and as high under the pectoral muscles or breasts as is comfortable. Make sure that the POLAR logo is facing forward and is right-side-up. 3. Use saline solution such as saliva or contact lens solution to wet the two electrode areas on the sensor unit. If heart rate readings do not appear until you begin perspiring, re-wet the electrode areas. 4. As you walk or run on the treadmill, position yourself near the center of the walking belt. For the console to display heart rate readings, the user must be within arm's length of the console. 5. The heart rate monitor is designed to work with people who have normal heart rhythms. Heart rate reading problems may be caused by medical conditions such as premature ventricular contractions (pvcs), tachycardia bursts, and arrhythmia. 6. The operation of the heart rate monitor can be affected by magnetic interference caused by high power lines or other sources. If it is suspected that magnetic interference may be causing a problem, try relocating the treadmill. 7. If the heart rate monitor still does not function properly, test it by having another person try it. 8
-
 1
1 -
2
-
 3
3 -
 4
4 -
 5
5 -
 6
6 -
 7
7 -
 8
8 -
 9
9 -
 10
10 -
 11
11 -
 12
12 -
 13
13 -
14
-
15
-
16
-
17
-
18
-
19
-
20
-
21
-
22
-
23
-
24
-
25
-
26
-
27
-
28
-
29
-
30
-
31
-
32
-
33
-
34
-
35
-
36
-
37
-
38
 |
 |
