NordicTrack S3000 Treadmill English Manual - Page 7
Foot Locknut 111 above the right Rear Foot. Turn
 |
View all NordicTrack S3000 Treadmill manuals
Add to My Manuals
Save this manual to your list of manuals |
Page 7 highlights
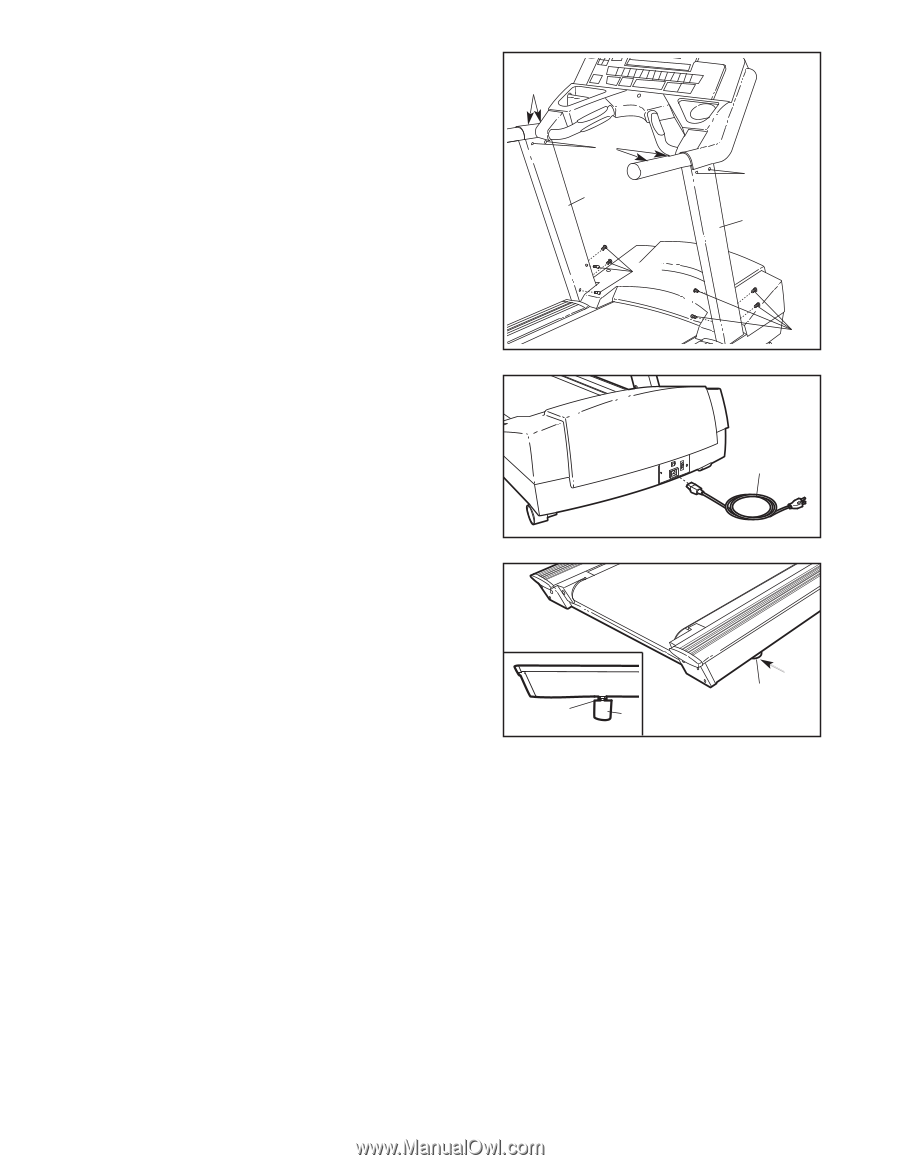
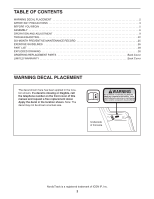
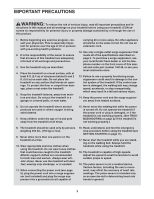
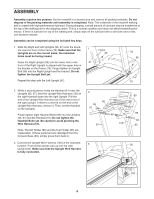
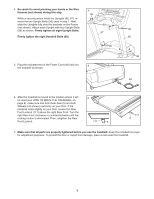
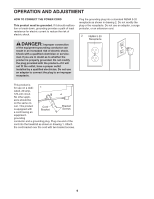
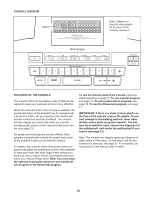
4. Be careful to avoid pinching your hands or the Wire Harness (not shown) during this step. While a second person holds the Uprights (95, 97), remove the two Upright Bolts (96) used in step 1. Next, slide the Uprights fully onto the brackets on the Frame (not shown). Attach each Upright with four Upright Bolts (96) as shown. Firmly tighten all eight Upright Bolts. Firmly tighten the eight Handrail Bolts (99). 4 99 99 97 96 5. Plug the indicated end of the Power Cord (48) fully into 5 the treadmill as shown. 99 95 96 48 6. After the treadmill is moved to the location where it will 6 be used (see HOW TO MOVE THE TREADMILL on page 8), make sure that both Rear Feet (5) and both Wheels (not shown) rest firmly on your floor. If the treadmill rocks slightly on your floor, loosen the Rear Foot Locknut (111) above the right Rear Foot. Turn the right Rear Foot clockwise or counterclockwise until the rocking motion is eliminated. Then, retighten the Rear Foot Locknut. 111 5 111 5 7. Make sure that all parts are properly tightened before you use the treadmill. Keep the included hex keys for adjustment purposes. To protect the floor or carpet from damage, place a mat under the treadmill. 7
-
 1
1 -
 2
2 -
 3
3 -
 4
4 -
 5
5 -
 6
6 -
 7
7 -
 8
8 -
 9
9 -
 10
10 -
 11
11 -
 12
12 -
13
-
14
-
15
-
16
-
17
-
18
-
19
-
20
-
21
-
22
-
23
-
24
-
25
-
26
-
27
-
28
-
29
-
30
-
31
-
32
 |
 |