Oki B4350n Flash DIMM Reference - Page 8
Step 2, Convert the Print Files to Binary .bin, Format, Add the .bin Files to the Project
 |
View all Oki B4350n manuals
Add to My Manuals
Save this manual to your list of manuals |
Page 8 highlights
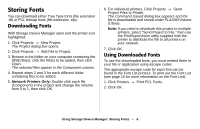
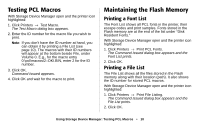
Step 2: Convert the Print Files to Binary (.bin) Format 1. Click Projects → Filter Macro File. The Filter Printer Patterns dialog box appears. 2. Make any needed adjustments in the PCL settings†, then click OK. The Open dialog box appears. †Note:Depending on how the PCL Macro was created, it may be necessary to remove or filter some common PCL commands. 3. Make sure Print spool files (*.prn) is selected in the "Files of type" drop-down list 4. Browse to the folder where you saved the files and double-click the file name. The file is saved in the same directory as a .bin file. Filter File Created appears. 5. Click OK. 6. Repeat the above steps for each .prn file you wish to include in the project. Step 3: Add the .bin Files to the Project Note: You can also add files to the project by opening either My Computer or Microsoft Explorer, browsing to the directory where the .bin files are stored, then selecting the files and dragging them in to the project. 1. Click Projects → Add File to Project. The Open dialog box appears. 2. Highlight the .bin file you wish to add and click Open. The file name appears in the Project dialog box. 3. Repeat the above steps for each .bin file you wish to add to the Project. Note: To delete a file from the project, click the file name, then click Projects → Remove File from Project. Using Storage Device Manager: Storing PCL Macros • 8
-
 1
1 -
2
-
 3
3 -
 4
4 -
 5
5 -
 6
6 -
 7
7 -
 8
8 -
 9
9 -
 10
10 -
 11
11 -
 12
12 -
 13
13 -
14
-
15
-
16
-
17
-
18
-
19
-
20
-
21
-
22
-
23
-
24
-
25
-
26
-
27
-
28
-
29
-
30
-
31
-
32
-
33
-
34
-
35
-
36
-
37
-
38
-
39
-
40
-
41
-
42
-
43
-
44
-
45
-
46
-
47
-
48
-
49
-
50
-
51
-
52
-
53
-
54
 |
 |