Olympus FE 230 FE-230 Advanced Manual (English) - Page 31
camera into the multi-connector of the camera and the printer's, Remove the USB cable from
 |
UPC - 050332159792
View all Olympus FE 230 manuals
Add to My Manuals
Save this manual to your list of manuals |
Page 31 highlights
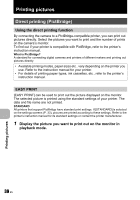
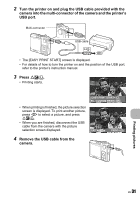
2 Turn the printer on and plug the USB cable provided with the camera into the multi-connector of the camera and the printer's USB port. Multi-connector USB cable • The [EASY PRINT START] screen is displayed. • For details of how to turn the printer on and the position of the USB port, refer to the printer's instruction manual. 3 Press OF/
-
 1
1 -
2
-
3
-
4
-
5
-
6
-
7
-
8
-
9
-
10
-
11
-
12
-
13
-
14
-
15
-
16
-
17
-
18
-
19
-
20
-
21
-
22
-
23
-
24
-
25
-
 26
26 -
 27
27 -
 28
28 -
 29
29 -
 30
30 -
 31
31 -
 32
32 -
 33
33 -
 34
34 -
 35
35 -
 36
36 -
37
-
38
-
39
-
40
-
41
-
42
-
43
-
44
-
45
-
46
-
47
-
48
-
49
-
50
-
51
-
52
-
53
-
54
-
55
-
56
-
57
-
58
-
59
-
60
-
61
-
62
-
63
-
64
-
65
-
66
-
67
-
68
-
69
-
70
-
71
-
72
-
73
-
74
-
75
 |
 |
Printing pictures
EN
31
2
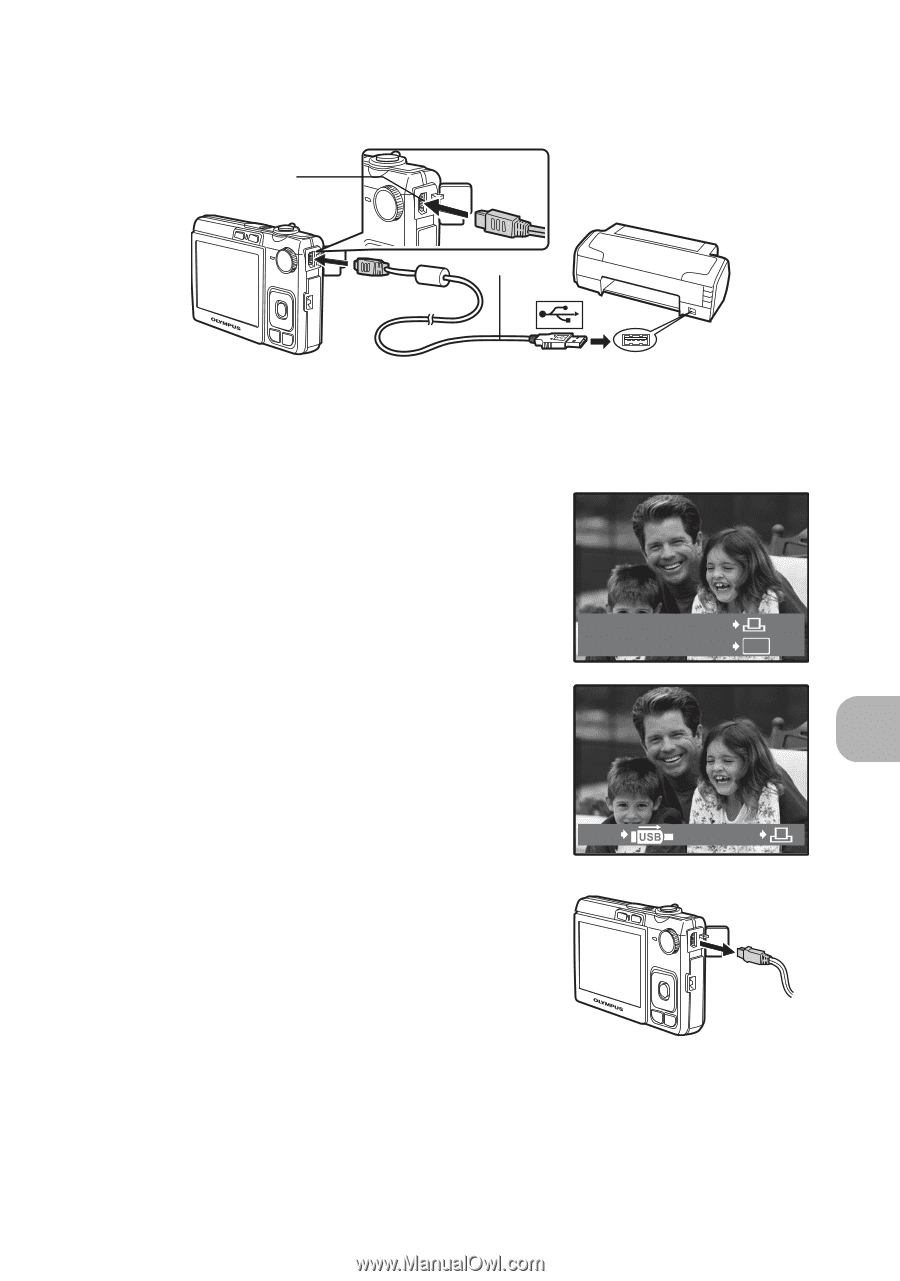
Turn the printer on and plug the USB cable provided with the
camera into the multi-connector of the camera and the printer’s
USB port.
•
The [EASY PRINT START] screen is displayed.
•
For details of how to turn the printer on and the position of the USB port,
refer to the printer’s instruction manual.
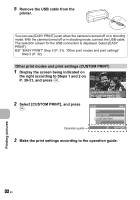
3
Press
O
F
/
<
.
•
Printing starts.
•
When printing is finished, the picture selection
screen is displayed. To print another picture,
press
XY
to select a picture, and press
O
F
/
<
.
•
When you are finished, disconnect the USB
cable from the camera with the picture
selection screen displayed.
4
Remove the USB cable from the
camera.
Multi-connector
USB cable
OK
PC / CUSTOM PRINT
EASY PRINT START
PRINT
EXIT