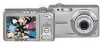
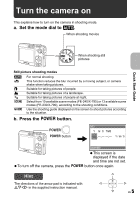
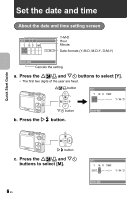
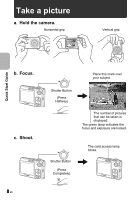
Olympus FE 230 FE-230 Advanced Manual (English) - Page 4
Prepare the battery - charger
 |
UPC - 050332159792
View all Olympus FE 230 manuals
Add to My Manuals
Save this manual to your list of manuals |
Page 4 highlights
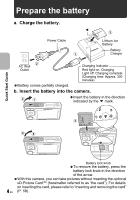
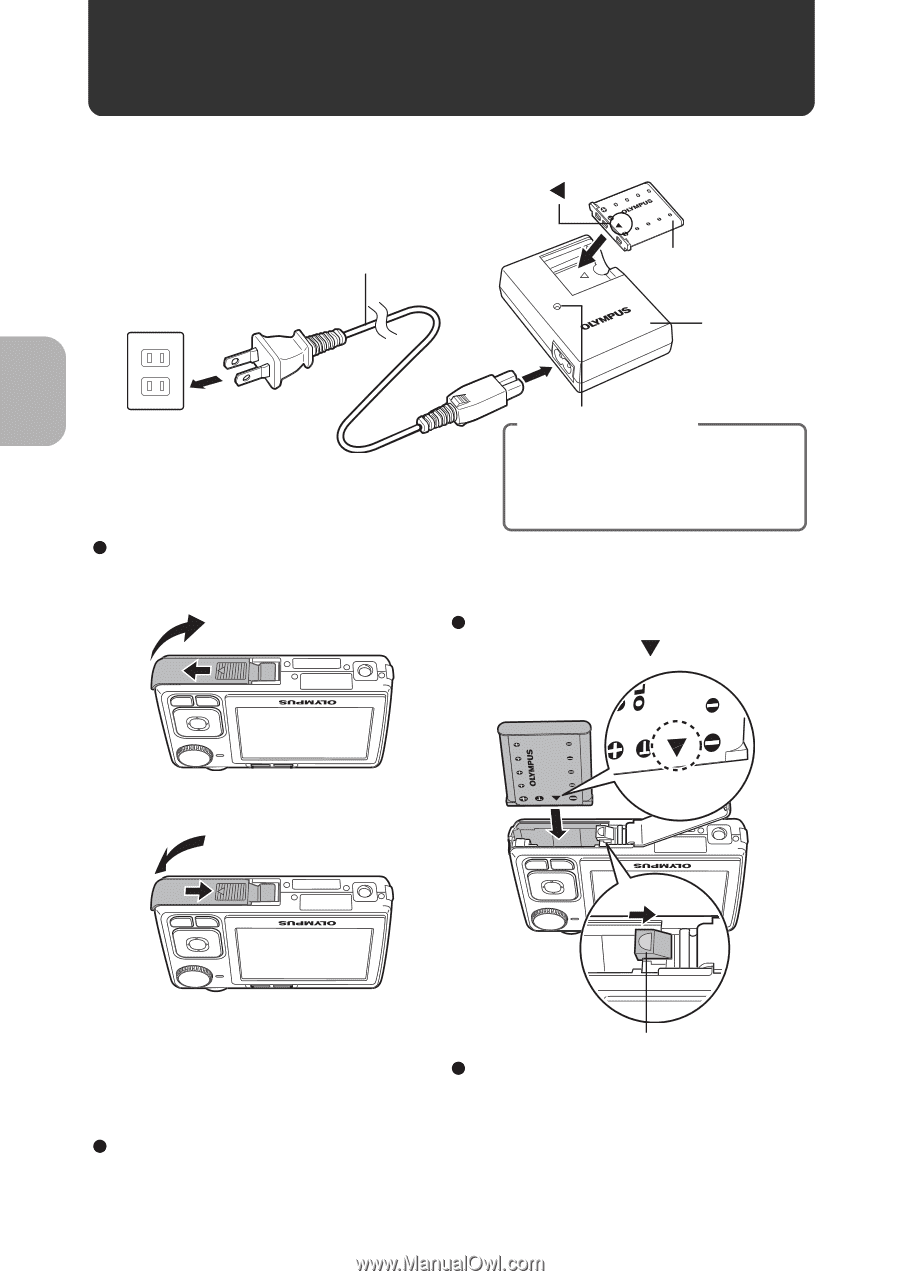
Prepare the battery a. Charge the battery. W 3 Power Cable 1 Lithium Ion Battery Battery Charger 2 AC Wall Outlet Charging Indicator Red light on: Charging Light off: Charging complete (Charging time: Approx. 300 minutes) Battery comes partially charged. b. Insert the battery into the camera. 21 Insert the battery in the direction indicated by the mark. 3 45 Quick Start Guide Battery lock knob To remove the battery, press the battery lock knob in the direction of the arrow. With this camera, you can take pictures without inserting the optional xD-Picture Card™ (hereinafter referred to as "the card"). For details on inserting the card, please refer to "Inserting and removing the card" 4 EN (P. 58).
-
 1
1 -
 2
2 -
 3
3 -
 4
4 -
 5
5 -
 6
6 -
 7
7 -
 8
8 -
 9
9 -
 10
10 -
11
-
12
-
13
-
14
-
15
-
16
-
17
-
18
-
19
-
20
-
21
-
22
-
23
-
24
-
25
-
26
-
27
-
28
-
29
-
30
-
31
-
32
-
33
-
34
-
35
-
36
-
37
-
38
-
39
-
40
-
41
-
42
-
43
-
44
-
45
-
46
-
47
-
48
-
49
-
50
-
51
-
52
-
53
-
54
-
55
-
56
-
57
-
58
-
59
-
60
-
61
-
62
-
63
-
64
-
65
-
66
-
67
-
68
-
69
-
70
-
71
-
72
-
73
-
74
-
75
 |
 |
Quick Start Guide
4
EN
Prepare the battery
a.
Charge the battery.
Battery comes partially charged.
b.
Insert the battery into the camera.
With this camera, you can take pictures without inserting the optional
xD-Picture Card™ (hereinafter referred to as “the card”). For details
on inserting the card, please refer to “Inserting and removing the card”
(P. 58).
1
Red light on: Charging
Light off: Charging complete
(Charging time: Approx. 300
minutes)
AC Wall
Outlet
Power Cable
Battery
Charger
Lithium Ion
Battery
3
2
Charging Indicator
Battery lock knob
To remove the battery, press the
battery lock knob in the direction
of the arrow.
3
1
2
4
5
Insert the battery in the direction
indicated by the
mark.