Panasonic CF72VCJUZQM CF72V3JUZQM User Guide - Page 11
Setup Windows, Select the Operating System
 |
View all Panasonic CF72VCJUZQM manuals
Add to My Manuals
Save this manual to your list of manuals |
Page 11 highlights
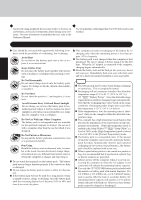
Getting Started 7 Select the Operating System Windows 2000 and Windows XP are preinstalled on this computer. After one of them is selected with the following procedure, only that Operating System can be used. 1 At the screen for the agreement of the selection of the Operating System, press Y . 2 With the number keys, select either Windows 2000 or Windows XP. (The selection of the Operating System is only performed the first time the computer is started up. A change cannot be made after the selection.) 3 At the confirmation message, press Y . The Operating System preparation will start, during which the computer will restart. CAUTION Do not touch the keyboard. If you accidentally touch the keyboard and the cancel confirmation menu is displayed, do not cancel. 4 When the screen indicating the completion of the Operating System preparation is displayed, press any key. The computer will restart. 8 Setup Windows Moving the cursor ( ) or clicking buttons can be performed with the touch pad ( page 17). Windows 2000 CAUTION Do not press any key or move the touch pad until [Windows 2000 Professional Setup] is displayed. 1 At the [Welcome to the Windows 2000 Setup Wizard], select [Next]. 2 After reading the agreement, select [I accept this agreement] or [I don't accept this agreement] and then select [Next]. NOTE If [I don't accept this agreement] is selected, the Windows setup will be aborted. 3 Select settings for your region and then select [Next]. 4 Enter your name and organization and then select [Next]. 5 Enter your computer name and administrator password and then select [Next]. CAUTION Remember this password! If the password is forgotten, Windows 2000 cannot be operated. 6 Enter the correct date, time and the time zone and then select [Next]. You can also complete these settings at a later time. 7 At the [Networking Settings], select [Typical settings] and then select [Next]. 8 At the [Workgroup or Computer Domain], select [No, this computer is not on a net- work, or is on a network without a domain] and then select [Next]. The computer will restart. 9 At the [Welcome to the Network Identification Wizard], select [Next]. 10 At the [Users of This Computer], select [Users must enter a user name and password to use this computer] and then select [Next]. 11 Select [Finish]. 12 Enter your administrator password and then select [OK]. If the cursor can not be pointed correctly with the stylus, perform [Calibration] in [Start] - [Settings] - [Control Panel] - [Mouse] - [TouchScreen]. 11
-
 1
1 -
2
-
3
-
4
-
5
-
 6
6 -
 7
7 -
 8
8 -
 9
9 -
 10
10 -
 11
11 -
 12
12 -
 13
13 -
 14
14 -
 15
15 -
 16
16 -
17
-
18
-
19
-
20
-
21
-
22
-
23
-
24
-
25
-
26
-
27
-
28
-
29
-
30
-
31
-
32
-
33
-
34
-
35
-
36
 |
 |
