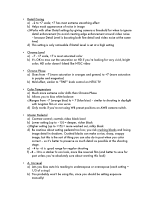
Panasonic HVX200A Getting Started Guide - Page 14
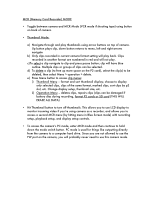
MCR Memory Card Recorder MODE
 |
UPC - 791871303351
View all Panasonic HVX200A manuals
Add to My Manuals
Save this manual to your list of manuals |
Page 14 highlights
MCR (Memory Card Recorder) MODE • Toggle between camera and MCR Mode (VCR mode if shooting tape) using button on back of camera. • Thumbnail Mode: a) Navigate through and play thumbnails using arrow buttons on top of camera. Up button plays clip, down button returns to menu, left and right arrows navigate b) Only clips recorded in current camera format setting will play back. Clips recorded in another format are numbered in red and will not play. c)To select a clip navigate to clip and press pause button; clip will have blue outline. Multiple clips or groups of clips can be selected. d) To delete a clip (to free up more space on the P2 card), select the clip(s) to be deleted, then select Menu > operation > delete. e) Press Menu button to access clip menus: i) Thumbnail Menu - format and sort thumbnail display; choose to display only selected clips, clips of the same format, marked clips, sort clips by p2 slot, etc. Change display setup, thumbnail size, etc. ii) Operation Menu - deletes clips, repairs clips (clips can be damaged if battery dies during recording, format P2 cards or SD card (THIS WILL ERASE ALL DATA) • Hit Thumbnail button to turn off thumbnails. This allows you to use LCD display to monitor incoming video if you're using camera as a recorder, and allows you to access a second MCR menu (by hitting menu in Blue Screen mode) with recording setup, playback setup, and display setup controls. • To access the camera's PC mode, enter MCR mode and then continue to hold down the mode switch button. PC mode is used for things like outputting directly from the camera to a computer hard drive. Since you are not allowed to use the FW port on the camera, you will probably never need to use this camera mode.
-
 1
1 -
2
-
3
-
4
-
5
-
6
-
7
-
8
-
 9
9 -
 10
10 -
 11
11 -
 12
12 -
 13
13 -
 14
14
 |
 |