Panasonic HVX200A Getting Started Guide - Page 9
A. Iris Level - hd video camera
 |
UPC - 791871303351
View all Panasonic HVX200A manuals
Add to My Manuals
Save this manual to your list of manuals |
Page 9 highlights
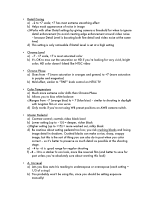
• Detail Coring a) -2 to +7 scale; +7 has most extreme smoothing effect b) Helps mask appearance of noise in image c)Works with other Detail settings by giving camera a threshold for when to ignore detail enhancement (to avoid creating edge enhancement around video noise - because Detail Level is boosting both fine detail and video noise at the same time) d) This setting is only noticeable if Detail Level is set at a high setting • Chroma Level a) -7 - +7 scale, +7 is most saturated color b) It's OK to max out the saturation on HD if you're looking for very vivid, bright color; HD color doesn't bleed like NTSC video • Chroma Phase a) Goes from -7 (more saturation in oranges and greens) to +7 (more saturation in purples and magentas) b) Mild effect, similar to "TINT" knob control on NTSC TV • Color Temperature a) Much more extreme color shifts than Chroma Phase b) Allows you to bias white balance c)Ranges from -7 (orange bias) to + 7 (blue bias) - similar to shooting in daylight with tungsten film or vice versa d) Only works if you're not using WB preset positions on AWB camera switch. • Master Pedestal a) Contrast control; controls video black level b) Lower setting (up to -15) = deeper, richer black c)Higher setting (up to +15) = more washed out, milky black d) Be cautious about setting pedestal too low; you risk crushing blacks and losing image detail in shadows. Crushed blacks can make a nice, sharp, snappy image, but this is the sort of thing you can also do in post when you color correct - so it's better to preserve as much detail as possible at the shooting stage. e) -4 to -6 is good range for regular shooting f) -8 - -10 is a starker hi con look, more like reversal film (and better to save for post unless you're absolutely sure about wanting this look) • A. Iris Level a) Lets you bias auto Iris reading to underexpose or overexpose (each setting = 1/3 of a stop) b) You probably won't be using this, since you should be setting exposure manually!
-
 1
1 -
2
-
3
-
 4
4 -
 5
5 -
 6
6 -
 7
7 -
 8
8 -
 9
9 -
 10
10 -
 11
11 -
 12
12 -
 13
13 -
 14
14
 |
 |
