Panasonic HVX200A Getting Started Guide - Page 4
Continue holding AWB button down to run ABB Automatic Black Balance - low light
 |
UPC - 791871303351
View all Panasonic HVX200A manuals
Add to My Manuals
Save this manual to your list of manuals |
Page 4 highlights
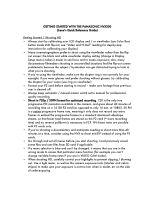
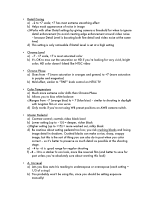
max=2.8, at widest angle, max=1.6.... So stay wide for low-light shooting! • Press Iris button for auto Iris (factoring in iris bias customized in scene file menu) • Iris display is calibrated in half stops, though the actual iris dial makes 1/6 of a stop increments between stops, so it's capable of very nuanced exposure distinctions. • Iris readout numbers are sequences in half stops (i.e. 5.6 / 6.8 / 8 / 9.6 etc) Gain • Calculates amount of electronic gain that you add; brightens image electronically • GAIN ADDS NOISE to picture, so use sparingly • Gain is added in 6dB increments (low=0 / mid=+6dB / high=+12dB); customize these increments in SW MODE menu • Gain will NOT work with a variable frame rate lower than 22fps and will not work with slow shutter speed (e.g. 1/12) White Balance • To use presets: a) Set WB switch to preset b) Hit AWB button in front of camera to toggle between two presets: i) 3200K = tungsten preset ii) 5600K = daylight preset • To manually white balance: a) Make sure iris is set correctly first b) Select position A or B (you can store 2 manual white balance settings for easy access if you need to switch back and forth) c)Put white paper in front of camera to fill viewfinder d) Hit AWB button until "AWB Ach OK" prompt e) Continue holding AWB button down to run ABB (Automatic Black Balance shuts iris completely and allows processor to balance black signal coming from chips; this is a calibration that does not need to be done every time you shoot, but can be done for general maintenance). f) Customize AWB in SW MODE menu
-
 1
1 -
 2
2 -
 3
3 -
 4
4 -
 5
5 -
 6
6 -
 7
7 -
 8
8 -
 9
9 -
 10
10 -
11
-
12
-
13
-
14
 |
 |