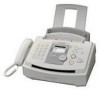
Panasonic KX FL501 Laser Fax - Page 54
Basic features cont., How to set menu options
 |
UPC - 037988809141
View all Panasonic KX FL501 manuals
Add to My Manuals
Save this manual to your list of manuals |
Page 54 highlights
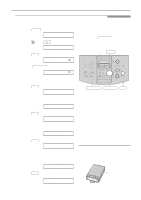
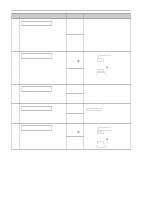
Features Summary Basic features (cont.)! How to set menu options 1. Press MENU . 2. Rotate JOG DIAL until the desired feature is displayed. 3. Press SET . 4. Rotate JOG DIAL until the desired setting is displayed. 5. Press SET . 6. Press MENU . Note: q Step 4 may be slightly different depending on the feature. q See page 52 for more details. Programming table (cont.) Code Display & Feature Settings How the unit operates REMOTE TAM ACT. If you are using the unit with an answering machine, activate this feature, and set the remote #12 activation ID to secure the remote operation for the answering machine. DIALING MODE #13 If you cannot dial, change the setting depending on your telephone line service. PAPER SIZE #16 To set the recording paper size. ON / ID=11 OFF TONE PULSE LETTER LEGAL To select "ON" and enter ID: 1. Press MENU . 2. Rotate JOG DIAL and select this feature. 3. Press SET . 4. Rotate JOG DIAL to select "ON". 5. Press SET . 6. Enter your ID from 1 to 5 digits, using 0-9, and #. 7. Press SET . 8. Press MENU . "TONE": For tone dial service. "PULSE": For rotary pulse dial service. "LETTER": Letter size paper. "LEGAL": Legal size paper. MELODY RINGER #17 To set the ring melody. BELL MELODY (A, B, C, D) You can select the bell or the melody. The selected bell or melody will sound while setting. (The default setting is in bold type.) 54
-
 1
1 -
2
-
3
-
4
-
5
-
6
-
7
-
8
-
9
-
10
-
11
-
12
-
13
-
14
-
15
-
16
-
17
-
18
-
19
-
20
-
21
-
22
-
23
-
24
-
25
-
26
-
27
-
28
-
29
-
30
-
31
-
32
-
33
-
34
-
35
-
36
-
37
-
38
-
39
-
40
-
41
-
42
-
43
-
44
-
45
-
46
-
47
-
48
-
 49
49 -
 50
50 -
 51
51 -
 52
52 -
 53
53 -
 54
54 -
 55
55 -
 56
56 -
 57
57 -
 58
58 -
 59
59 -
60
-
61
-
62
-
63
-
64
-
65
-
66
-
67
-
68
-
69
-
70
-
71
-
72
-
73
-
74
-
75
-
76
-
77
-
78
-
79
-
80
-
81
-
82
-
83
-
84
 |
 |
