Panasonic KXTG5583 KXTG5583 User Guide - Page 69
Picture ID KX-TGA552 only, Picture ID, Fixed data, User data, No data
 |
View all Panasonic KXTG5583 manuals
Add to My Manuals
Save this manual to your list of manuals |
Page 69 highlights
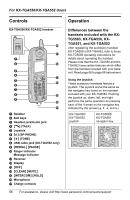
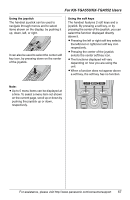
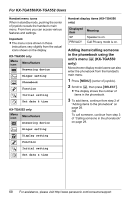
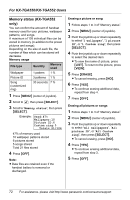
For KX-TGA550/KX-TGA552 Users Picture ID (KX-TGA552 only) You can assign a picture to each caller in the phonebook. When a call is received from a caller stored in the phonebook, the picture is displayed after Caller ID information is received (page 33). L Usually the picture will be displayed from the 2nd ring. There are 5 preset pictures. You can also download picture data for callers from a PC. Refer to the help section of the GIGARANGE USB Utility software for details. If you have not installed the GIGARANGE USB Utility software, refer to the included "Installation Guide for GIGARANGE USB Utility" for details. 1 Press {C} (right soft key). 2 Push the joystick up or down repeatedly to display the desired item. 3 Press {OPTION}. 4 Press {3} to select "Picture ID". 5 To select a preset picture, scroll to "Fixed data", then press {SELECT}. OR To select your original picture, scroll to "User data", then press {SELECT}. 6 Push the joystick up or down repeatedly to select the desired picture. L To view the picture name, press {LIST}. To return to the picture, press {VIEW}. 7 Press {SAVE}, then press {OFF}. Note: L To cancel the Picture ID assignment, select "No data" in step 5, then press {SELECT}. L To erase your original picture, see page 72. If you erase a picture assigned to a caller, the Picture ID assignment will be canceled. For assistance, please visit http://www.panasonic.com/consumersupport 69
-
 1
1 -
2
-
3
-
4
-
5
-
6
-
7
-
8
-
9
-
10
-
11
-
12
-
13
-
14
-
15
-
16
-
17
-
18
-
19
-
20
-
21
-
22
-
23
-
24
-
25
-
26
-
27
-
28
-
29
-
30
-
31
-
32
-
33
-
34
-
35
-
36
-
37
-
38
-
39
-
40
-
41
-
42
-
43
-
44
-
45
-
46
-
47
-
48
-
49
-
50
-
51
-
52
-
53
-
54
-
55
-
56
-
57
-
58
-
59
-
60
-
61
-
62
-
63
-
 64
64 -
 65
65 -
 66
66 -
 67
67 -
 68
68 -
 69
69 -
 70
70 -
 71
71 -
 72
72 -
 73
73 -
 74
74 -
75
-
76
-
77
-
78
-
79
-
80
-
81
-
82
-
83
-
84
-
85
-
86
-
87
-
88
-
89
-
90
-
91
-
92
-
93
-
94
-
95
-
96
 |
 |