Panasonic SA-XR57K Receiver - Page 32
input terminal and confirm the choice., Select the equipment connected to the digital
 |
UPC - 037988253685
View all Panasonic SA-XR57K manuals
Add to My Manuals
Save this manual to your list of manuals |
Page 32 highlights
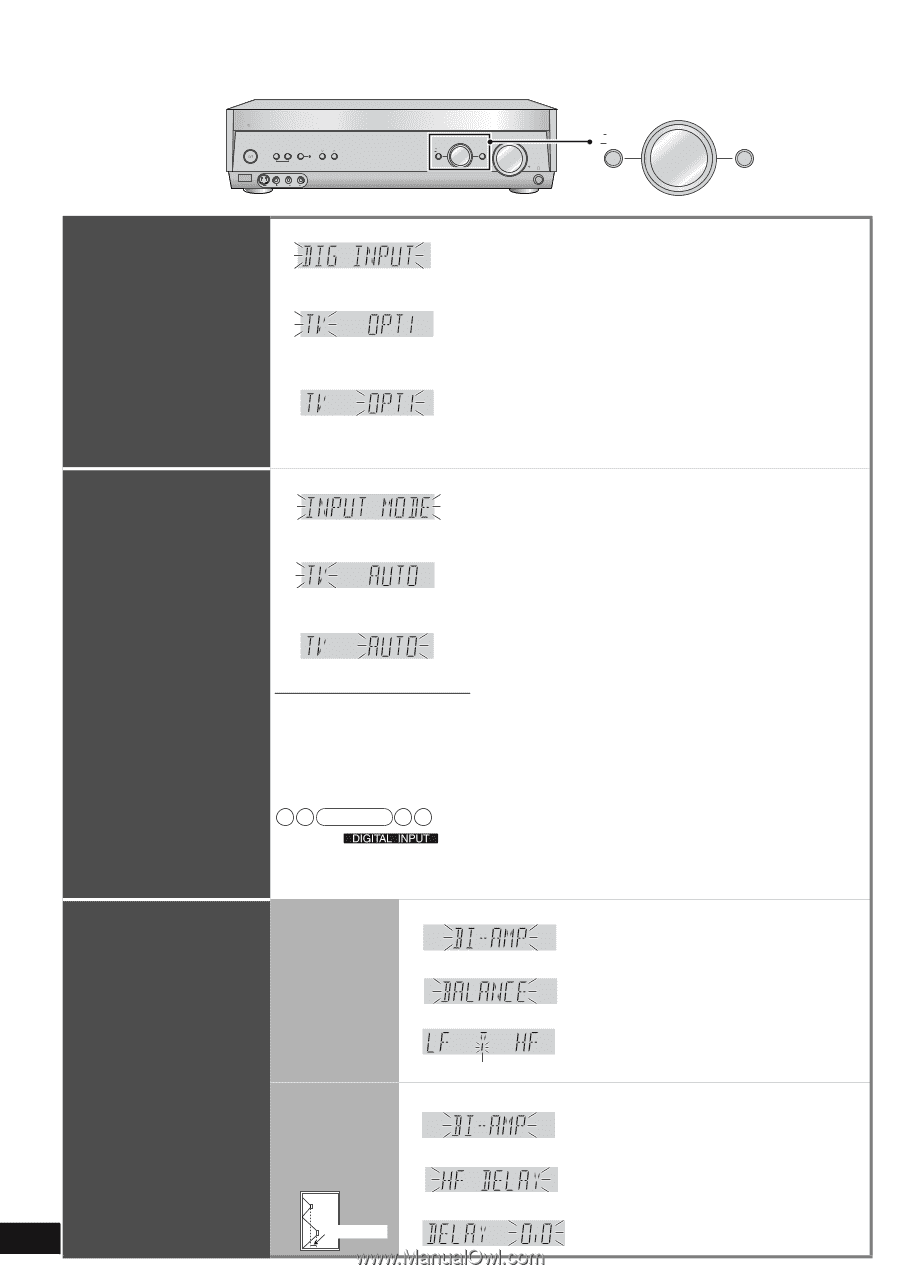
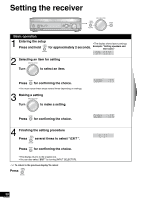
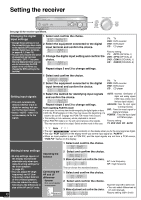
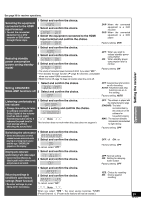
Setting the receiver AUTO SPEAKER ADVANCED WIRELESS DETECTOR DUAL AMP BI-AMP READY POWER SPEAKERS MULTI CH A B SURROUND TUNE AUTO SPEAKER DETECTOR AUX S VIDEO IN VIDEO IN L AUDIO IN R See page 30 for receiver operations. HDMI MENU SETUP INPUT SELECTOR ENTER RETURN VOLUME MENU SETUP INPUT SELECTOR ENTER RETURN Changing the digital input settings • Change these settings to suit the connections you have made to the optical (OPT) and coaxial (COAX) digital input terminals. (á pages 6, 7, 9 and 13) • You can only allocate one piece of equipment per terminal. (Example) "OPT 1 " becomes the only digital terminal you can use for connecting the DVD player to the unit when you change the DVD setting to the terminal. 1 Select and confirm the choice. 2 Select the equipment connected to the digital input terminal and confirm the choice. 3 Change the digital input setting and confirm the choice. Repeat steps 2 and 3 to change settings. TV : TV DVR : DVD recorder DVD : DVD player CD : CD player Factory setting: TV : OPT1 (OPTICAL 1) DVR : OPT2 (OPTICAL 2) DVD : COAX1 (COAXIAL 1) CD : COAX2 (COAXIAL 2) 1 Select and confirm the choice. 2 Select the equipment connected to the digital input terminal and confirm the choice. TV : TV DVR : DVD recorder DVD : DVD player CD : CD player Setting input signals • This unit automatically detects whether input is digital or analog, but you can fix the input mode. • Select "AUTO " when it is not necessary to fix the signal. 3 Select the method for identifying input signals and confirm the choice. Repeat steps 2 and 3 to change settings. Note regarding PCM FIX mode • In rare cases, the unit may have trouble recognizing the digital signals on discs. • With the PCM signals on CDs, this may cause the beginning of a track to be cut off. Engage the PCM FIX mode if this occurs. • This setting is not necessary when playback is normal. • When PCM FIX mode is on, the unit cannot process other signals. This may cause noise to be output. Select another mode in this case. AUTO : Automatic identification of digital and analog signals (HDMI takes priority when the input signal is digital.) ANALOG : Fixes the input signal to analog and plays. DIG : Fixes the input signal to digital and plays. PCMFIX : Fixes the input signal to PCM and plays. Factory setting: TV, DVR ,DVD, CD : AUTO Note • The sign " " appears constantly on the display when you fix the input signal as digital. • The sign "PCM" appears on the display when you set the input signal as "PCMFIX ". • When an input position is set to PCM FIX, and the input signals are not from a PCM source, "PCM FIX " flashes on the display. 1 Select and confirm the choice. Making bi-amp settings • Bi-amp settings appear on the display and become selectable only when you make bi-wiring settings for the front speakers (á page 31). • You can adjust HF (high frequency) and LF (low frequency) output balance of the bi-wired speakers. • You can reduce the delay time due to the difference in size of the HF and LF units. 32 RQT8549 Adjusting the balance Correcting the HF and LF difference Speaker (Side view of a speaker in cross section) Difference 2 Select and confirm the choice. 3 Make adjustment and confirm the choice. The bar shows the standard balance. 1 Select and confirm the choice. 2 Select and confirm the choice. 3 Make adjustment and confirm the choice. in LF : Low frequency HF : High frequency Adjustment range: 0.0 to 12.0 in (inch) • You can select differences at 0.5 inch intervals. Factory setting: 0.0 in (inch)
-
 1
1 -
2
-
3
-
4
-
5
-
6
-
7
-
8
-
9
-
10
-
11
-
12
-
13
-
14
-
15
-
16
-
17
-
18
-
19
-
20
-
21
-
22
-
23
-
24
-
25
-
26
-
 27
27 -
 28
28 -
 29
29 -
 30
30 -
 31
31 -
 32
32 -
 33
33 -
 34
34 -
 35
35 -
 36
36 -
 37
37 -
38
-
39
-
40
 |
 |