Panasonic SAXR700 SAXR700 User Guide - Page 11
Testing speaker output, To select SPEAKERS A, To stop the test signal
 |
View all Panasonic SAXR700 manuals
Add to My Manuals
Save this manual to your list of manuals |
Page 11 highlights
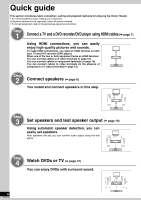
Quick guide Set speakers and test speaker output Testing speaker output Confirm audio output using the test signal after speakers are set. 1 2 3 To select "SPEAKERS A" Press SPEAKERS A to switch " A " on. To test speaker output Press AUTO TEST When only the SPEAKERS A setting is selected When SPEAKERS A and SPEAKERS B settings are selected SPEAKERS SPEAKERS A AB • If you select SPEAKERS B only, the test signal will not be output. • Adjust the volume of front speakers to the normal listening level. • The test signal is output from one speaker at a time for two seconds in the order shown below. L C R RS SBR SBL LS SW or L C R RS SB LS SW (When you connect one surround back speaker) Speaker L : RS : SBR : SB : SW : How speakers are displayed Front left C : Center R : Front right Surround right LS : Surround left Surround back right SBL : Surround back left Surround back (When you connect one surround back speaker) Subwoofer To stop the test signal Press AUTO TEST Note • Unconnected speakers do not output the test signal. • Check connections and perform automatic speaker detection once again when a connected speaker does not output the test signal. (á pages 9 and 10) • When bi-wire speakers are connected (á page 20), press [SPEAKERS A] or [SPEAKERS B] to switch " A B " on. SPEAKERS BI-WIRE AB To make detailed settings To make various settings automatically To set speakers the way you like With the supplied setup microphone, the unit sets speaker distances, polarity, size, lowpass filter, frequency and levels automatically (á page 24). "Adjusting speaker volumes" (á page 31) "Setting speakers and their sizes" (á page 35) "Setting distances" (á page 35) "Setting the lowpass filter" (á page 35) 11 RQT8739
-
 1
1 -
2
-
3
-
4
-
5
-
 6
6 -
 7
7 -
 8
8 -
 9
9 -
 10
10 -
 11
11 -
 12
12 -
 13
13 -
 14
14 -
 15
15 -
 16
16 -
17
-
18
-
19
-
20
-
21
-
22
-
23
-
24
-
25
-
26
-
27
-
28
-
29
-
30
-
31
-
32
-
33
-
34
-
35
-
36
-
37
-
38
-
39
-
40
-
41
-
42
-
43
-
44
-
45
-
46
-
47
-
48
-
49
-
50
-
51
-
52
 |
 |
